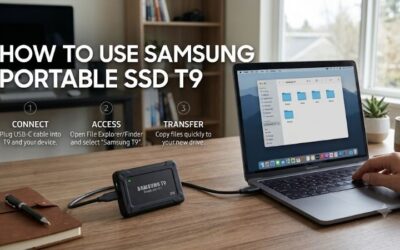
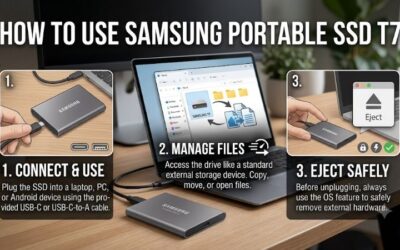
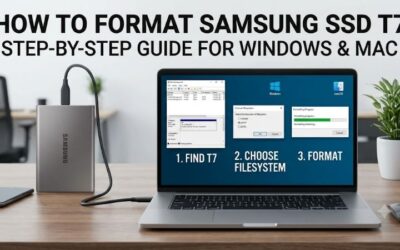
The how to set up Samsung SSD T7 on Mac process is usually simple: connect the portable drive with the correct USB cable, find it in Finder, and start copying files. The standard Samsung T7 ships formatted as exFAT, so it can normally work with macOS without a reformat or a separate driver. You only need to change the format when you have a specific reason, such as using the drive only with Macs or dedicating it to Time Machine backups. The steps below cover the original T7; the T7 Touch and T7 Shield are separate models with some different features.
- How to set up Samsung SSD T7 on Mac for first use
- Choose the right format before you erase anything
- Reformat the T7 for Mac-only storage
- Install Samsung software only for optional management features
- Turn on password protection only if you can manage the password
- Check the connection and expected transfer speed
- Troubleshoot a T7 that does not appear or accept files
- Use the T7 with Time Machine or as everyday external storage
- Final setup checklist
How to set up Samsung SSD T7 on Mac for first use
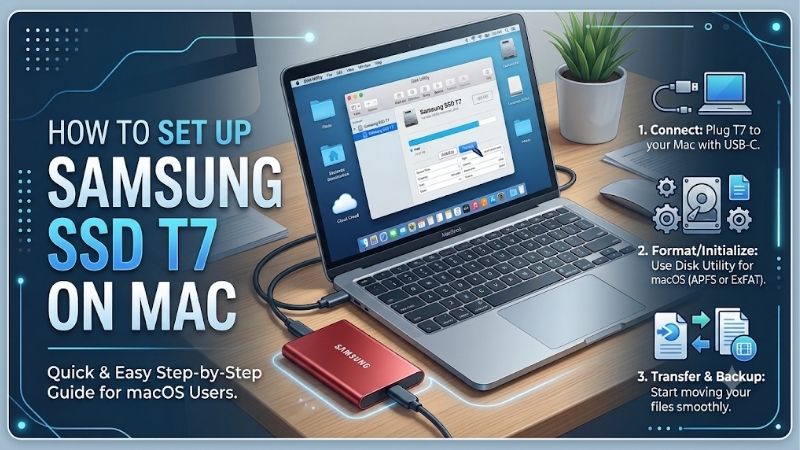
For everyday storage, connect the T7 and see whether macOS mounts it. Do not erase or reformat it simply because it is new. Samsung ships the standard T7 formatted as exFAT, which supports read/write access on Mac and Windows.
-
Take the T7 and its included cables out of the box. The original package may include a USB-C-to-USB-C cable and a USB-C-to-USB-A cable. Choose the one that matches a port on your Mac.
-
Connect the cable to the T7 and plug the other end directly into the Mac. Start with a direct port rather than a hub or dock so there are fewer connection variables.
-
Wait for macOS to mount the volume. Look for the drive on the desktop or in the Finder sidebar under Locations. If it is missing from both, open Finder Settings. Enable external disks under General for desktop display and under Sidebar for Locations. Names and screen layouts can vary by macOS release.
-
Select the Samsung volume in Finder and open it. The drive may contain Samsung setup software. You do not need to install that app just to store, open, or copy normal files on an unlocked T7.
-
Copy a small test file from the Mac to the T7. Open the copy from the external drive to confirm that it can both write and read data.
-
Create folders for your use case, such as Documents, Photos, Video, or Projects. Keeping a consistent folder structure makes the drive easier to back up and move between computers.
-
When finished, click the Eject icon beside the T7 in Finder or right-click its volume and choose Eject. Wait until it disappears before unplugging the cable. Samsung recommends ejecting or unmounting the drive to reduce the risk of data loss or file-system damage.
If Finder shows the drive and the test file opens, the basic setup is complete. Keep exFAT unless you have a Mac-only or Time Machine reason to change it. Reformatting is not required for macOS compatibility and does not automatically improve transfer speed.
Choose the right format before you erase anything
A file system determines how a drive organizes data and which computers can use it. Choose based on where the T7 will be connected, not merely because the first computer is a Mac.
| Format | Best fit | Mac compatibility | Windows compatibility |
|---|---|---|---|
| exFAT | Sharing files between Mac and Windows | Read and write | Read and write |
| APFS | Storage used only with modern Macs | Read and write | Not natively supported |
| APFS (Encrypted) | Mac-only storage that should require a password | Read and write after unlocking | Not natively supported |
| NTFS | A drive mainly used with Windows | Usually read-only without extra software | Read and write |
Samsung identifies exFAT as the T7’s factory format and lists read/write support on both Mac and Windows. Its manual describes NTFS as read-only on Mac; Apple likewise notes that macOS may read NTFS but cannot write to it with built-in support.
Keep exFAT if you regularly move files between a Mac and a Windows PC. It is the practical default for a shared portable drive because both systems can read and write without a special file-system driver. If the drive already works, there is no need to change it.
Choose APFS if the T7 will stay with Macs running macOS 10.13 or later. Apple designed APFS for modern Mac storage, including flash-based SSDs. Windows does not natively support APFS, so it is a poor choice for a drive that must regularly move between Mac and Windows.
Choose APFS (Encrypted) if you want macOS to request a password before mounting the volume. This differs from Samsung Security Mode, which is managed through Samsung software on supported drives. Avoid stacking both encryption methods unless you have a clear reason; each adds its own unlock process and compatibility considerations.
For Time Machine, use a Mac-compatible backup format rather than exFAT. Apple identifies APFS and APFS Encrypted as preferred formats for a new backup disk; older macOS backup disks may use Mac OS Extended. Setting up the T7 as a Time Machine destination can involve erasing or reformatting it, so do not select a drive containing files you need to preserve.
Reformat the T7 for Mac-only storage
Reformat only when you have chosen a Mac-only file system, need APFS encryption, or are preparing a dedicated backup drive. Erasing deletes the files already on the T7. Copy them to another drive first. If Security Mode is enabled, unlock the T7 before changing its layout; the small locked partition is not the full storage volume.
-
Connect the T7 and open Disk Utility from Applications > Utilities, or find it with Spotlight.
-
Choose View > Show All Devices. This reveals the physical drive and its volumes.
-
Identify the Samsung T7 in the sidebar. Select the top-level physical device if you need to change the partition scheme. Check its name and capacity carefully; never select your Mac’s internal disk.
-
Click Erase and enter a volume name, such as Samsung T7 Mac. Choose GUID Partition Map for Scheme when available. Apple recommends GUID Partition Map for Intel and Apple silicon Macs.
-
Choose APFS for general Mac-only storage, or APFS (Encrypted) to protect the volume with a password. Avoid case-sensitive APFS unless a particular application requires case-sensitive file names.
-
Read the confirmation dialog and verify that it identifies the T7. If it names another drive, cancel. Otherwise, confirm Erase and wait for Disk Utility to finish.
-
Click Done, close Disk Utility, and check Finder. Copy a test file to the new volume and open it.
Apple’s Disk Utility instructions follow the same sequence: show all devices, select the external disk, click Erase, choose a scheme and format, name the drive, then confirm. Apple also says secure-erase options are unavailable for SSDs in Disk Utility. Use a suitable encryption option for data protection rather than expecting repeated overwrites. 【turn235355search0】
Do not choose APFS if you need routine Windows access, and do not use exFAT as a Time Machine destination simply because it came on the T7. Never erase a drive as a casual troubleshooting step when its files have not been backed up.
Install Samsung software only for optional management features
An unlocked T7 mounted in Finder does not need a Samsung app for ordinary file storage. Management software is relevant when you want to configure password security, check firmware updates, or use other supported drive features.
The original T7 manual describes Samsung Portable SSD Software 1.0 for the T7 and T7 Touch. Samsung’s T7 2TB support page now lists Magician Software 9.0.1 for macOS, dated March 30, 2026, and Samsung’s current supported-model list includes the original T7. Check the support page for your exact model and use the current macOS installer there rather than relying on an old copy bundled on the drive.
To install it, open Samsung’s official support page, select the T7 model or capacity, download the Mac version, and follow the installer prompts. macOS may request an administrator password or software permission. Once installed, connect the drive and open Magician to confirm that it detects the T7. Use only the features shown as available for your model; Samsung says features vary by drive and operating system.
Samsung identifies macOS Catalina 10.15 as the minimum supported system for Magician 9.0. The T7’s older hardware compatibility statement lists Mac OS X 10.10 or later, but that does not mean every current management feature works on those older versions. Drive mounting and management-app support are separate questions.
Turn on password protection only if you can manage the password
The original T7 offers optional password protection through Samsung Security Mode. It is not required for storage. When enabled, the drive must be unlocked after connecting. Until then, only a restricted partition of approximately 128 MB may appear. 【turn212214view2】
To use Security Mode, connect the T7, open the supported Samsung management software, select the drive, and open its security settings. Choose password protection, then follow the prompts to create and confirm a password. Save it in a trusted password manager. Disconnect the T7 safely and reconnect it once to confirm that you can unlock it.
Do not enable this feature unless you can reliably retain the password. Samsung says there is no password-recovery option. If you forget it, the documented recovery path is a factory reset through Samsung’s service process, which erases all data on the drive. Keep a separate backup before turning on Security Mode. 【turn575190view2】【turn575190view3】
For a Mac-only drive, APFS (Encrypted) is another option built into macOS. It avoids relying on the Samsung unlock app, but it is not a universal answer for Windows access. Pick one method based on the computers that need access, and test it before storing the only copy of important files.
Check the connection and expected transfer speed
The standard T7 uses USB 3.2 Gen 2, with an interface rate of up to 10 Gbps. Samsung advertises sequential speeds up to 1,050 MB/s read and 1,000 MB/s write, but those are manufacturer maximums, not guaranteed results for every Mac or transfer. Samsung says maximum performance depends on a compatible USB 3.2 Gen 2 connection and UASP support. 【turn668165view6】
Use the included cable and a suitable high-speed port. A USB 2.0 connection or slower hub can reduce performance. USB-C describes the connector shape; it does not guarantee a 10 Gbps data connection. Check your Mac’s specifications if the port speed is unclear.
A folder containing thousands of small files may take longer to copy than one large video file. Background tasks, free space, the receiving drive, and file-system overhead also affect transfer time. A small test copy confirms basic operation; it is not a performance benchmark.
A displayed capacity below the number printed on the package does not automatically indicate a fault. Manufacturers use decimal capacity labels, while operating systems may display storage using a different unit convention. Samsung documents this difference in the T7 manual.
Troubleshoot a T7 that does not appear or accept files
A T7 can be connected but not mounted, mounted but hidden from the Finder desktop, locked by Security Mode, or formatted in a way that prevents writing. Work through the checks below in order. Avoid erasing the drive until you have ruled out simple connection and file-system problems.
How to set up Samsung SSD T7 on Mac when Finder cannot see it
First, check the connection. Disconnect the T7, reconnect it firmly, and try another compatible port on the Mac. If you are using a hub, dock, monitor port, or adapter, connect the T7 directly to the Mac. Try the included cable that matches your port. Samsung’s troubleshooting guidance recommends checking the USB connection and trying a different port when a portable SSD is not recognized.
Next, open Disk Utility and choose View > Show All Devices. If the T7 appears in the sidebar but is not visible in Finder, select its volume and use Mount if that option is available. If Disk Utility sees the physical device but reports a volume problem, run First Aid before considering a reformat. First Aid is a diagnostic and repair step; it is not a substitute for a backup. If files on the T7 are important and the drive will not mount, do not erase it in an attempt to make it appear.
If Disk Utility does not detect the T7 at all, test another compatible cable and port, then try another Mac if one is available. If it remains undetected across known-good connections, contact Samsung support rather than opening the enclosure or attempting hardware repairs. Keep the drive intact if warranty service may be needed.
Finder shows only a small 128 MB volume
This is a known behavior when Samsung Security Mode is enabled and the drive has not been unlocked. Samsung says only the approximately 128 MB security partition is visible until you enter the password and unlock the T7 through supported Samsung software. That small volume does not necessarily indicate that the main storage has failed. Open the Samsung management app, select the T7, enter the correct password, and wait for the full volume to mount.
If you do not remember enabling Security Mode, consider whether someone else configured the T7 before you received it. Do not format the visible partition before confirming whether the drive is locked; formatting can destroy data and will not recover a forgotten password.
The T7 appears in Finder but you cannot copy files to it
Select the drive in Finder and press Command-I to open Get Info. Check the Format field. If it says NTFS, macOS may allow you to read the files but not write new ones with its built-in support. Back up the data elsewhere, then reformat the T7 as exFAT for Mac-and-Windows sharing or APFS for Mac-only use. Do not erase it until you have another copy of anything you need.
If the format is exFAT, check whether the drive has free space and whether another computer recently disconnected it without ejecting it. Samsung notes that exFAT drives shared between operating systems can sometimes enter a read-only state after an improper disconnect; its manual recommends reconnecting the T7 to the Mac and ejecting it properly. If the issue continues, back up the files and use Disk Utility to check the volume for errors.
Apple also recommends checking permissions when a directly connected external drive can be read but not written. In Finder’s Get Info window, expand Sharing & Permissions and review the settings. Also consider whether the T7 is currently selected as a Time Machine backup disk, because a backup destination may be reserved for Time Machine rather than general file storage.
Samsung software says no drive is connected
This is different from the T7 failing to mount in Finder. Samsung’s compatibility guidance documents cases where its management app cannot detect a connected portable SSD because macOS blocks a required Samsung system extension. The correct fix depends on the macOS release and the Mac’s processor. Check that you downloaded the current software for the T7, not the application for older T5 or X5 models, and follow the exact instructions Samsung provides for your version of macOS.
Be especially careful before changing Startup Security on an Apple silicon Mac. Samsung’s published troubleshooting page describes changing the startup security policy and allowing legacy kernel extensions as a workaround for its software. Apple’s documentation explains that enabling third-party kernel extensions on Apple silicon requires Reduced Security, and Apple says kernel extensions are no longer its recommended approach because they can affect system integrity and reliability. Do not lower your Mac’s security just to make an external drive appear in Finder; ordinary file storage does not require the Samsung management app. Consider this only when you specifically need a Samsung software feature, after reviewing current Samsung instructions and the security trade-off.
Use the T7 with Time Machine or as everyday external storage
Match the format to the job. For general storage, keep exFAT if you share files with Windows or use APFS if the drive will remain with Macs. For Time Machine, follow Apple’s setup flow and use APFS or APFS Encrypted for a new backup disk. macOS may offer to erase and reformat a non-APFS disk when you select it as the destination.
A dedicated backup drive is the simplest arrangement. Read the confirmation carefully because assigning the T7 to Time Machine can erase existing data. An external SSD is portable storage, not a complete backup plan: deletion, theft, damage, file-system corruption, or drive failure can still make files unavailable. Keep a second copy of important data on another physical drive or trusted backup service, and eject the T7 before carrying it.
Final setup checklist
Before relying on the T7, confirm that Finder and Disk Utility recognize it, the file system matches your Mac/Windows or Time Machine needs, and a test file copies and opens successfully. Keep a separate backup of important data, store any security password safely, and eject the drive before disconnecting it.
For most Mac owners, the simplest setup is best: connect the T7 with the correct cable, leave the factory exFAT format alone, test a copy, and eject it when finished. Reformat only when you specifically need APFS, macOS-managed encryption, or a dedicated Time Machine destination. Install Samsung’s current Mac management software only for optional security and firmware features.