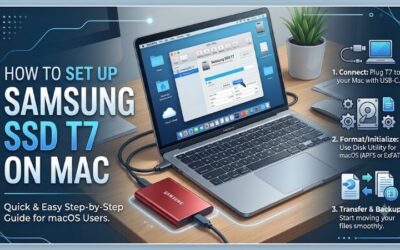
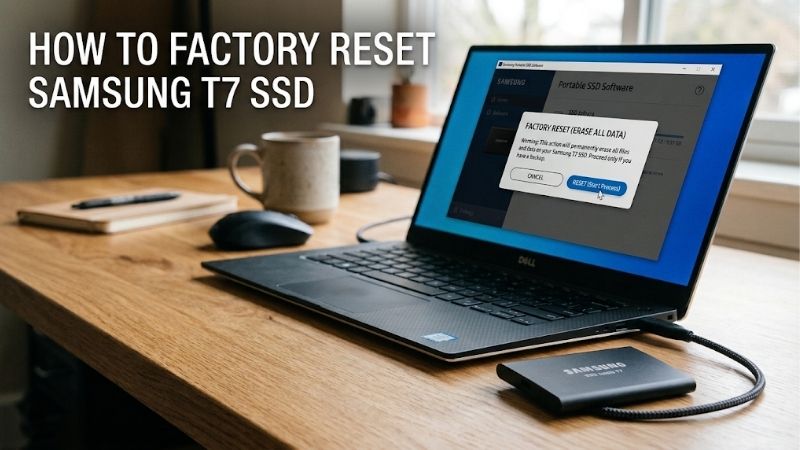
If you’re looking up how to factory reset Samsung T7 SSD after forgetting the password, use PSID Revert in Samsung Magician if the feature is available for your drive. It permanently erases your files. If you can still open the drive and only want a fresh file system, back up your files and format it in Windows or macOS.
How to factory reset Samsung T7 SSD after forgetting the password
Samsung Magician’s PSID Revert restores a supported Samsung T7 to factory settings using a code from the physical drive label. The process removes the existing Samsung Security Mode setup and deletes all user data. If the files matter and you might still be able to unlock the drive, try to regain access and copy them before proceeding.
| What you see or need | What to do | Effect on your files |
|---|---|---|
| Samsung asks for a password you still know | Unlock the drive and use Samsung’s security settings to change or turn off Security Mode | No format or factory reset is required |
| Samsung asks for a password you forgot, and you only need the drive back | Use PSID Revert if Samsung Magician offers it for the selected drive | All user data on the T7 is erased |
| The T7 opens normally and you want an empty drive or a different file system | Format the accessible data volume in Windows or macOS | The formatted volume’s contents are removed |
| Windows asks for a BitLocker recovery key | Find the recovery key before taking any destructive action | The correct key can restore access to the BitLocker volume |
| The drive never appears on the computer | Check the cable, port, and a second computer before trying to reset it | Connection checks leave the files in place |
How to factory reset Samsung T7 SSD using PSID Revert
Start with the physical SSD in hand and a supported computer running Samsung Magician. The PSID is the drive’s Physical Security ID, a 32-character code used to authorize the reset. It is separate from the password you set, the serial number, and the model number. Use the code that belongs to the specific T7 you intend to erase.
- Connect the T7 directly to the computer with a known-good USB data cable. Disconnect other external drives if you can. If the T7 is already unlocked and you can see your files, finish copying anything you need before continuing.
- Open Samsung Magician and select the portable SSD. Confirm the model and advertised capacity against the drive in front of you. If you own two matching drives, disconnect the one you plan to keep before running the reset.
- Open PSID Revert for the selected drive. If the option is missing or unavailable, follow the troubleshooting steps below before attempting any other erase operation.
- Find the PSID on the drive label and enter it into Magician. Read the full string carefully, especially where similar characters are hard to distinguish. If you’re working from a photo, compare it with the physical label before submitting it.
- Review the data-loss warning and start the reset only when you’re ready to lose the drive’s contents. Leave the cable connected and let Magician finish. Keep the computer awake and avoid closing the application while the operation is in progress.
- After Magician confirms completion, reconnect the drive and check whether the previous Samsung password prompt is gone. Inspect the full drive capacity before putting files back. If the disk has no usable volume, set one up using the Windows or macOS steps below.
Samsung’s Magician documentation lists the original T7, T7 Touch, and T7 Shield as PSID Revert-capable models. Use the option actually shown for your connected drive and software setup. If your current installation doesn’t expose PSID Revert, a supported Windows computer with Samsung’s current installer is a practical next check.
What to do if PSID Revert is missing or fails
First determine whether Magician identifies the physical Samsung SSD. Seeing a small installer volume in File Explorer or Finder establishes that the computer sees something over USB. Magician still needs to recognize the target drive and make the reset feature available before you can use its PSID.
Connect directly to a different computer port, try a known-good data cable, and refresh the drive list in Magician. Docks and adapters add another connection to troubleshoot. If Magician recognizes the T7 but rejects the code, recheck that it is labeled PSID and belongs to that unit. On a used drive, the box may belong to another SSD, so the label on the unit is the better reference.
If the label is unreadable or the operation continues to fail after those checks, contact Samsung support for the exact model and explain whether Windows or macOS detects it and whether Magician lists it. Keep the model number and the exact error message handy. If you bought it secondhand and it arrived locked, the seller may be able to unlock it or arrange a return.
Check what’s blocking access before erasing the drive
A Samsung password prompt, an operating-system encryption prompt, and a request to format an unreadable volume point to different problems. Identifying which one you have can save your files. Start by noting the name of the application showing the prompt and checking whether the computer sees the T7’s full capacity.
Check whether Samsung Security Mode is enabled
When a T7 is locked, the computer may initially show only a small volume containing Samsung’s software or installer files. Samsung documents several reported sizes for this volume. If a terabyte-class SSD shows up as only a few dozen megabytes, try unlocking it through Samsung’s software before changing its partitions.
If you know the password, unlock the drive and check for your files. Then use Samsung’s security settings if you want to change the password or turn Security Mode off. For example, if you’re repurposing the T7 as a shared transfer drive and want it to mount without the Samsung prompt, turn Security Mode off with the current password. Format it separately only if you also need to clear the files or change the file system.
If you have a T7 Touch with a registered fingerprint, use it to unlock the drive if that still works, then copy your files to a separate device. A working fingerprint gives you a chance to save the data even if you can’t recall the password. Check what Samsung’s software requires before changing Security Mode, since access to the files and permission to change security settings are separate questions.
Identify BitLocker and Mac volume passwords
A prompt that explicitly asks for a BitLocker recovery key is coming from Windows encryption. A Mac prompt for an encrypted volume can likewise be separate from the T7’s Samsung password. Record the exact wording before acting, especially if this is a work drive whose recovery credentials might be held by an IT administrator.
For BitLocker, look for the recovery key that matches the key ID shown by Windows. For a Mac volume, use the password associated with that encrypted volume. If you enabled both Samsung Security Mode and operating-system encryption, you may encounter two prompts in sequence. Successfully unlocking the Samsung layer can make the full drive visible while the volume itself still needs its own credential.
Verify your backup and identify the physical disk
If the T7 is readable, copy everything you intend to keep to a different physical drive or another storage location you can access. A backup folder or second partition on the same T7 will be lost in a factory reset. Open a few files directly from the backup and check that large or important folders completed the transfer.
Next, confirm which drive is about to be erased. Check the model, capacity, and existing volume name together. If you have two identical T7s connected, unplug the one that should stay intact. When a utility shows only generic disk names, identify the target by seeing which entry disappears and returns when you disconnect and reconnect the idle T7. Finish this check before starting a reset or format.
Format an unlocked Samsung T7 on Windows or Mac
Formatting is the right operation when you can access the T7 and want an empty data volume or a different file system. An ordinary format changes the storage volume. If Samsung Security Mode remains enabled, reconnecting the T7 can still bring back the Samsung unlock prompt even after the volume has been reformatted.
Choose exFAT, NTFS, or APFS for the devices you use
Choose the file system based on where you need to write files. For a T7 that moves between a Windows PC and a Mac, exFAT is the straightforward choice. NTFS suits Windows-focused storage, while APFS suits a Mac-only workflow. For a camera, console, or other dedicated device, check that device’s storage requirements before formatting.
| File system | Best fit | What to check |
|---|---|---|
| exFAT | Moving project files and other large files between Windows and macOS | Confirm that any camera, console, or other device in the workflow also supports it |
| NTFS | Storage used primarily with Windows | macOS normally reads NTFS but does not write to it using its built-in tools |
| APFS | Storage used primarily with modern Macs | Windows does not natively mount APFS as a regular usable volume |
| APFS (Encrypted) | Mac-only storage that needs volume-level encryption | Keep the new volume password available independently of any Samsung password |
For example, if you capture footage on a camera and edit on both Windows and Mac, check the camera first. A computer may read and write to the volume while the camera still requires its own formatting process or partition layout. If your recording device provides its own setup instructions for external storage, follow those requirements before committing footage to the T7.
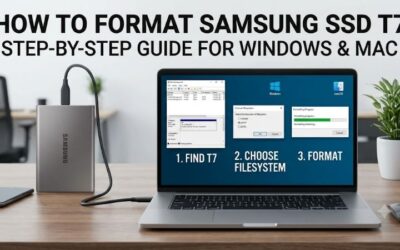
Format the T7 in Windows
Use File Explorer when the T7 already has one accessible volume and you only need to change its file system or clear it for reuse. Use Disk Management when you need to see which physical disk owns a volume, assign a missing drive letter, or create a new volume on unallocated space.
- Unlock the T7 through Samsung’s software if required. Open File Explorer and confirm that the data volume is the one you intend to erase.
- Close applications using the drive. In This PC, right-click the T7’s data volume and choose Format.
- Choose exFAT or NTFS, leave the allocation size at its default for general storage, and enter a recognizable volume label.
- Use Quick Format for routine reuse of a working volume. Review the selected drive and start the format. Quick Format prepares the volume for reuse without serving as a verified sanitization method.
- Reopen the volume after formatting, check its capacity and file system, and copy a test file to it.
If the T7 has no drive letter, open Disk Management and inspect its status. For an existing, readable volume that simply has no letter, assign one through Change Drive Letter and Paths. If the space is unallocated after an intentional reset, use New Simple Volume, assign a letter, and choose a supported file system. If that wizard doesn’t offer exFAT, you can format the newly mounted volume as exFAT in File Explorer. Initialize the physical disk only if Windows identifies it as uninitialized, you have confirmed it is the T7, and you have already backed up or intentionally discarded its data. GPT is the usual choice for modern computers.
Erase the T7 in macOS Disk Utility
Use Disk Utility to rebuild the T7 as a single volume or switch it to a file system that fits your workflow. Selecting the physical device lets you set the partition scheme as well as the file system. This erases every volume on the selected physical drive, so verify the backup before you start.
- Connect and unlock the T7 if Samsung Security Mode is active. Open Disk Utility and select View > Show All Devices.
- Under External, select the top-level Samsung T7 entry. Check its capacity and inspect the volumes nested below it to confirm you have the correct disk.
- Choose Erase and enter a volume name. Select ExFAT for Windows and Mac, or APFS for Mac-only storage. Choose GUID Partition Map for normal use on modern computers.
- Review the device and settings, then click Erase. Wait until Disk Utility finishes before ejecting or unplugging the SSD.
- Confirm the volume opens in Finder, copy a test file, and eject the drive before reconnecting it to your other device.
If you can’t see the Scheme menu in the erase dialog, go back and select the physical device above the indented volume. If the drive is visible only as a small Samsung software volume, deal with the Samsung lock first. Erasing that small volume won’t expose the protected storage.
Verify the reset and troubleshoot what happens next
Before trusting the T7 with your only copy of an important file, check three things after reconnecting it. Confirm that the intended Samsung security setting is in effect, that the full data capacity is visible, and that the drive can write and reopen a file on the devices you plan to use.
Check the capacity and test a real file transfer
A nominal 1 TB drive can appear as roughly 931 GB in a Windows display that uses binary units for the calculation. That difference is normal. A drive that shows only a tiny installer volume or has a substantial block of unallocated space needs a closer look before you assume the reset or format is complete.
Copy a file to the T7, eject the drive, reconnect it, and open the copy from the T7. If you use exFAT to move between Windows and Mac, try writing a file on each machine. That second write matters because a volume that opens successfully on both systems may still be read-only on one of them. If you enable Samsung Security Mode again, reconnect once more and verify the new password while the test file is still expendable.
Separate a connection problem from a formatting problem
If the drive disappears during transfers, vanishes from the disk utility, or only appears when the cable is held at an angle, start with the connection. A direct port and another USB data cable are more useful diagnostic checks than repeating the format on a drive that drops offline.
If the T7 consistently appears in Disk Management or Disk Utility but never mounts, inspect the volume status and file system. An unlocked exFAT volume that fails on one computer but opens on another gives you a way to copy the files before investigating further. If the drive has already been intentionally erased, creating a fresh volume may be appropriate. If it still holds your only copy, stop before initializing, formatting, or accepting a prompt to erase an unreadable disk.
Can you reset a used T7 and keep the previous owner’s files?
PSID Revert lets you reuse a locked T7 by erasing it. The PSID authorizes that destructive operation and cannot unlock the existing files. If a used T7 arrives locked, ask the seller to clear their Security Mode settings or arrange a return before deciding whether to reset it yourself.
If the seller says the drive was wiped, check its behavior after unplugging and reconnecting it. Being able to open it once only proves it was accessible during that session. A clean reconnect gives you a chance to see whether a previous Samsung password still blocks access.
Is formatting enough before selling a Samsung T7?
A routine format gives the next user an empty file system. If your goal is to remove a Samsung lock and erase the drive’s existing data before handing it over, use the documented PSID Revert feature when available. Apple’s Disk Utility does not offer its secure overwrite controls for SSDs.
For a handoff, reconnect the T7 after the reset, confirm the previous password prompt is gone, and create a fresh volume if needed. If this is an organization-owned drive with a formal disposal policy, follow its approved sanitization process and record the result before transferring the device.
Conclusion
Use Samsung Magician’s PSID Revert if you forgot the T7 password, the option is available, and you accept losing every file on the drive. If you can still unlock it, back up your files first. Use Windows or macOS formatting for a fresh file system, then reconnect the T7 and verify that it shows its full capacity and can reopen a test file.