To learn how to transfer photos from iphone to samsung t7 ssd, start with your phone’s port. Use a USB-C data cable or a powered Lightning adapter, then export originals from Photos to the T7. If the drive stays locked or your iCloud library won’t fit on the phone, use a computer and check the files before deleting anything.
How to transfer photos from iPhone to Samsung T7 SSD without a computer
Connect the T7, confirm its storage volume appears in Files, then use Export Unmodified Original in Photos to save your selected items to that volume. The first test should include a photo and a short video. If both open from the T7 after you reconnect it, you can copy the rest in batches using the same connection.
| Your setup | What to use | What to check first |
|---|---|---|
| iPhone with USB-C | USB-C to USB-C data cable | The T7 appears under Locations in Files |
| iPhone with Lightning, including iPhone 14 | Lightning to USB 3 Camera Adapter, USB power adapter and charging cable, and a USB-A to USB-C data cable | The adapter is powered and the T7 stays mounted |
| T7 protected by Samsung Security Mode | Mac or Windows PC with compatible Samsung software | The full storage volume opens after you unlock the drive |
| iCloud Photos library larger than the iPhone’s free space | Mac Photos or an iCloud Photos download on a computer | The full-resolution originals are available to export |
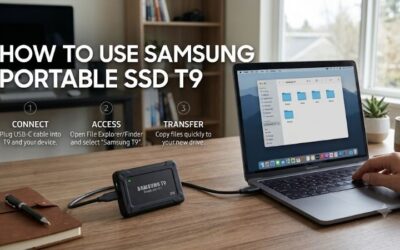
Prepare the T7 and check it in Files
The standard Samsung T7 ships formatted as exFAT, which makes it suitable for an archive you expect to read on an iPhone, Mac, and Windows PC. Apple requires a single data partition in a supported format. If the drive already holds files, check the existing volume and back up its contents before considering any format change.
- Unlock the iPhone. Attach the drive using the cable or powered adapter that matches your phone.
- Open Files and tap Browse. If you land inside a folder, go back to the Browse screen that lists Locations.
- Tap the T7’s volume name. It may appear under a name you or another computer assigned it, so look for any new storage location.
- Create a destination folder on the T7, such as iPhone Photo Archive, and use a dated subfolder for your first batch. If the drive will not let you create a folder, resolve that before opening Photos.
NTFS is outside Apple’s documented list for iPhone external storage. APFS is an option for Apple devices, but exFAT is the practical choice when a Windows PC also needs to read the drive. Check free space on a computer if you cannot establish it confidently from your phone. A folder that opens and accepts a small file may still lack space for a long video or an entire year of photos.
Connect a USB-C iPhone directly
Use the T7’s USB-C to USB-C data cable when available. A cable that charges the phone can still be the wrong cable for the transfer if it lacks data support. Start with a direct connection so you can identify whether the phone recognizes the drive before adding a hub or another device.
Plug the cable firmly into both devices, unlock the phone, and find the volume in Files. If the drive appears and then disconnects while saving, try a known-good data cable before changing anything on the disk. A powered USB hub is another option if the phone cannot supply stable power to the drive. A hub introduces another cable and port, so test the same small batch again before trusting it with larger exports.
The T7’s rated interface speed is a ceiling for the drive under suitable conditions. The phone, cable, any hub, and the transfer itself all affect how quickly the job completes. If Photos needs to retrieve full-resolution items from iCloud, the internet connection can matter more than the USB connection. Keep the setup still until the write finishes.
Connect an iPhone 14 or another Lightning model
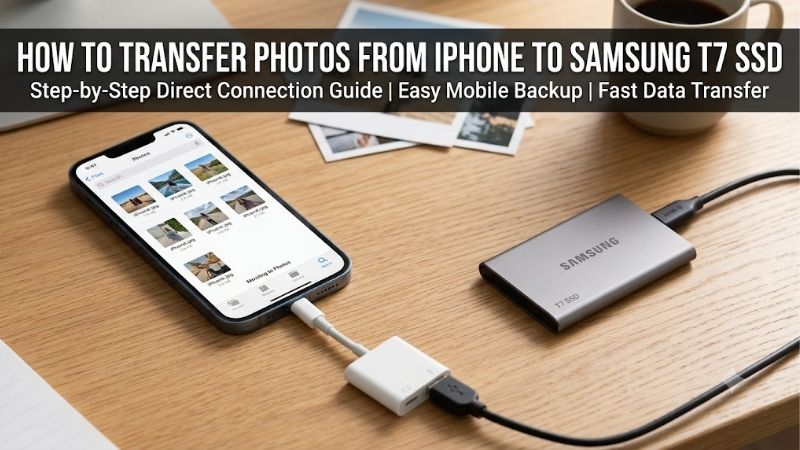
Use Apple’s Lightning to USB 3 Camera Adapter with its power input connected. The adapter has a USB-A port for the T7’s data cable and a Lightning port for power. The regular Lightning charging cable that you plug into a computer serves a different purpose and does not replace this powered connection to the SSD.
- Connect a USB power adapter to the camera adapter’s Lightning power port using a Lightning charging cable.
- Connect the T7 to the camera adapter’s USB-A port using a USB-A to USB-C data cable.
- Plug the camera adapter into the unlocked iPhone and look for the drive in Files under Locations.
- If the phone reports that the accessory uses too much power, confirm that the camera adapter is receiving power and retry. If the drive still fails to mount or disconnects repeatedly, use a Mac or PC for the transfer.
The USB 3 wording identifies the adapter. It does not establish the speed you will get on an iPhone 14. Plan for a longer session if you have many videos, and use the computer route if you already have a reliable cable for importing from the phone. If you only need to offload photos once and have a computer available, you can use that route with the cables you already own.
Export original photos and videos to the T7
Use Photos for items in the photo library and Files to confirm where the export landed. The unmodified export is the right choice when you want the original capture, including its original file format. If you want crops, filters, or trims you applied in Photos, keep a separate rendered copy and compare it with the original.
- Open Photos, tap Select, and choose a small group. Include a video and, if relevant, a Live Photo you want to preserve.
- Tap Share, then choose Export Unmodified Original. The label can appear in plural for multiple selections. Scroll through the available actions if needed.
- In the destination picker, navigate back to Locations if it opens in another folder. Choose the T7’s volume name and the dated folder you made.
- Tap Save. Leave the drive connected while the export completes. Open the destination in Files and preview the sample files before selecting the next batch.
Files treats the SSD as a storage destination. The export produces files you can browse, and a folder of those files is separate from the Photos library database that manages albums, edits, and other library information. If your goal is to preserve a particular album as a group, export its contents into a folder with that album’s name. For items that are already documents in Files, such as images downloaded to On My iPhone, use Copy and Paste into the T7 folder.
Handle iCloud Photos and edits before a large transfer
With Optimize iPhone Storage turned on, some full-resolution originals may reside in iCloud while smaller versions remain on the phone. A photo that opens in Photos can still need a download before export. Plan for both phone storage and network access, especially if you are moving years of videos and photos at once.
Download originals when the iPhone has enough room
For a library that fits on the phone, open Settings, tap your name, then go to iCloud and Photos. Choose Download and Keep Originals. Leave the phone connected to Wi-Fi and give it time to retrieve the files. Check that older photos and longer videos can be accessed before starting a large export.
If free storage is tight, try a small batch first or download the originals on a computer with room for the library. Choosing Download and Keep Originals for a collection larger than the device’s available space can leave the transfer waiting on downloads or storage. Using a computer also gives you a larger workspace to inspect the archive and organize it without tying up the phone.
If you use Shared Albums, distinguish them from your personal iCloud Photos library. Apple notes that items copied from Shared Albums may have lower resolution than the originals. If a shared picture is important and you need original quality, obtain the original from the person who has it or locate the copy you originally added from your library.
Keep original captures and edited versions in separate folders
An unmodified export saves the source image or video before Photos applied your edits. If an old picture looks uncropped on the T7, the export may be working as intended. Decide which version matters and keep both if you might want to adjust the edit later or share the finished image with someone.
A Mac gives you explicit controls for this. In Photos, export unmodified originals to one folder and use the standard photo export for edited images to another. A Live Photo can export as a still image plus a video file when you use the Mac’s unmodified export. Keep the associated files together and avoid renaming one component on its own. The archive’s file count can therefore differ from the number of items selected in Photos.
Use a Mac or Windows PC if the direct connection fails
A computer is useful when the T7 uses Samsung’s password protection, the phone’s adapter is unreliable, or the library is too large for the iPhone’s free space. Connect the T7 to the computer, open the full volume, and create a destination folder first. Keep the phone library intact while you import and verify the files.
How to transfer photos from iPhone to Samsung T7 SSD on a Mac
Use Image Capture for a direct import of files available over the iPhone’s USB connection. If the photos already live in the Mac’s Photos library, use Photos to export selected originals to the T7 instead. The choice depends on where your full-resolution files are available and whether you also want edited versions.
- Connect both the iPhone and T7 to the Mac. Unlock the iPhone and respond to the trust or connection prompts if they appear.
- Open Image Capture and select the iPhone in the sidebar. Use the Import To destination menu to select a folder on the T7. Select a small batch and download it, then verify the result in Finder.
- If your full library is in iCloud Photos, open Photos on the Mac. When appropriate and you have sufficient Mac storage, choose Download Originals to this Mac in Photos settings under iCloud. Select the items, then use File, Export, and Export Unmodified Original for the selected photos. Choose the T7 as the destination.
If a wired import shows fewer items than you expect, compare it with what you see in iCloud Photos and check whether originals are stored locally. Do not use any automatic delete-after-import option while building the archive. When the files are verified and the copy has finished, eject the T7 in Finder before unplugging it.
Import on Windows and copy the files to the T7
On Windows, use the Apple Devices app and Microsoft Photos for a wired import. The simplest way to confirm where the files went is to import to a known local folder, then copy that folder to the T7. Check that the PC has enough free space for this intermediate copy before starting a large batch.
- Install Apple Devices from the Microsoft Store if needed. Connect the iPhone with a data cable, unlock it, and approve the trust prompt when it appears.
- Open Microsoft Photos, select the import option for the connected device, and choose the items to import. If you use iCloud Photos, Apple advises downloading the full-resolution originals to the iPhone before wired import. If they will not fit, download them through iCloud Photos on the computer instead.
- Locate the imported or downloaded files in File Explorer and copy them to the archive folder on the T7. If you downloaded a ZIP archive, extract it and inspect the files before considering the transfer complete.
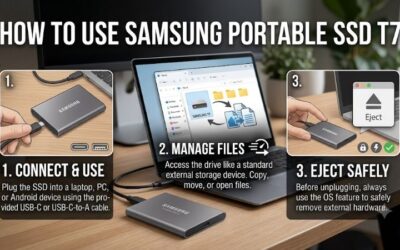
- Open a sample from the T7, then safely eject the drive when you finish.
Some Windows apps need support for HEIF images or HEVC videos. A file that fails to preview in one app may still be intact. Check the file size and try an app that supports the format before starting the import again. If you need JPEG copies for sharing, save those separately and keep the original files in the archive.
Troubleshoot a missing drive or failed export
Start by separating three problems. A missing volume points to the cable, power, format, or drive lock. An export that fails after the drive mounts calls for checking space and source files. A copy that appears complete but will not play needs verification on another device or in a compatible app.
Check Samsung Security Mode before changing the format
A password-protected T7 may expose only a restricted volume. If you see a tiny volume with Samsung software or much less capacity than expected, connect it to a supported Mac or Windows PC and unlock it with Samsung’s compatible software. Use the computer to copy the files if you want to keep password protection enabled.
If you choose to disable Security Mode with the current password so that you can use the phone directly, confirm that the full volume mounts afterward and remember that anyone with the drive can then access an unencrypted archive. If the password is lost, keep any accessible copies and check Samsung’s recovery guidance. Formatting or a factory reset is a destructive step and should not be used as a routine connection fix.
Retry failed batches without mixing partial copies
When a transfer stops midway, keep the source photos and note the date range or album you were copying. Put the retry into a fresh folder. This gives you a clear boundary between files from the interrupted attempt and files from the retry, so duplicate names are easier to identify.
Try exporting one old photo, one recent photo, and one longer video separately. If only an older item fails, check its availability in iCloud. If short files copy and long files fail, check remaining capacity and whether the drive is FAT32, which has a per-file limit of roughly 4 GB. If the whole volume disappears during the attempt, return to the cable and power checks before trying another batch.
Verify the SSD archive before deleting photos
Open the batch folder from the T7 after disconnecting and reconnecting it. Check both ends of the date range, inspect some older and newer images at full size, and scrub through several videos to confirm they play near the beginning and end. If possible, repeat the check from a second device.
Use folders named by date range or album to compare the source selection against the result. File counts help identify obvious gaps, but a Live Photo may produce multiple files. Check important items individually and keep another verified copy of anything you cannot replace. A second copy on a separate disk or another independent storage location protects you if the T7 is lost or fails.
Deleting from Photos while iCloud Photos is syncing removes the item from iCloud and other devices using that library. If you only want to reclaim space on the iPhone while keeping photos in iCloud, use Optimize iPhone Storage once the sync is current. If you intend to remove items from the synced library, verify your independent copies first and delete only the batches you have checked.
Conclusion
Use the T7’s USB-C data cable with a USB-C iPhone or a powered camera adapter with a Lightning model. Export unmodified originals into dated folders and use a Mac or PC if the SSD stays locked or your iCloud library won’t fit on the phone. Reconnect the T7 and verify the photos and videos before deleting any originals.