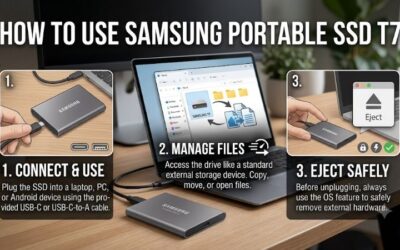
The easiest way to get started is to connect the drive with the included USB-C cable, open it in your file manager, and copy files like you would with any external drive. This guide explains how to use Samsung Portable SSD T9 on a PC, Mac, or compatible mobile device. The T9 ships formatted as exFAT, so most users can begin without erasing it. Reformat only when a device or workflow requires another file system, and back up existing files before changing the format.
- How to use Samsung Portable SSD T9 for the first time
- Prepare the T9 and choose the right USB connection
- How to use Samsung Portable SSD T9 on Windows and Mac
- Choose a file system before you reformat the T9
- Set up password protection with Samsung Magician
- Use the T9 with Android phones, tablets, and other devices
- Transfer files faster and avoid common mistakes
- Troubleshoot a Samsung T9 that is not recognized
- Frequently asked questions about using the T9
- Make the T9 part of a reliable storage workflow
How to use Samsung Portable SSD T9 for the first time
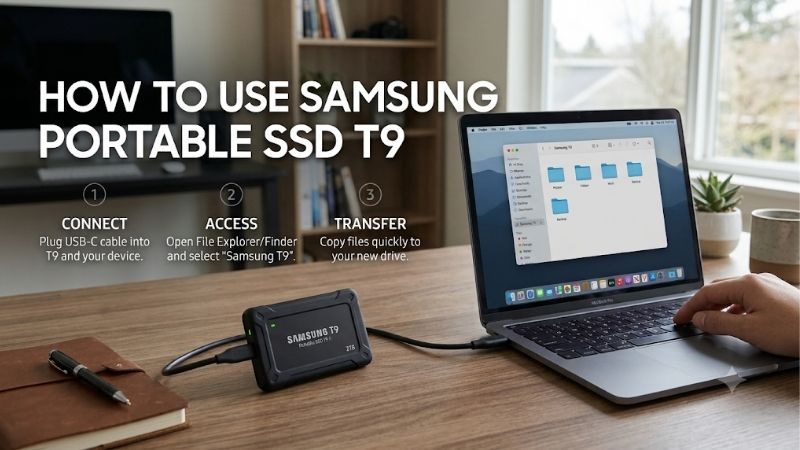
The Samsung Portable SSD T9 is an external solid-state drive for moving, storing, backing up, and working with files between compatible devices. It is available in 1TB, 2TB, and 4TB capacities, connects over USB-C, and includes both a USB-C-to-C cable and a USB-C-to-A cable. You do not need to install a desktop application just to open the drive and copy ordinary files. The operating system handles those everyday tasks.
Before connecting it, decide what you want the drive to do. If you will move files between Windows and macOS, leave the factory exFAT format in place unless you have a specific compatibility problem. If the T9 will stay with one Mac, APFS may be a better fit. If it will stay with Windows, NTFS is a common Windows format, although it is not ideal for a drive that must also accept writes from a Mac. Formatting is optional, not a required first-run step.
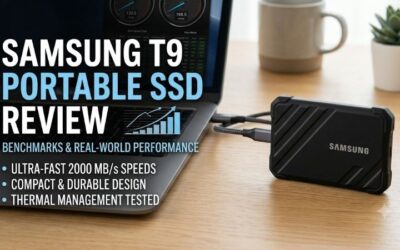
The T9’s advertised maximum sequential transfer rate is up to 2,000 MB/s. That number is a ceiling, not a speed every computer will deliver. Reaching the maximum requires a host port and cable that support USB 3.2 Gen 2×2 at 20Gbps, as well as UASP support. The T9 can still connect to slower USB ports, but its speed will be limited by the connection and host system.
Prepare the T9 and choose the right USB connection
The box includes USB-C-to-C and USB-C-to-A cables. Use the C-to-C cable with a compatible USB-C port or the C-to-A cable with USB-A. For initial setup, connect directly to the computer rather than through a hub or dock so that you can rule out extra connection variables.
USB-C describes the connector shape, not its speed. The T9 uses USB 3.2 Gen 2×2 at 20Gbps for its maximum advertised performance, but a computer’s USB-C port may support a slower mode. Check the computer’s specifications instead of assuming every USB-C port supports Gen 2×2. The drive is backward-compatible with USB 3.2, 3.1, 3.0, and 2.0, although older ports will limit transfer speed. Use the included cable first if the T9 is not recognized.
The T9 is bus-powered, so it draws power from the connected device. Keep the computer awake during large transfers and avoid moving the cable while files are being written. Samsung rates the drive as drop-resistant up to 3 meters under its test conditions; that does not make it waterproof or immune to damage.
How to use Samsung Portable SSD T9 on Windows and Mac
Use the T9 on a Windows PC
-
Connect the T9 to a USB port using the included USB-C-to-C or USB-C-to-A cable.
-
Wait for Windows to detect the drive. Open File Explorer and look under This PC. The portable SSD should appear as a drive with a letter, although the exact letter varies by computer.
-
Double-click the T9 drive to view its folders. If it is new and has no files, the window may look empty. That is normal.
-
Open a second File Explorer window and locate the folders you want to copy. Drag files or folders to the T9, or use Copy and Paste.
-
Wait until the copy dialog finishes before disconnecting the drive. For a large video folder or a large number of small files, the transfer may take longer than the progress bar initially suggests.
-
To open a file from the T9, double-click it or open the relevant application and browse to the external drive. For editing, confirm that the application supports working from external storage and that the T9 has enough free space for temporary and export files.
If Windows asks you to format the disk, cancel until you know it is empty or have a separate backup. The prompt may indicate an unsupported or damaged file system; formatting erases the existing file structure. To check the format, right-click the drive in File Explorer, choose Properties, and inspect File system. Factory-format T9 drives use exFAT. The displayed capacity may be lower than the printed 1TB, 2TB, or 4TB because manufacturers and operating systems calculate capacity differently.
Use the T9 on a Mac
-
Connect the T9 to a USB-C or compatible USB-A port with the supplied cable.
-
Open Finder and look under Locations in the sidebar. The external volume should appear there. Depending on Finder settings, it may also appear on the desktop.
-
Select the T9 to open it. If the drive is new, you can create folders with File > New Folder or the Command-Shift-N shortcut.
-
Copy files by dragging them from a Finder window to the T9, or use Command-C and Command-V. To move files, be careful to distinguish a copy from a move; keeping the original files until the transfer is verified is safer.
-
Open a copied file from the T9 to confirm that it is readable. Eject the volume in Finder before unplugging it.
To inspect the file system, select the T9 in Finder and press Command-I, or choose File > Get Info. The Format field identifies its format. If you can read files but cannot save to the drive, check the format and free space. macOS may read NTFS without being able to write to it using built-in tools.
Choose a file system before you reformat the T9
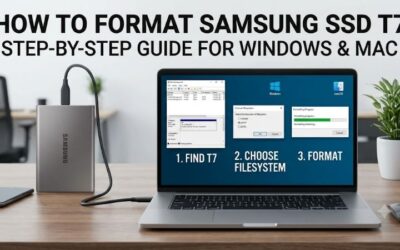
A file system determines how an operating system organizes and accesses files. The T9 ships as exFAT, generally the most practical format when the same SSD moves between Windows and Mac because both can read and write it.
| File system | Best use | Important limitation |
|---|---|---|
| exFAT | Sharing files between current Windows and Mac computers | Does not provide all the Mac-specific features of APFS |
| APFS | A drive used mainly with modern Macs | Not natively suitable for routine Windows file exchange |
| NTFS | A drive used mainly with Windows PCs | macOS can read NTFS but does not natively write to it in the usual setup |
| Mac OS Extended | Older Mac workflows or specific compatibility needs | Not the best default for a drive shared with Windows |
Keep exFAT for general storage across Windows and Mac. Choose APFS for a Mac-centered workflow, or NTFS when Windows is the main environment and you specifically need a Windows format. Avoid FAT32 for large media projects because it has a 4GB maximum individual file size.
Format the T9 in Windows
Formatting erases the selected volume. Back up its files and double-check the T9’s capacity before continuing.
-
Connect the drive and open Disk Management from the Start menu.
-
Identify the T9 by its capacity and label. Do not select the internal Windows drive.
-
Right-click the correct existing volume and choose Format. If the disk appears as unallocated or Windows asks to initialize it, stop and verify the device before proceeding.
-
Choose exFAT for Windows-and-Mac sharing or NTFS for a Windows-only workflow. Add a recognizable volume label.
-
Review the selected volume and confirm the format.
Most new T9 owners can skip this process because the factory exFAT format already supports cross-platform use.
Format the T9 with Disk Utility on a Mac
Use Disk Utility only when you intend to erase the drive. Back up its contents first.
-
Open Disk Utility from Applications > Utilities.
-
Choose View > Show All Devices.
-
Select the physical Samsung T9 in the sidebar and confirm its capacity.
-
Click Erase and enter a name.
-
Choose APFS for a modern Mac-only drive or exFAT for Windows-and-Mac sharing. Choose GUID Partition Map as the scheme when available.
-
Confirm the selected device and format, click Erase, and wait for completion.
Do not choose APFS if you need to write to the same drive from a standard Windows computer. In Disk Utility, the physical device is the top-level entry and its volumes appear underneath it.
Set up password protection with Samsung Magician
The T9 supports AES 256-bit hardware encryption, and Samsung Magician provides security settings for supported portable SSDs, including the T9. Password protection is optional: leave it disabled for ordinary plug-and-play storage, or enable it to require an unlock step before accessing protected files.
Download Magician from Samsung’s official storage support page. Install the version for your operating system, connect the T9, open Magician, select the portable SSD, and go to Security Setting. Follow the on-screen prompts to enable password protection and create a password. The exact screen labels can change between software releases.
Choose a unique password and keep a secure copy in a password manager, not only on the T9. A password-protected drive may show a restricted area or very small capacity until you unlock it through supported Samsung software. Consider device compatibility before enabling security if you need to use the SSD with cameras, consoles, or shared devices that cannot run the unlock software.
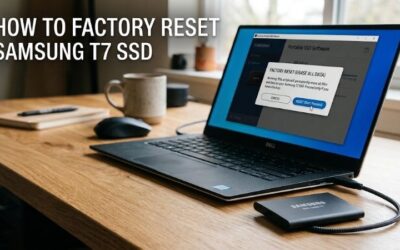
A forgotten password is a serious risk. Samsung’s support guidance says that regaining use requires a factory reset through an authorized service center, and the reset deletes all data on the SSD. Do not assume the password can be recovered. Leave password protection off if you do not need it.
Use the T9 with Android phones, tablets, and other devices
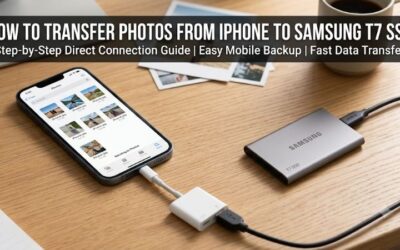
Samsung lists Android smartphones and tablets among the T9’s compatible device categories. Connect it with a compatible USB-C cable or adapter, open the phone’s file manager, and look for external or USB storage. The exact menu depends on the Android manufacturer and software version. Copy files as you would between folders on the phone, keeping the device awake during large transfers.
The phone must support USB host or OTG storage; a USB-C port alone does not guarantee external-drive support. If the phone does not detect the T9, test the SSD on a computer and check the phone manufacturer’s specifications before reformatting anything. If password protection is enabled, confirm that the phone and available Samsung software can unlock the drive.
Compatible cameras, smart TVs, and game consoles may also use the T9, but support varies by device. A camera or console may require a particular file system or restrict what it can store. Check the host device’s storage documentation before formatting the SSD for a specialized role.
Transfer files faster and avoid common mistakes
For maximum performance, use a USB 3.2 Gen 2×2 20Gbps port, a suitable cable, and UASP. Samsung rates the 1TB and 2TB versions for up to 2,000 MB/s sequential reads and 1,950 MB/s writes; the 4TB version is rated up to 2,000 MB/s for both. Those are manufacturer maximums, not guaranteed everyday transfer speeds.
Actual speed depends on the host port, cable, source drive, file sizes, number of files, and workload. Copying one large video is different from copying thousands of small documents. A 10Gbps port will work but cannot deliver the T9’s 20Gbps interface maximum.
Avoid unplugging the drive during a transfer, formatting it before checking why it is not recognized, assuming every USB-C cable supports 20Gbps, or treating drop resistance as waterproofing. Also, do not keep the only copy of important files on a portable SSD. After a backup, open a few files from the T9 and compare the copied folders with the originals.
Troubleshoot a Samsung T9 that is not recognized
Start with the cable and port before changing partitions or erasing anything.
| Symptom | What to check |
|---|---|
| The T9 does not appear | Reseat the cable, try another direct USB port, and test the included cable |
| Windows asks to format it | Cancel if it contains files; test on another compatible computer |
| Capacity looks unusually small | Unlock the drive in Samsung software if password protection is enabled |
| Mac can read but not write | Check the format, free space, and permissions; NTFS may be read-only in macOS |
| Transfers are slow | Check the port generation, cable, UASP support, and whether a hub is involved |
| A phone cannot detect the T9 | Confirm USB host/OTG support and test the SSD on a computer |
On Windows, open Disk Management to see whether the physical T9 is detected. If it appears without a drive letter, it may need one assigned. If it appears as unallocated or RAW, do not initialize or format it if you need the files. Try another cable and computer before concluding that the SSD has failed.
On a Mac, check Finder settings and Disk Utility. If the drive appears but will not accept files, inspect its format; built-in macOS tools may read NTFS without writing to it. Reformatting to exFAT or APFS erases the data.
For firmware updates, Samsung recommends backing up the files, closing other applications, keeping the drive connected, and not powering off during the update. Reconnect the T9 after the update completes. If multiple computers and a known-good cable still cannot detect it, contact Samsung support. For a forgotten password, Samsung says a factory reset through an authorized service center deletes the data.
Frequently asked questions about using the T9
Do I need to install Samsung software to use the T9?
No. For normal file storage and transfers, connect the drive and use File Explorer or Finder. Samsung Magician is optional for management tasks such as security settings, firmware updates, and drive information.
Should I format the T9 before using it?
Usually not. Samsung ships the portable SSD in exFAT, which is suitable for sharing files between Windows and Mac computers. Reformat only when a specific operating system or device requires another file system.
Can I use the T9 on both Windows and Mac?
Yes, exFAT is the practical choice for routine file exchange between current Windows and macOS systems. APFS is intended for Mac-focused use, while NTFS is not normally writable by macOS without additional software.
Why does the computer show less storage than the capacity on the label?
Drive makers use decimal capacity units, while operating systems may report capacity using a different convention. Some space is also used by formatting. A displayed capacity below the printed 1TB, 2TB, or 4TB figure does not automatically indicate a fault.
What happens if I forget the T9 password?
Samsung says a forgotten password requires a factory reset through an authorized service center, and the reset erases the data. Keep the password in a secure password manager.
Make the T9 part of a reliable storage workflow
For most owners, using the Samsung T9 means connecting it, opening it in File Explorer or Finder, and copying files. Keep exFAT for Windows-and-Mac sharing; choose APFS or NTFS only for a workflow that specifically needs it and only after backing up the data.
Magician is optional for ordinary transfers but useful for security and firmware management. Use a suitable port and cable, eject the SSD before unplugging it, and keep a second copy of important files.