Choosing the best monitor timing standard for gaming depends on whether you are using a normal display mode or creating a custom resolution and refresh rate. For most gamers, Auto is the safest and most convenient choice because the graphics driver selects an appropriate timing formula. CVT Reduced Blanking (CVT-RB) is the more interesting option when configuring custom high-refresh modes because it reduces blanking intervals and pixel-clock requirements. However, neither setting automatically increases your monitor’s refresh-rate capability or improves gaming performance. Understanding Auto, CVT, CVT-RB, DMT, and GTF helps you avoid incompatible display modes and get the most from your existing monitor.
- Best monitor timing standard for gaming: Auto or CVT-RB?
- What monitor timing standards actually control
- Understanding the six timing standard options
- Why timing standards do not automatically improve gaming performance
- How to choose the best monitor timing standard for gaming
- How to change the monitor timing standard in NVIDIA Control Panel
- Creating custom monitor timings with AMD Radeon Software
- Verify the refresh rate after changing timing settings
- Common monitor timing problems and how to troubleshoot them
- Frequently asked questions
- Final verdict
Best monitor timing standard for gaming: Auto or CVT-RB?
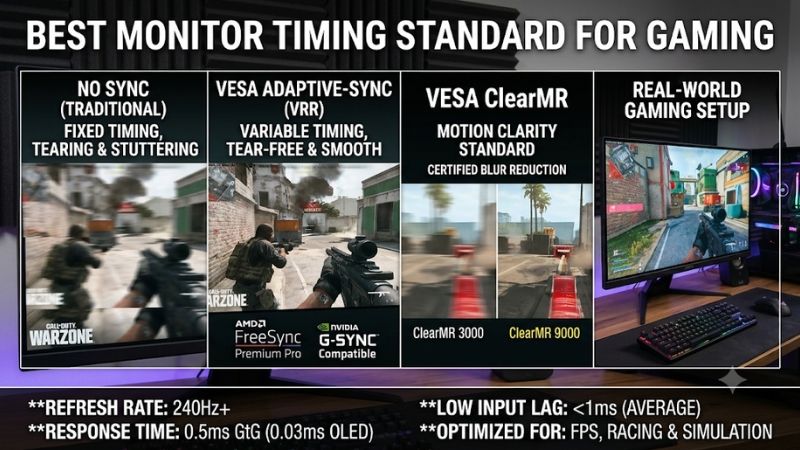
The most useful answer is to leave Timing Standard on Auto unless you have a specific reason to create or troubleshoot a custom display mode. If Auto fails to produce a compatible mode, CVT-RB is worth investigating for a supported custom resolution, particularly when targeting a high refresh rate.
These settings appear in NVIDIA Control Panel’s Create Custom Resolution interface. They determine how the graphics driver calculates the timing information needed to transmit a particular resolution and refresh rate to the monitor. They do not represent different physical panel technologies, gaming presets, or image-quality enhancements.
Here is the practical comparison:
| Timing standard | Main purpose | Gaming recommendation |
|---|---|---|
| Auto | Driver selects a suitable timing formula | Best default for most users |
| CVT-RB | Reduces horizontal and vertical blanking | Useful for compatible custom high-refresh modes |
| CVT | Standardized timing calculation | Alternative when Auto or CVT-RB is unsuitable |
| DMT | Uses predefined VESA display timings | Useful for established standard modes |
| GTF | Older General Timing Formula | Mainly for legacy compatibility |
| Manual | Allows individual timing parameters | Advanced troubleshooting only |
NVIDIA explains that Auto automatically determines the appropriate standard. It describes GTF as an older formula, DMT as a collection of predefined VESA timings, and CVT as a standard designed to support modern display resolutions. NVIDIA also explains that CVT-RB reduces horizontal and vertical blanking periods, allowing a lower pixel clock and potentially higher frame rates within a given signaling bandwidth.
The important qualification is that a timing formula cannot bypass the monitor’s specifications. A 144Hz display does not become a genuine 240Hz monitor because CVT-RB produces a lower pixel clock. The monitor’s panel electronics, supported scanning frequencies, input bandwidth, GPU output, and firmware still determine which modes work.
For everyday gaming at the monitor’s native resolution and advertised refresh rate, Auto is normally sufficient. Consider CVT-RB when a legitimate custom mode needs more efficient timing or when the manufacturer’s documentation or a reliable compatibility procedure specifically recommends it.
What monitor timing standards actually control
A monitor timing standard describes how a graphics card organizes and transmits an image signal. It defines more than the visible resolution. The signal also needs information about synchronization, the spacing between active image regions, refresh frequency, and the timing of horizontal and vertical scanning.
For example, a display mode described as 1920 × 1080 at 144Hz contains two familiar specifications: 1,920 visible pixels across, 1,080 visible lines vertically, and 144 complete refresh cycles per second. However, the video signal must account for additional timing intervals outside the visible image.
Those intervals are called blanking periods. They help organize the signal between active image regions and synchronization events. They are not necessarily black borders displayed around the picture.
Active pixels and blanking intervals
The active area is the portion of the signal containing the visible image. Horizontal blanking accounts for the timing between active pixels and the next horizontal synchronization event. Vertical blanking accounts for the corresponding interval between image scans.
A simplified display timing calculation includes:
-
Active horizontal pixels.
-
Active vertical lines.
-
Horizontal front porch and sync width.
-
Vertical front porch and sync width.
-
Total horizontal and vertical pixel counts.
-
Horizontal and vertical synchronization polarity.
-
Refresh rate and pixel clock.
NVIDIA’s custom timing documentation identifies these as configurable parameters. Its interface also shows that changing horizontal or vertical refresh frequency affects the related scanning frequency.
The total number of pixels transmitted during a refresh cycle is therefore greater than the visible resolution alone might suggest. This is why two timing formulas can produce the same visible resolution and nominal refresh rate while requiring different pixel-clock frequencies.
Why pixel clock matters for gaming monitors
Pixel clock describes the rate at which pixels are transmitted within the display timing system. It is usually expressed in MHz in monitor configuration tools.
A higher resolution requires more visible pixels per frame. A higher refresh rate requires those frames to be transmitted more frequently. Both can increase the required pixel clock.
Consider two common gaming configurations:
| Display mode | Visible pixels per frame | Refresh rate |
|---|---|---|
| 1920 × 1080 | 2,073,600 | 144Hz |
| 2560 × 1440 | 3,686,400 | 144Hz |
| 2560 × 1440 | 3,686,400 | 240Hz |
| 3840 × 2160 | 8,294,400 | 120Hz |
These figures describe the active image workload, not the complete signaling requirement. Blanking intervals and the chosen timing formula also affect the total pixel clock.
This is where reduced-blanking timing becomes useful. It can reduce some of the non-visible timing overhead, helping a compatible display mode fit within a lower pixel-clock requirement.
However, do not confuse this with reducing the GPU’s rendering workload. CVT-RB does not lower the number of visible pixels in a 2560 × 1440 frame, improve game-engine optimization, or create additional GPU performance. Its role concerns signal timing rather than game rendering.
Understanding the six timing standard options
The options in NVIDIA Control Panel have different purposes. Understanding their differences helps determine when changing the default setting is useful and when it simply introduces unnecessary compatibility problems.
Auto: Best monitor timing standard for most gamers
Auto is the recommended starting point for a normal gaming setup. NVIDIA describes it as the option that automatically determines the best timing standard for the selected display mode.
This is useful because modern graphics drivers and displays exchange supported-mode information. The monitor can report supported resolutions and refresh rates through its display identification information, allowing the graphics driver to select a compatible output mode.
A typical user with a 1080p 144Hz, 1440p 165Hz, or 4K 120Hz gaming monitor does not need to manually select GTF or CVT-RB just to access its advertised native refresh rate.
Auto is also convenient when you connect different displays to the same gaming PC. A standard 1080p secondary monitor and a high-refresh primary display may support different timing combinations. Leaving the driver to select a suitable standard avoids assuming that one formula works equally well for every connected screen.
Its limitation is that automatic selection cannot guarantee that every nonstandard custom resolution will work. A particular mode may be missing, an older monitor may report incomplete identification information, or a display may reject the generated timing.
In those cases, a different timing formula may be worth testing. Start with Auto rather than changing the setting without a clear compatibility problem.
CVT Reduced Blanking: Best for compatible high-refresh custom modes
CVT-RB stands for Coordinated Video Timings-Reduced Blanking. It modifies conventional CVT timing by reducing horizontal and vertical blanking periods.
The practical advantage is a lower pixel-clock requirement for compatible display modes. NVIDIA explicitly describes CVT-RB as a way to reduce blanking and permit higher frame rates within the timing system. AMD provides a similar explanation in its documentation for custom display modes.
NVIDIA+1
This makes CVT-RB particularly interesting for custom high-refresh configurations. A player trying to configure a supported nonstandard refresh rate may find that reduced-blanking timing is accepted where a conventional timing formula is rejected.
For example, someone experimenting with a custom 2560 × 1440 mode on a monitor that supports an appropriate scanning range may benefit from testing CVT-RB rather than conventional CVT. Whether the mode works still depends on the exact monitor and connection.
CVT-RB is not an automatic gaming performance upgrade. It does not reduce input latency by itself, improve pixel response times, increase the panel’s physical refresh capability, or guarantee higher in-game FPS.
Also, do not assume that all products implement identical CVT-RB revisions or timing constraints. Use the options exposed by your driver and the exact compatibility limits published for your monitor.
CVT: A standardized alternative for modern displays
CVT means Coordinated Video Timings. It is a VESA timing standard used to generate display timings for different resolutions and refresh rates.
NVIDIA describes CVT as supporting higher resolutions better than older timing formulas. It can be useful when a conventional standard timing is required or when Auto and CVT-RB do not produce a suitable mode.
The main difference between conventional CVT and CVT-RB is the blanking approach. CVT uses the standard timing calculation, while CVT-RB reduces the blanking periods to lower the pixel-clock requirement.
For gaming, CVT is not inherently better than CVT-RB. Nor does it automatically produce a sharper image or smoother animation. Its usefulness depends on which timing the monitor accepts.
A gamer working with a standard native resolution should rarely need to select CVT manually. It is more relevant when investigating a custom mode or resolving a specific display compatibility issue.
DMT: Predefined VESA display timings
DMT stands for Discrete Monitor Timings. Unlike formulas that calculate timing values for a requested mode, DMT consists of predefined display timing modes.
The goal is to provide established timings for recognized resolution combinations. This can be useful when a monitor supports a specific standard mode that the graphics driver needs to reproduce.
NVIDIA notes that when an applicable DMT timing is available, its driver normally selects DMT instead of GTF.
DMT is therefore a compatibility-oriented option rather than a gaming speed enhancement. Selecting it does not automatically make a monitor faster or improve its response characteristics.
For a modern gaming monitor, DMT is generally less important than Auto and CVT-RB when creating custom modes. It remains useful to understand because it appears in the same timing-standard menu and can matter when working with predefined display configurations.
GTF: An older timing formula
GTF means General Timing Formula. NVIDIA identifies it as an older, widely used timing standard, with newer displays increasingly moving toward CVT.
GTF can still be relevant when working with older monitors or unusual display hardware that expects legacy timing behavior. It is not the normal first choice for a modern 144Hz, 165Hz, 240Hz, or 360Hz gaming display.
A player troubleshooting a legacy monitor might test GTF if the manufacturer’s documentation or a known compatible configuration calls for it. However, choosing GTF simply because it appears in the menu will not make a modern gaming monitor faster.
For most users, Auto is a better starting point, followed by a compatible CVT or CVT-RB mode when a particular custom resolution requires it.
Manual: For users who understand display timing parameters
Manual mode gives the user control over timing values instead of relying on an automatically generated formula.
Depending on the driver interface, configurable parameters include horizontal and vertical front porch, sync width, total pixels, polarity, refresh rate, and related scanning information.
This can help experienced users reproduce a monitor manufacturer’s supplied timing values or investigate a specific compatibility issue. It is not a recommended way to experiment randomly with refresh rates.
Entering incorrect values can cause a black screen, an out-of-range warning, unstable output, or a mode the monitor cannot synchronize with. Use Manual only when you have reliable timing data for the exact display and connection.
Why timing standards do not automatically improve gaming performance
A common misunderstanding is that selecting CVT-RB will automatically make a game run faster or reduce display input lag. That is not what the setting does.
A graphics card has to render each frame before sending it to the monitor. The monitor then receives the signal, processes it, and updates the panel. Timing standards control how the signal is structured during transmission. They do not change the GPU’s rendering speed or the monitor’s physical pixel-transition characteristics.
Several separate display specifications matter for gaming:
| Specification | What it controls | Why gamers care |
|---|---|---|
| Refresh rate | Number of screen updates per second | Determines maximum refresh capability |
| Frame rate | Frames rendered by the GPU per second | Affects how frequently new game frames are available |
| Pixel response time | Speed at which pixels change between colors | Affects ghosting and motion clarity |
| Input lag | Delay between an input and its visible response | Affects perceived responsiveness |
| Pixel clock | Rate of pixel transmission in a display timing mode | Helps determine whether a signal fits available bandwidth |
| Timing standard | Calculation of synchronization and blanking parameters | Affects mode compatibility and signal requirements |
| VRR | Dynamically adjusts refresh timing to match frame delivery | Helps reduce tearing and inconsistent presentation |
These features work together, but they are not interchangeable.
For example, changing from GTF to CVT-RB does not reduce the monitor’s input lag from 10ms to 5ms. It does not turn a 165Hz panel into a 240Hz panel, either. A mode that requires less pixel-clock bandwidth may become compatible with a particular connection, but the physical refresh capability remains unchanged.
It is also important not to confuse monitor timing standards with frame-time consistency. A game running at 200 FPS produces a new frame approximately every 5ms on average. If those frames arrive inconsistently, gameplay may still feel uneven. That problem concerns frame delivery and game performance, not the timing formula selected in a custom resolution dialog.
How to choose the best monitor timing standard for gaming
The correct choice depends on your monitor’s specifications, graphics card, connection, and the reason you are creating a custom mode.
For standard 1080p and 1440p gaming
Use Auto when running the monitor at its native resolution and advertised refresh rate.
For example, a 1920 × 1080 144Hz monitor should normally expose its supported 144Hz mode through Windows and the graphics driver without requiring manual timing changes.
The same principle applies to 2560 × 1440 at 165Hz or 240Hz. The monitor manufacturer has already established supported modes, so there is little benefit in replacing the default timing formula.
If the desired mode is missing, first check the monitor’s input limitations, graphics driver, display cable, and operating-system refresh-rate selection. A timing-standard adjustment should not be the first troubleshooting step.
For custom 144Hz, 165Hz, and 240Hz modes
CVT-RB is worth testing when a custom mode needs a lower pixel-clock requirement and the monitor supports the requested scanning frequency.
This is particularly relevant when configuring a mode close to the bandwidth limits of a particular interface. Reducing blanking overhead can make the signal easier to accommodate.
However, the cable and interface still impose their own bandwidth limits. DisplayPort 1.4, HDMI 2.0, and HDMI 2.1 do not have identical transmission capabilities. Color depth, chroma format, resolution, and refresh rate also affect bandwidth requirements.
Do not use CVT-RB to justify selecting a refresh rate that exceeds the manufacturer’s supported range. A successful timing calculation does not prove that the panel can operate reliably at that frequency.
For older monitors and unusual resolutions
DMT or GTF may be worth considering when working with older equipment.
DMT provides predefined VESA timing modes, while GTF uses an older timing formula. These options can be useful when compatibility with a legacy display is more important than experimenting with high refresh rates.
For an older 60Hz office monitor, there is little reason to force an unfamiliar 120Hz mode. Start with its documented supported resolutions and refresh rates.
For HDMI televisions used as gaming displays
Be particularly careful with custom timing modes on televisions.
TVs may use consumer-video timing modes that differ from the computer-oriented display modes used by desktop monitors. NVIDIA’s documentation discusses EIA-861B timing parameters as examples of timing modes associated with HDTV connections.
A television can accept 3840 × 2160 at 60Hz but reject a custom PC timing that appears similar on paper. HDR, chroma subsampling, color depth, HDMI input settings, and firmware compatibility can also affect available modes.
Start with the manufacturer’s recommended PC or gaming input configuration. Only experiment with custom timing if a specific compatibility issue requires it.
How to change the monitor timing standard in NVIDIA Control Panel
NVIDIA Control Panel provides a dedicated interface for creating custom resolutions and selecting the timing formula. Menu availability can differ by GPU, driver, Windows version, and display configuration.
Prepare your monitor before creating a custom mode
Before changing anything, identify the exact monitor model and check its manufacturer’s manual or specification page.
Record the following information:
-
Native resolution.
-
Maximum supported refresh rate.
-
Supported refresh rates at each resolution.
-
Horizontal and vertical scanning limits, when published.
-
Supported HDMI and DisplayPort modes.
-
Maximum supported input bandwidth.
-
Recommended timing information, if provided.
This matters because a monitor’s advertised maximum refresh rate may only be available at a particular resolution or through a specific input.
For example, a monitor may support 240Hz through DisplayPort but only 144Hz through HDMI. Selecting CVT-RB cannot remove that interface limitation.
Use the cable and port specified by the monitor manufacturer. If you are testing a custom high-refresh mode, connecting directly to the graphics card is preferable to introducing an older receiver, adapter, or docking station.
Create a custom resolution in NVIDIA Control Panel
Follow this general procedure:
-
Right-click the Windows desktop and open NVIDIA Control Panel.
-
Select Change resolution under Display.
-
Select the monitor you want to configure.
-
Open Customize, then choose Create Custom Resolution.
-
Enter a resolution and refresh rate that are within the monitor’s documented capabilities.
-
Expand the Timing section if it is available.
-
Leave Standard on Auto initially. If you have a specific compatibility reason, compare the available timing options, including CVT-RB.
-
Select Test.
-
Save the custom mode only if the monitor accepts it and the displayed image is stable.
NVIDIA’s support documentation describes this process and explains that an unsuccessful test may produce an out-of-range message or a black screen before the previous display image returns.
Do not immediately increase the refresh rate after a failed test. First confirm that your requested resolution, cable, input, color depth, and timing parameters are correct.
Also remember that NVIDIA’s custom timing interface is intended for users who understand the effects of display timings. Its documentation specifically recommends advanced knowledge before changing individual timing parameters.
Creating custom monitor timings with AMD Radeon Software
AMD users can also create custom display modes, although the interface is different from NVIDIA Control Panel.
AMD Software: Adrenalin Edition includes a Custom Resolution function. AMD’s current documentation describes the workflow using Adrenalin Edition 25.6.1 and an RX 9070. The available options may differ depending on hardware and software configuration.
Steps for AMD users
-
Open AMD Software: Adrenalin Edition.
-
Search for Custom Resolution using the software’s search function.
-
Select the monitor you want to modify if multiple displays are connected.
-
Review and accept the applicable terms when prompted for the first time.
-
Select Create New.
-
Enter the required resolution, refresh rate, and other supported timing parameters.
-
Select Create and allow AMD Software to check compatibility.
-
Apply the resulting custom mode through Windows Display settings or the appropriate application.
AMD explains that incompatible settings are rejected rather than saved as a valid custom profile. It also warns that not every custom display mode works with every monitor.
One important distinction is that AMD’s current custom-resolution process should not be assumed to provide the same dropdown interface as NVIDIA’s Timing Standard menu. Some parameters are configured directly rather than through an identical list of named standards.
AMD also explains the meanings of GTF, DMT, CVT, and CVT-RB in its display timing documentation. Its description of CVT-RB identifies reduced horizontal and vertical blanking as the reason for its lower pixel-clock requirements.
Verify the refresh rate after changing timing settings
Creating a custom mode is only the first part of the process. You also need to confirm that Windows is using the intended resolution and refresh rate.
In Windows 11:
-
Open Settings.
-
Select System.
-
Open Display.
-
Select Advanced display.
-
Choose the correct monitor if multiple displays are connected.
-
Check the current display resolution and refresh rate.
-
Select the intended refresh rate from the available list.
Microsoft explains that the available refresh rates depend on the capabilities of the display and the connected hardware. It also notes that some refresh-rate entries may not support the currently selected resolution, which can cause Windows to change the resolution when that rate is selected.
For a gaming setup, verify that you are using the intended combination, such as 2560 × 1440 at 165Hz, rather than accidentally selecting a lower resolution to access a higher refresh rate.
You should also check the monitor’s on-screen information menu if it provides a live input-resolution and refresh-rate readout.
A successful custom resolution test does not independently establish good gaming performance. Check the image for flicker, blanking, corrupted colors, intermittent signal loss, or other instability. If any of these appear, return to a previously verified mode.
Common monitor timing problems and how to troubleshoot them
Custom timing problems are not always caused by choosing the wrong standard. The following checks help identify whether the issue involves the display, cable, GPU driver, or requested resolution.
| Problem | Possible cause | Recommended action |
|---|---|---|
| Black screen after testing | Monitor rejects the custom mode | Return to a previously supported resolution |
| Highest refresh rate missing | Cable or port limitation | Check the monitor’s input specification |
| Flickering at high refresh rates | Unsupported timing or unstable mode | Restore the previous refresh rate |
| Lower resolution after selecting a refresh rate | Selected rate does not support the current resolution | Choose a documented resolution-refresh combination |
| Custom resolution rejected | Unsupported timings or scanning frequency | Check the monitor manual and try Auto |
| Image appears stretched | Scaling or aspect-ratio configuration | Restore native resolution and correct scaling |
| HDR unavailable at maximum refresh | Bandwidth or connection configuration | Check the manufacturer’s supported HDR modes |
The monitor displays an out-of-range message
An out-of-range warning usually means the display cannot synchronize with the requested signal.
The first step is to stop experimenting with higher refresh rates. Return to a known supported mode and check the monitor’s maximum horizontal and vertical scanning frequencies if those specifications are published.
Try Auto before testing other timing formulas. If the issue remains, restore the native resolution and standard refresh rate.
Do not repeatedly force an unsupported timing in the expectation that the monitor will eventually accept it.
The maximum refresh rate is unavailable
Check whether the monitor supports its advertised maximum through the connection you are using.
Some models have different limits between HDMI and DisplayPort. Others require Display Stream Compression or a specific color-depth setting to reach certain resolution and refresh-rate combinations.
A cable’s connector shape does not establish its bandwidth capability. Confirm the actual cable specification and GPU output requirements.
Also check Windows Advanced Display settings. If the manufacturer lists 240Hz but Windows only exposes 144Hz, there may be an input, driver, resolution, or configuration limitation.
The picture flickers after enabling CVT-RB
Flickering can indicate an unstable signal or a mode the display does not handle correctly. It can also arise from other issues, including cable quality and display-driver problems.
Return to Auto and test the monitor at its normal refresh rate. If the flickering disappears, the custom mode may be incompatible.
Do not assume that the setting is safe simply because the display initially shows an image.
The display becomes black after saving a custom resolution
NVIDIA warns that an unsuccessful custom-mode test can result in a black screen or out-of-range message. Its documented testing process is designed to identify rejected modes before they are saved.
Use the recovery behavior provided by the graphics driver and monitor. If the image does not return, use Windows recovery or safe display settings to restore the previous supported configuration. Avoid creating additional custom profiles until the display is stable again.
Frequently asked questions
Is CVT-RB the best monitor timing standard for gaming?
CVT-RB is a useful option for compatible custom high-refresh modes because it reduces blanking and pixel-clock requirements. However, Auto is the better default for most gaming setups. The best choice depends on the exact resolution, refresh rate, connection, and monitor compatibility.
Does CVT-RB increase FPS?
No. CVT-RB changes display signal timing, not the speed at which a GPU renders game frames. It may help a supported display mode fit within a lower pixel-clock requirement, but it does not increase GPU performance or create additional frames.
Should I use CVT or CVT-RB for 240Hz?
Start with Auto. If you are creating a custom 240Hz mode and the monitor supports the requested resolution and refresh rate, CVT-RB may be worth testing. Neither option guarantees compatibility, and the monitor’s manual and connection specifications remain the deciding references.
Is GTF better than CVT for gaming?
Generally, no. GTF is an older timing formula and is more relevant to legacy compatibility. CVT and CVT-RB are more appropriate starting points for modern display timing configurations, although most users should leave the selection on Auto.
Does monitor timing affect G-SYNC or FreeSync?
Timing compatibility can affect whether a display mode is recognized and whether supported display features remain available. However, selecting CVT-RB does not enable G-SYNC or FreeSync by itself. Adaptive-sync compatibility depends on the monitor, graphics card, connection, driver, and supported operating range.
Should I use Manual timing for gaming?
Usually not. Manual timing is intended for users who have accurate timing information and understand synchronization parameters. A small configuration error can make the display reject the signal. Use Auto or a documented standard instead.
Final verdict
For most PC gamers, Auto is the best monitor timing standard because it lets the graphics driver select a suitable timing formula for the display mode. You do not need to change it simply because you purchased a 144Hz, 165Hz, 240Hz, or 360Hz monitor.
CVT-RB is the most useful alternative when creating a supported custom high-refresh mode and reducing blanking overhead is beneficial. CVT and DMT remain useful compatibility options, while GTF is mainly relevant to older equipment. Manual mode should be reserved for advanced troubleshooting with reliable timing specifications.
Most importantly, timing standards do not replace monitor bandwidth requirements or the display’s physical capabilities. Verify your monitor’s supported modes, use the correct cable and input, test custom settings carefully, and confirm the final resolution and refresh rate in Windows.
For a conventional gaming setup, a properly configured native resolution at the monitor’s advertised refresh rate will generally be a better starting point than experimenting with unsupported custom timings.