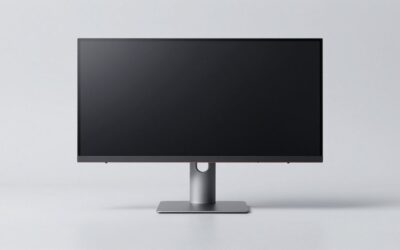
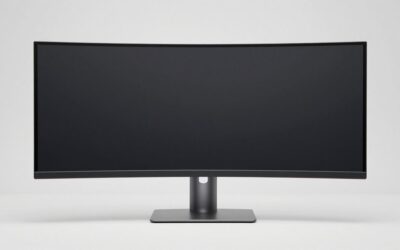
A wall mounted ultrawide monitor can free up desk space and put a wide screen at a more comfortable height, but the mount must match more than the monitor’s advertised diagonal size. Before buying a wall mounted ultrawide monitor setup, confirm the display’s weight without its stand, VESA hole pattern, curved-panel clearance, and the strength of the wall where the mount will attach. For most home offices and gaming desks, a sturdy wall-mounted arm is the most flexible choice; a fixed or tilting plate is better when the screen will rarely move.
- The safest wall mounted ultrawide monitor setup starts with fit, not price
- Check weight, VESA pattern, and rear clearance before ordering
- Choose a wall mounted ultrawide monitor mount type
- Make sure the wall can carry the mount and its leverage
- Plan viewing height, distance, and cables as one system
- Common buying mistakes to avoid
- Wall mounted ultrawide monitor compatibility checklist
- Frequently asked questions
- Final verdict
Quick answer: Our top pick in 2026 is the Mount style — our #1 rated choice. See the full ranked comparison, alternatives and buying advice below.
The safest wall mounted ultrawide monitor setup starts with fit, not price
The right mount is the one approved for the exact display and the wall you have, with enough reach for your seating position and enough clearance for the screen’s width and curve. Do not choose by price, claimed maximum weight, or a “fits up to 49 inches” label alone. Check the monitor and mount manuals together, then confirm all four limits: screen size, supported weight, VESA pattern, and installation surface.
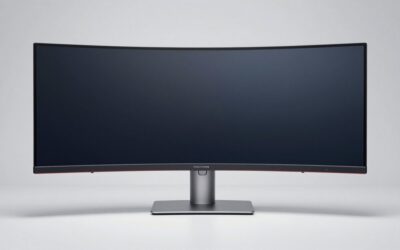
For a large 34-inch, 38-inch, 45-inch, or 49-inch display, weight and size ratings should both be met. A monitor may be light enough for a standard arm but too wide or too deep for its movement range. Likewise, a mount advertised for a 49-inch screen may only support a particular weight range or VESA pattern. Curved models need extra attention because their rear housings can sit farther from the wall and their balance can differ from a flat panel.
| Mount style | Best use | Main trade-off |
|---|---|---|
| Fixed wall plate | A screen that stays in one position | Minimal adjustment; rear ports can be hard to reach |
| Tilting wall plate | A stable display that needs a small downward or upward angle | Usually offers little side-to-side repositioning |
| Articulating arm | A desk shared between tasks or a screen that needs to swing aside | Needs space to fold and may flex more when extended |
| Heavy-duty gas-spring arm | Frequent height and angle changes | Higher cost and a need to match the monitor’s weight range precisely |
| Wall track or workstation system | A more adjustable workspace with keyboard or computer support | More parts, installation complexity, and wall space |
A fixed mount is usually the simplest option when you already know the correct screen height and want the display close to the wall. An adjustable arm is worth paying for when you regularly move between seated and standing positions, need to bring the monitor closer for detailed work, or use the same desk for gaming and productivity. If you only need to raise the panel, compare a wall mount with a stable desk riser or desk arm before drilling holes; mounting is not automatically the best upgrade.
Check weight, VESA pattern, and rear clearance before ordering
Start with the exact monitor model number, including its generation or suffix. Download its manual or specifications page from the manufacturer rather than relying only on a retailer title. Record the monitor’s weight without the original stand, its VESA mounting pattern, any required spacer or screw information, and the dimensions of the rear housing. The shipping weight and weight with the stand are not the figures to use for the mount’s load rating.
Find the monitor’s real mounting weight
The mount must support the display at its installed weight, not the weight of the package and not the weight listed with a large stand attached. If the manufacturer lists only a range or the information is ambiguous, ask its support team before buying. Stay within the mount’s minimum and maximum load range: gas-spring arms may not rise properly when a monitor is too light, while an overloaded arm can sag, drift, or become difficult to control.
Weight is only one part of the calculation. A wide monitor creates a longer lever when extended from the wall. The screen’s center of gravity, depth, and distance from the mounting plate can affect how the arm behaves, especially when swung to one side. That is why a mount’s stated screen-size range matters even when the monitor seems comfortably under the listed pound limit.
Match the VESA hole pattern and fasteners
VESA describes the standardized mounting-hole layout on the back of many flat-panel displays. Common monitor patterns include 75 × 75 mm and 100 × 100 mm, but ultrawide size alone does not guarantee either pattern. Measure the horizontal and vertical distance between the threaded holes if the manual does not state the pattern. Match it to the mount’s supported layout; do not assume that a TV mount or a universal-looking plate will line up.
Check screw diameter and length as well. Screws that are too short may not engage enough threads; screws that are too long can damage the display. Use only the screw sizes and spacers approved by the monitor or mount manufacturer. Spacers can help clear a recessed mounting area or ports, but improvised stacks of washers are not a substitute for the correct hardware. If the monitor has no VESA holes, verify whether the manufacturer supports a specific adapter and whether the adapter is rated for that exact model.
A useful example shows why model-specific checks matter. Samsung lists the 49-inch Odyssey G9 G95C with a 100 × 100 mm wall-mount pattern and a weight of 23.4 lb without its stand. Mount-It!’s MI-12009 wall arm is listed for 17- to 49-inch displays weighing 4.4 to 44 lb and supports 75 × 75 mm and 100 × 100 mm patterns. Those published size, weight, and hole-pattern figures align on paper. Still, check the current instructions for the exact monitor and mount—including curved-screen limits, screw requirements, and movement clearance—before treating the pairing as approved.
The reverse example is just as important. Ergotron’s LX Wall Mount System is specified for displays up to 32 inches and 25 lb. A particular 49-inch monitor weighing less than 25 lb would pass the weight check but fail the manufacturer’s screen-size guidance. Do not override a mount maker’s stated size limit just because the VESA holes fit.
Choose a wall mounted ultrawide monitor mount type
A fixed plate keeps the monitor close to the wall and is often the cleanest-looking solution. It can suit a shallow desk if you are confident about the viewing position and can reach the rear ports during installation. Measure the gap needed for power and video cables; “low profile” should never mean crushing a connector against the wall. A fixed plate is less attractive if you frequently change seats or need to access the monitor’s controls.
A tilting plate adds a small angle adjustment without the bulk of a long arm. It can help compensate for a monitor mounted slightly above eye level, but it will not move the screen forward or sideways. Verify that its tilt range works with the monitor’s curve and weight, and confirm that the plate does not block the ventilation openings.
An articulating wall arm is the practical middle ground for a changing desk setup. It can pull the panel forward, shift it to one side, and fold back when not in use. Measure the arm’s minimum folded depth and maximum extension. A long arm offers flexibility but gives the screen more room to move; use the mount within the manufacturer’s permitted range and avoid pushing or pulling on the panel itself. For a very wide screen, test where the outer edges travel when the arm swivels. The monitor might hit a nearby cabinet, a side wall, a speaker, or a second display before the arm reaches its advertised angle.
Gas-spring arms make frequent height adjustments easier because the spring counterbalances the display. Their specified weight range is critical: a screen outside that range may not stay put. Some models support large ultrawides, while many ordinary single-monitor arms are designed for smaller or lighter screens. Never extrapolate capability from the product family name; check the exact model, included pivot or VESA head, and any limits for curved displays.
A wall track can provide more mounting positions or support a broader workstation layout, but it is not a universal fix for a weak wall. The track, brackets, fasteners, and wall structure all need to be rated for the installation. If you want both the monitor and keyboard to move, check whether the system is designed for that purpose rather than trying to attach a keyboard tray to an unrelated arm.
Make sure the wall can carry the mount and its leverage
For a typical home installation, the mounting points should attach to suitable framing or a solid masonry surface using the hardware and method specified for the mount. Drywall is a wall finish, not a dependable structural anchor for an extended monitor arm. Do not substitute general-purpose plastic anchors or toggle bolts unless the mount manufacturer explicitly specifies an appropriate rated installation for that wall construction. A heavy screen pulled away from the wall applies leverage as well as downward load.
Identify whether the wall uses wood studs, metal studs, masonry, or another construction. Find the exact fastening locations and check for electrical wiring, plumbing, and other services before drilling. A mount designed for a wood stud may require different hardware or a dedicated kit for metal studs; never assume the included lag screws suit every wall. For brick or concrete, use fasteners matched to the substrate and the mount instructions. Brick veneer, hollow block, plaster, and drywall over masonry can require different treatment from solid concrete.
If you cannot confidently identify the wall structure, the right fasteners, or the path of wiring and pipes, ask a qualified installer. That is especially sensible for a 45- or 49-inch monitor on a long arm, a wall with uncertain framing, or a rental where damage is a concern. A professional installation costs more than doing it yourself, but replacing a damaged screen or repairing a failed wall fixing can cost far more.
Before you drill, mark the screen’s proposed outline on the wall with painter’s tape. Sit at the desk and confirm the height, the centerline, and the distance from your eyes. Check that the monitor can move through its normal range without striking a wall, shelf, window, microphone boom, or lamp. Open drawers and cabinets, and account for any standing-desk movement. A position that looks centered while the monitor is folded close to the wall may feel off-center once the arm is extended.
Plan viewing height, distance, and cables as one system
A good wall position puts the main viewing area directly in front of you, not off to one side simply because a stud is easier to reach there. The top of the display should generally sit at or slightly below eye level, with the center of the viewing area below horizontal eye level. Treat that as a starting point, not a rigid rule: the correct position depends on the monitor’s height, curvature, your posture, and how much of the panel you use. With a large ultrawide, the outer corners extend well beyond the central viewing area, so moving the screen too high or too close can make you repeatedly tilt or turn your head.
A wall mount also fixes the screen relative to the room, while your chair and desk may move. If you use a sit-stand desk, test the screen height at both positions and ensure that the cables still reach without pulling tight. An arm with a limited height range may not suit a large change in desk height. Where there is no convenient adjustment, a wall track or a suitable long-reach arm may be a better solution than a fixed plate.
Cable routing needs a plan before installation. Measure the actual path from the PC to the monitor as the arm moves; a cable that reaches when the screen is folded can become taut at full extension or swivel. Leave enough slack for normal movement without making a loop that catches on the hinge. Route cables through the arm’s approved channels where possible, but avoid sharp bends and tight ties. Make sure power and video connectors are accessible after mounting, the monitor’s vents remain clear, and cables do not hang where a chair or standing desk can snag them.
Check the connectors on the display before choosing cable length. A recessed DisplayPort or HDMI socket may need extra clearance that a flush wall plate does not provide. If you need longer DisplayPort, HDMI, or USB runs, buy cables rated for the required signal and length rather than assuming any inexpensive extension will work at the monitor’s maximum resolution and refresh rate. For high-refresh gaming displays, validate the cable and GPU output requirements separately from the mount’s mechanical compatibility.
Common buying mistakes to avoid
-
Choosing by diagonal size alone. A “49-inch compatible” statement is useful only when the weight range, VESA pattern, curved-screen guidance, and wall installation also match.
-
Ignoring the arm’s extension and folded depth. A long arm may solve one clearance issue but create another when the screen swings toward a doorway or side wall.
-
Using the monitor’s weight with its stand attached. Use the manufacturer’s display-only weight for the load check.
-
Treating the VESA pattern as a complete fit guarantee. The screws may line up even though the mount is undersized, the monitor is too deep, or the plate blocks ports.
-
Mounting to drywall without suitable structural support. Follow the correct method for the actual wall and the exact mounting hardware.
-
Buying a gas-spring arm without checking its minimum load. A counterbalance mechanism must match the monitor’s weight range to operate correctly.
-
Forgetting future access. Leave room to reach controls, unplug the display, clean behind it, and replace cables without dismantling the entire setup.
-
Tightening fasteners by guesswork. Follow the installation guide, use the correct tools, and avoid overtightening screws into the monitor housing.
Wall mounted ultrawide monitor compatibility checklist
Before ordering, write down the monitor’s exact model, display-only weight, VESA pattern, rear depth, and any manufacturer mounting notes. Then check the mount’s supported size range, minimum and maximum weight, VESA plate, arm extension, folded depth, tilt and swivel range, and allowed wall type. Confirm the required screws, spacers, anchors, and tools; do not assume every item is included or appropriate for your wall.
Next, measure the proposed screen position and movement envelope. Leave enough room to use the keyboard comfortably, see the outer edges without excessive head movement, connect the cables, and move the arm without hitting nearby objects. For an adjustable desk, test both sitting and standing positions. Finally, verify current availability and return terms with the seller only after the model-specific checks are complete. A return policy does not make an incompatible or unsafe installation acceptable.
Frequently asked questions
Can any monitor arm hold a 49-inch ultrawide?
No. The arm must be approved for the display’s size, display-only weight, VESA pattern, and depth or curvature where the manufacturer specifies a limit. Many standard monitor arms are designed for smaller screens. Check the exact model documentation rather than inferring capacity from appearance or weight alone.
Is a wall mount better than a desk arm?
A wall mount can free up desk space and keep the support independent of the desktop, but it requires suitable wall structure and makes relocation or height changes more involved. A desk arm may be easier to reposition or remove, provided the desk edge or grommet area can support it. Compare the actual installation surfaces, not just the arm’s advertised features.
Can I mount an ultrawide directly to drywall?
Do not attach an extended monitor arm to ordinary drywall alone unless a mount’s instructions specifically provide a rated method for that exact wall construction. In most installations, the fixing needs to engage appropriate structural framing or masonry with the correct hardware. If you are unsure what is behind the wall, consult a qualified installer.
Do curved monitors need a special VESA mount?
Not necessarily. A curved display can use standard VESA holes, but its depth, balance, and rear housing may affect clearance and arm behavior. Confirm the exact VESA pattern and weight, then check whether the mount maker explicitly supports the display size and curved form factor. Never force the screen or bend its panel to make the hardware fit.
How high should a wall-mounted ultrawide sit?
Start with the main viewing area centered in front of your seated position and the top edge at or slightly below eye level, then adjust for screen height, distance, curvature, and comfort. A wide panel can tempt buyers to mount it too high to clear objects below it. Mock up the outline with tape and test the seated and standing views before drilling.
Final verdict
The best wall-mounted ultrawide setup is not necessarily the most expensive or the one with the highest advertised pound rating. It is the mount whose size range, load rating, VESA interface, movement geometry, and wall hardware match the exact monitor and the room. Start with the manufacturer’s specifications, test the proposed position with a taped outline, and plan cable movement before making holes. If the wall or compatibility is uncertain, pause and get the mount maker or a qualified installer to verify it. Protecting the monitor and wall is more important than getting the cleanest-looking setup in one afternoon.
Ready to decide? Our #1 pick for 2026 is the Mount style.
Live price & availability on Amazon.