Affiliate disclosure: As an Amazon Associate we earn from qualifying purchases. This post contains affiliate links — we may earn a small commission at no extra cost to you. This never affects our picks. Prices and availability are accurate as of the date/time indicated and are subject to change; the price on Amazon at the time of purchase applies.
- Prerequisites the Builder Must Have
- Step 1: Establish a Documented Stock Baseline
- Step 2: BIOS Hygiene Before Anything Else
- Step 3: AMD Path – PBO and Curve Optimizer
- Step 4: Intel Path – Per-Core Ratios with Conservative LLC
- Step 5: CPU Stress Testing Discipline
- Step 6: Memory Tuning Beyond XMP/EXPO
- Step 7: GPU Baseline with MSI Afterburner
- Step 8: GPU Memory Tuning First
- Step 9: Modest Core Overclock
- Step 10: Undervolt the GPU – The Highest Value Step
- Step 11: Combined CPU + GPU Stress
- Step 12: Long-Form Real-World Validation
- Common Pitfalls Builders Encounter
- Pro Tips From Years of Builds
- Builder-Recommended Products
- Conclusion
- Related Guides
- Related Articles
- Frequently Asked Questions
- Related Articles
Top picks at a glance:
| Product | Price | Rating | Buy |
|---|---|---|---|
| STORMCRAFT Phantom RTX 5080, AMD Ryzen 7 9800X3D, 32GB | $2999.99 | ⭐ 5.0/5 | View on Amazon |
| Samsung 990 PRO SSD 2TB NVMe M.2 PCIe Gen4, M.2 2280 In | Check on Amazon | ⭐ 4.8/5 | View on Amazon |
| Lenovo Legion T7 34Irz8 PC i9-14900KF GeForce RTX 4080 | $1977.99 | — | View on Amazon |
| iBUYPOWER Y40 PRO Black Gaming PC Desktop Computer AMD | $2099.99 | ⭐ 3.7/5 | View on Amazon |
| MXZ Gaming PC,AMD Ryzen 7 7700, GeForce RTX 4060Ti,16GB | Check price | — | View on Amazon |
As an Amazon Associate we earn from qualifying purchases at no extra cost to you.





This is the exhaustive builder’s reference for overclocking CPU and GPU in 2026. It runs longer than the average tutorial because the topic doesn’t reward brevity. Builders tuning systems for living rooms, content creation rigs, dedicated workstations, and high-refresh gaming setups all share one obligation: the system has to stay stable for the long haul. A weekend-stable overclock that crashes during a six-hour render or a competitive match isn’t an overclock; it’s a liability. This guide treats overclocking as a stability problem with performance as the byproduct, which is the right framing for any builder who has to support their work over years rather than benchmark for an afternoon.
Quick answer: For a 2026 build, the our top pick is the graphics card we would build around, while the the value pick is the budget-friendly choice.
We’ll cover the prerequisites in detail because most failed overclocks are failures of preparation. We’ll walk every step with explicit numbers and explain why each setting matters. We’ll document the common pitfalls we see in builder communities, because the same mistakes recur weekly and the same fixes resolve them. And we’ll share the pro tips accumulated from tuning hundreds of builds, including the unwritten conventions that turn a competent tuner into someone whose systems just work.
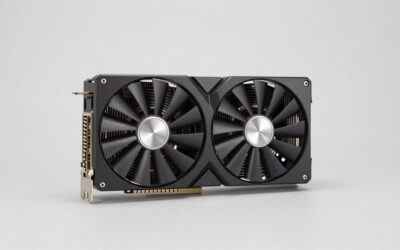
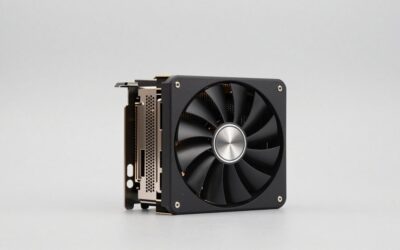
The honest framing first. Modern silicon ships far closer to its limits than chips from the 2010s. Intel’s 14th and 15th generation K chips and AMD’s Ryzen 7000/8000/9000 series boost aggressively out of the box. NVIDIA RTX 40 and 50 cards along with AMD’s RDNA 3 generation use dynamic boost algorithms that already extract most of the silicon’s headroom in any thermally healthy build. The realistic gain from a competent overclock in 2026 is 5% to 10% on most workloads, with the occasional outlier reaching 12% on chips that were unusually conservative at stock. The far more valuable outcome for builders is sustained performance under long workloads, lower temperatures, and quieter operation through undervolting. Treat raw performance as a bonus and thermal/acoustic improvement as the main prize and your tuning satisfaction will be much higher.
🛒 Best Price Today on Amazon
Prime members get fast, free shipping on everything above, plus member-only deals. New members get a 30-day free trial — cancel anytime.
Start 30-Day Prime Free Trial →See Today’s Amazon DealsPrerequisites the Builder Must Have
Before you open a single BIOS menu, confirm the system is healthy at stock. Run Cinebench R23 multi-core for ten minutes. The chip should hold its full boost clock with no thermal throttling, and peak temperatures should stay below 85C on Ryzen chips or below 90C on Intel K chips. If you’re over those numbers at stock, the cooling is undersized, the thermal paste is aged, or case airflow is restricted. Fix those problems before overclocking. Tuning on top of a thermal weakness produces unstable results and accelerates wear on the silicon.
Run the GPU through Unigine Superposition at 4K Optimized for ten minutes. Peak temperatures should stay under 80C on the GPU core, and the card shouldn’t be slamming into power limits continuously. If it is, the card is already constrained at stock and your tuning headroom shrinks. Builders should also confirm case airflow with a thermal camera or even a kitchen thermometer probe near the GPU intake; an undersized intake fan profile starves the card of cool air no matter how good its cooler is.
Cooling that supports overclocking: minimum 240mm AIO for Ryzen 7 and Core i7 chips, 280mm or 360mm AIO for Ryzen 9 and Core i9, or a premium dual-tower air cooler such as the Noctua NH-D15 G2 or Thermalright Phantom Spirit 120 SE for builds that prefer air. The “premium” qualifier matters; entry-level dual-tower coolers don’t match AIO performance under sustained loads.
Power supply requirements: a quality 80+ Gold or better PSU rated at least 150W over the system’s stock peak draw. Modern Ryzen 9 plus RTX 4080-class systems easily peak past 600W in combined workloads, so 750W minimum is the recommendation there and 850W or higher for Ryzen 9 / Core i9 plus RTX 4090/5090 setups. Never overclock on a PSU older than five years without replacing it first; aged capacitors push dirty power that crashes tunes which would be rock-solid on a healthy supply.
Software stack: HWiNFO64 for sensor monitoring (sensors-only mode to save resources), Cinebench R23 and Prime95 small FFTs for CPU validation, OCCT in CPU+GPU combined mode for VRM and power delivery validation, MSI Afterburner for GPU tuning regardless of brand, FurMark and Unigine Superposition for GPU stress, and Karhu RAM Test or TestMem5 with the Anta777 Extreme config for memory validation. Update the motherboard BIOS to the latest stable release before you start; voltage regressions and boost algorithm fixes turn up in updates often, and tuning on stale firmware is a wasted weekend.
Step 1: Establish a Documented Stock Baseline
Open a plain text file. Date the entry. Note the ambient room temperature (this matters more than builders realize). Run Cinebench R23 multi-core for ten minutes and record: multi-core score, peak package temperature, peak power draw, average effective clock from HWiNFO64. Run a thirty-minute gaming session in your most demanding game at your usual settings and record: average FPS, 1% low FPS, peak GPU temperature, peak fan speed, average GPU effective clock from MSI Afterburner. These are your baseline numbers, and every later change gets measured against them.
Builders who skip this step end up unable to answer the simplest question once they’re done: did the overclock actually help? We’ve audited builds where the owner believed they had a substantial overclock and the measured performance was 4% slower than stock thanks to a chain of compensating changes that left net performance worse than baseline. The text file is the only objective evidence of what your tune actually does.
Step 2: BIOS Hygiene Before Anything Else
Flash to the latest stable BIOS. “Stable” not “beta” unless your community forum has vetted the beta. Read the changelog; voltage table updates and boost algorithm fixes are common, and tuning on stale firmware is a waste. After flashing, enter BIOS, load optimized defaults, save, and reboot. That clears any residual settings from past tuning attempts and gives you a clean starting state.
Enable XMP on Intel platforms or EXPO on AMD to apply the rated memory speed and primary timings. Verify the applied speed in HWiNFO64 after boot. Without this step the memory runs at JEDEC fallback speeds (4800-5600 MT/s typical on DDR5), leaving substantial performance unrealized and bottlenecking any CPU tuning you do later. Run Cinebench R23 for ten minutes at the XMP/EXPO speed to confirm memory stability; if Cinebench fails here, the memory kit is unstable at its rated speed and needs to be sorted before any CPU tuning.
Step 3: AMD Path – PBO and Curve Optimizer
For Ryzen 7000, 8000, and 9000 series, the modern tuning path is PBO with Curve Optimizer rather than a fixed all-core multiplier. Enter BIOS, navigate to the PBO menu, set PBO to Advanced, set PBO Limits to Motherboard, set Scalar to 1x (avoid higher Scalar values; they raise voltage without proportional performance gain), and set Curve Optimizer to All Cores, Negative, magnitude 10.
The negative magnitude tells each core to request that many counts less voltage at any given boost frequency. The result is lower temperatures at the same clock, which lets the boost algorithm hold higher clocks for longer under sustained load. Start at -10 and step toward more negative values; most Ryzen 7000 chips hold -15 to -25 all-core stable, Ryzen 9000 chips typically -10 to -20 due to tighter factory tuning. Per-core negative curves can go deeper on the strongest cores, but for builders prioritizing stability the all-core approach is more reliable.
Step 4: Intel Path – Per-Core Ratios with Conservative LLC
For Intel 14th and 15th gen K chips, push the top P-core ratios one or two bins above the stock turbo. Set the LLC (Load Line Calibration) to a mid value, usually level 4 or 5 on most boards; aggressive LLC settings cause voltage overshoot during transient loads, which is the main driver of long-term silicon degradation. Leave voltage on Auto for the first test; if the chip is unstable, set VCore manually to a modest value (typically 1.25V to 1.30V depending on the SKU) and retest.
Save and reboot. Run Cinebench R23 multi-core for ten minutes, watching effective clock and package temperature in HWiNFO64. If the chip holds the requested clock without throttling and stays under 90C, you’ve got a working starting point. If thermals are the limiter, sort out cooling before pushing harder; piling on voltage to mask inadequate cooling shortens chip lifespan for little performance gain.
Step 5: CPU Stress Testing Discipline
Cinebench R23 multi-core for thirty minutes is the first gate. The chip should hold effective clock within 100 MHz of the requested value and stay under thermal limits. If it drops further than that or hits the temperature ceiling, the tune isn’t stable; back off by one Curve Optimizer count or one Intel ratio bin and retest.
If Cinebench passes, run Prime95 small FFTs for one hour. This is the brutal test; it pushes the chip harder than any practical workload and exposes voltage instability that gentler tests miss. Open Event Viewer in another window and watch for WHEA warnings. The acceptable count is zero. Even one WHEA event signals silent calculation errors, and those errors will eventually reach data the builder cares about. Builders we work with have shared horror stories of slowly accumulating photo and document corruption traced back to “stable” tunes that threw occasional WHEA events. Zero is the bar.
Step 6: Memory Tuning Beyond XMP/EXPO
With the CPU validated, tune memory secondaries. The biggest builder wins are: tighten tRFC by 50 to 100 ticks (this single change often delivers measurable bandwidth gains on DDR5), tighten tRCD and tRP by 2-4 ticks, tighten tRRD_S and tRRD_L to 4-6 on AMD or 5-7 on Intel. Builders should reference Buildzoid’s YouTube deep-dives for their specific kit and IMC combination; his content is the closest thing to a public reference standard for DDR5 tuning.
After each timing change, save BIOS, boot, and run Karhu RAM Test or TestMem5 with the Anta777 Extreme config for at least one hour. Memory instability mimics CPU instability and is the most common cause of “random” crashes blamed on Windows or drivers in builder forums. A clean one-hour Karhu pass is the minimum bar; for builders shipping systems to clients, run a four-hour pass before declaring stability.
Step 7: GPU Baseline with MSI Afterburner
Install MSI Afterburner. Set RivaTuner’s on-screen display to show GPU core clock, memory clock, voltage, power limit percentage, and core temperature. Add the average effective clock metric too; modern boost algorithms shed delivered clock as temperature climbs, and average effective clock under sustained load is the only performance metric that means anything.
Run Unigine Superposition at 4K Optimized for ten minutes. Record average FPS, peak temperature, peak fan speed, and average effective clock. This is your stock GPU baseline. Builders skipping this step report being unable to judge whether their tune helped; the same documentation discipline that applies to CPU baselines applies here.
Step 8: GPU Memory Tuning First
Builder convention is to tune memory before core, because memory contributes meaningfully at high resolutions and the headroom is generally predictable. In Afterburner, increase the memory clock offset by +200 MHz, apply, and run Superposition for ten minutes. If there are no artifacts and no driver crash, add another +200 MHz and repeat.
Once past +800 MHz, drop to +100 MHz increments. Most RTX 40 and 50 cards take +1200 to +1800 MHz on memory before showing error-correction-induced FPS drops. The classic builder warning sign for over-tuned memory is FPS that rises with the offset and then falls; the memory is throwing errors and the error correction overhead has overtaken the clock benefit. When you see this, back off by 200 MHz and confirm FPS recovers. AMD RDNA 3 cards typically cap around +800 MHz on memory.
Step 9: Modest Core Overclock
Reset the core offset to zero. Bump it +15 MHz, apply, and run Superposition for ten minutes. Continue in +15 MHz increments. We use this small step because modern boost algorithms drift by more than 15 MHz between runs, so larger steps fall below the silicon variance noise floor and produce false stability calls. Most quality RTX 40 and 50 cards take +90 to +180 MHz on core before instability. Past that you get crashes, artifacts, or subtle performance regression as the card constantly slams into power and voltage limits.
Record the highest +MHz offset that clears ten minutes of Superposition with no artifacts. That figure becomes your target clock for the undervolt step.
Step 10: Undervolt the GPU – The Highest Value Step
Builders consistently call this the most valuable step. Open the voltage-frequency curve editor in MSI Afterburner with Ctrl+F. Locate your card’s stock peak voltage point (usually 1.05V to 1.10V on Nvidia, 1.15V on AMD RDNA 3). Drag the 0.95V curve point up to your validated peak clock from Step 9, then flatten everything to the right of it at the same clock. Apply.
The card now reaches your target clock at 0.95V instead of 1.10V. The result across the hundreds of builds we’ve tuned: 10-15C lower temperatures, 20-40% slower fan speeds, identical or marginally better sustained FPS because the card no longer hits its power limit during long workloads. Run Superposition for one hour at the new setting. If stable, run a four-hour gaming session split across two demanding titles. This is the highest-leverage change a builder can make to a GPU.
Step 11: Combined CPU + GPU Stress
Run OCCT in CPU+GPU combined mode for two hours minimum. This catches power delivery weaknesses that single-component tests miss; the combined load on the PSU and motherboard VRM is what most often exposes marginal tunes. Builders should expect VRM temperatures to climb meaningfully in this test; a quality motherboard with proper heatsinks handles the load, while entry-level boards may thermal-throttle their VRMs.
Step 12: Long-Form Real-World Validation
The last validation step is one week of normal use with HWiNFO64 logging in the background. Any tune that survives a real seven-day soak under your actual workload is genuinely stable. Tunes that fail under real conditions almost always surface inside that window. Builders shipping systems to clients should run this validation on a representative workload before handover.
Common Pitfalls Builders Encounter
Pitfall 1: No Documented Baseline
Skipping the stock baseline step makes it impossible to evaluate the tune. We’ve audited builds where the owner believed they had a substantial overclock and measurement revealed net regression versus stock. The text file with date, ambient, and stock numbers is non-negotiable for any serious builder.
Pitfall 2: Trusting Short Stress Tests
An overclock that passes fifteen minutes of Cinebench is exploratory, not validated. Thermal soak, sustained boost algorithm behavior, and VRM heat all evolve across the first hour of load. Minimum acceptable validation: one hour Prime95, one hour memory test, two hours OCCT combined, then a seven-day real-world soak. Anything less is wishful thinking.
Pitfall 3: Aggressive LLC Settings
Builders migrating from older Intel platforms still reach for the most aggressive LLC level. On modern Intel and AMD platforms that causes voltage overshoot during transient loads — the primary long-term degradation mechanism. Conservative LLC (mid-level) is safer and delivers equivalent sustained performance.
Pitfall 4: Mixing Curve Optimizer with Manual VCore
These two features fight each other and produce unpredictable behavior. Builders who enable both on Ryzen platforms report mysterious instability that resolves the instant one is disabled. Pick one approach. For Ryzen 7000, 8000, and 9000 the consistent recommendation is PBO + Curve Optimizer.
Pitfall 5: Ignoring WHEA Warnings
WHEA warnings are your early-warning system for silent calculation errors. The acceptable count is zero. Builders who shrug off the occasional WHEA event report eventual file corruption that traces straight back to those errors. There is no acceptable level of WHEA other than zero.
Pitfall 6: Tuning on a Worn-Out PSU
Aged capacitors push dirty power that crashes tunes which would be rock-solid on a healthy supply. Replace PSUs older than five years before tuning, and replace PSUs of unknown brand or age no matter what. A lot of “unstable chip” reports trace back to PSU degradation.
Pitfall 7: Validating at Mild Ambient, Deploying in Hot Summer
A tune validated at 18C ambient will routinely fail at 28C ambient. Bake a 7C ambient buffer into validation, or revalidate with the seasons. Builders in warmer climates report summer instability on tunes that ran flawlessly all winter.
Pitfall 8: Using FurMark Alone for GPU Validation
FurMark loads the GPU in a pattern no real workload reproduces. Builders who validate with FurMark alone report tunes that pass for hours and then crash in games. Treat FurMark as one data point alongside Superposition and real gaming sessions.
Pro Tips From Years of Builds
Tip 1: Effective Clock Is the Only Number That Matters
The BIOS multiplier or the Afterburner offset is the request. The effective clock under sustained load is what the chip actually delivered. Builders who track requested clocks instead of effective clocks consistently overrate their tunes. HWiNFO64’s effective clock sensor for CPUs and MSI Afterburner’s effective clock metric for GPUs are the references to trust.
Tip 2: Negative Curves Beat Positive Curves on Modern Silicon
It runs counter to anyone who learned overclocking in the voltage-pushing era, but it’s well documented across hundreds of builds. A negative Curve Optimizer paired with PBO’s wider thermal envelope produces faster sustained performance than any fixed-multiplier overclock running elevated voltage. Every one of the fastest Ryzen builds in our archive uses negative curves between -15 and -25.
Tip 3: Tune Fan Curves to Match the New Heat Profile
The stock fan curve was tuned for stock heat output. Overclocked systems generate heat in a different profile, often dumping more thermal load between 60C and 80C. Build a custom curve that ramps harder across that range. The slight extra noise during sustained loads is the price you pay for sustained boost.
Tip 4: Repaste First, Tune Second
Aged thermal paste is a hidden ceiling on every overclock. Builders who repaste before tuning report 4-8C improvements that translate straight into more headroom. Fresh paste, then fresh BIOS, then fresh tune. The order matters.
Tip 5: Document the Tune in the Build Notes
Keep a per-build tuning log: every BIOS setting you changed, the stress test results, validation duration, ambient temperature, BIOS version. When the inevitable BIOS update wipes settings or a component swap forces a re-tune, that log rebuilds the tune in twenty minutes instead of a weekend of rediscovery. For builders supporting client systems, the log is essentially mandatory.
Builder-Recommended Products
These are the products that consistently show up in our overclocked builds. We’ve validated each across years of tuning work.
Conclusion
Overclocking in 2026 is mature, measured work. The wild gains are gone. What remains is precision tuning that turns a thermally healthy system into a noticeably cooler, quieter, and modestly faster one. The builder who treats this as a stability and thermal optimization problem with performance as the side benefit will outperform the builder chasing peak boost numbers every time, both in measured results and in long-term satisfaction.
The exhaustive process documented here exists because every shortcut produces a failure mode we’ve seen. The seven-day real-world soak catches issues no synthetic test exposes. The documented baseline lets you evaluate whether the tune helped. The zero-WHEA standard prevents silent data corruption. Skip these steps and you ship a system that fails at the worst possible moment. Follow them and you ship a system that just works for years.
Once the tune is validated, periodic re-validation still matters. Every BIOS update can shift voltage tables. Every component swap can shift thermal behavior. Schedule a quarterly re-validation pass on long-lived builds; an hour of stress testing every three months catches drift that would otherwise turn into a surprise crash.
For deeper builder content, see our CPU cooler buyers guide May 2026 bestsellers for cooling recommendations matched to overclocking ambitions. Our PCs for overclockers May 2026 builders guide covers complete builds engineered for tuning. The Intel vs AMD 2026 builders guide documents platform-specific tuning headroom from our archive, and the DDR5 vs DDR4 2026 builders guide covers memory selection for tuning-friendly builds. Our GPU cooler buyers guide May 2026 bestsellers covers the aftermarket cooling that enables aggressive GPU tunes, and the power supply buyers guide May 2026 bestsellers documents quality PSUs that survive the demands of overclocked builds. Finally, the case fan buyers guide May 2026 bestsellers covers airflow components that enable the case to deliver cool air to the components that need it.
Related Guides
Related Articles
Want to dig deeper on this? Check the hand-picked guides below — each one runs the same scoring rubric we used in this review.
Frequently Asked Questions
Is overclocking safe for my hardware?
Done carefully within reasonable limits, modern overclocking is relatively safe because components have built-in thermal and voltage protections. The main risks are instability, excess heat, and reduced lifespan from high voltage. Increase settings gradually, monitor temperatures, and stress-test for stability. Avoid extreme voltages, and most CPUs and GPUs tolerate modest overclocks for years without issue.
What temperatures are safe when overclocking?
Keep CPU temperatures under roughly 85-90C under sustained load and GPUs typically below 80-85C, though safe limits vary by model, so check your specific hardware’s specifications. If you hit thermal throttling, improve cooling or reduce the overclock. Sustained high temperatures shorten component life, so prioritize adequate cooling before pushing clocks aggressively for stable, long-term results.
How do I test if my overclock is stable?
Run stress-testing and benchmarking tools for extended periods while monitoring temperatures and watching for crashes, artifacts, or errors. For CPUs, use multi-hour stress tests; for GPUs, run graphics stress tests and play demanding games. Instability shows as crashes, freezes, or visual glitches. If those appear, back off your settings until the system runs reliably under load.
Does overclocking void my warranty?
It can, depending on the manufacturer and component. Some GPU makers and CPU programs tolerate or even support overclocking, while others consider damage from it out of warranty. Check your specific product’s terms before proceeding. Since modest overclocks rarely cause damage, most users accept the small risk, but be aware of the policy for your parts.
Is manual overclocking still worth it in 2026?
The gains are often modest since modern CPUs and GPUs already boost aggressively out of the box. Manual overclocking can squeeze out extra performance, but automatic boost algorithms leave less headroom than in the past. Undervolting for lower temperatures and noise, or memory tuning, often provides better real-world benefit than chasing small clock-speed increases now.
Ready to decide? Our #1 pick for 2026 is the STORMCRAFT Phantom RTX 5080, AMD Ryzen 7 9800X3D, 32GB.
Live price & availability on Amazon.
Top picks from this guide
 iBUYPOWERiBUYPOWER Y40 PRO Black Gaming PC Desktop Computer AMD Ryzen…$2,401 \xc2\xb7 99/100
 MXZMXZ Gaming PC,AMD Ryzen 7 7700, GeForce RTX 4060Ti,16GB DDR5,…$1,339 \xc2\xb7 96/100
 STORMCRAFTSTORMCRAFT Phantom RTX 5080 Gaming PC Ryzen 7 9800X3D 32GB…$3,300 \xc2\xb7 96/100
 SamsungSamsung SSD 990 PRO 2TB, PCIe 4.0 M.2 2280, Up…$387 \xc2\xb7 95/100