Building a gaming monitor is possible without manufacturing the display panel yourself, but it is considerably more complicated than assembling a gaming PC in some respects. The answer to how hard is it to build a gaming monitor depends on whether you are connecting a ready-made LCD kit, converting a salvaged laptop screen, or designing custom display electronics. A basic assembly is achievable for an electronics hobbyist, while producing a reliable 144Hz gaming display with low input lag and variable refresh rate requires substantially more technical knowledge.
- How hard is it to build a gaming monitor?
- What components do you need to build a gaming monitor?
- Why gaming performance makes a DIY monitor more difficult
- How hard is it to build a gaming monitor from a matched kit?
- Step-by-step process for building a gaming monitor
- What technical skills do you need?
- Is building a gaming monitor cheaper than buying one?
- Safety precautions when assembling a DIY gaming monitor
- Common mistakes that make DIY gaming monitors harder
- Frequently asked questions
- Conclusion
How hard is it to build a gaming monitor?
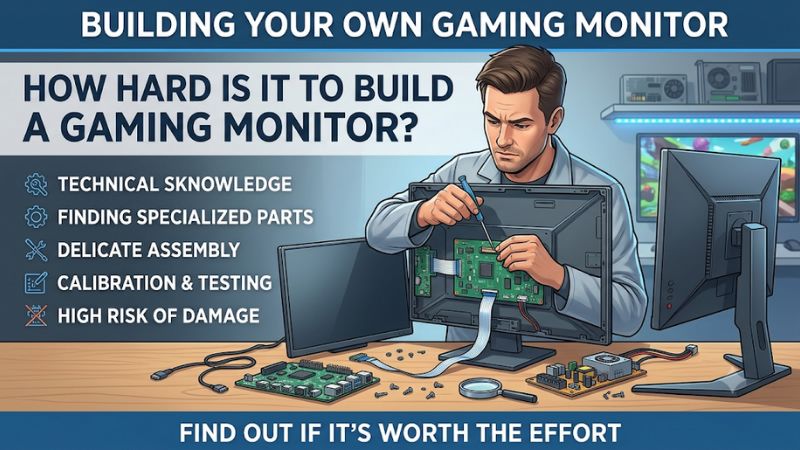
Building a basic monitor from a compatible LCD panel and controller board is a moderately difficult DIY electronics project. Building a gaming monitor that performs like a commercially manufactured product is much harder. The difference is that displaying an image requires basic compatibility, whereas gaming performance depends on the complete signal path, pixel response, refresh timing, controller firmware, and synchronization.
For a beginner, a documented display kit with a matched panel, controller, cable, and power adapter is the most realistic starting point. You may only need to connect the components, assemble a suitable enclosure, and configure the display. However, using an unidentified laptop panel or trying to combine unrelated controller boards can turn the same project into a frustrating troubleshooting exercise.
A practical difficulty comparison looks like this:
| DIY approach | Relative difficulty | Skills required |
|---|---|---|
| Assemble a complete matched LCD kit | Low to moderate | Basic electronics and careful assembly |
| Convert a known laptop screen into a monitor | Moderate | Datasheet reading and connector compatibility |
| Build a high-refresh gaming display | High | Signal compatibility, firmware, and display testing |
| Design a custom controller and firmware | Very high | Electronics engineering and programming |
| Manufacture an LCD panel from raw materials | Industrial-level | Specialized display fabrication facilities |
These are qualitative difficulty categories, not measured completion times. The key distinction is that assembling existing display electronics is a realistic hobby project, while manufacturing the LCD panel itself is outside the capabilities of an ordinary home workshop.
What components do you need to build a gaming monitor?
A DIY monitor is not simply an LCD panel connected to an HDMI cable. The panel needs compatible electronics to receive the computer’s video signal, generate the correct panel-driving signal, control illumination, and supply the necessary power. Every component must work as part of one system.
The LCD panel
The LCD panel is the most important starting component because its specifications determine what the finished display can realistically achieve.
You can salvage a panel from an old laptop, purchase a replacement laptop screen, or obtain a compatible display module from an electronics supplier. A working 15.6-inch Full HD laptop panel, for example, can become the foundation of a compact desktop display.
However, screen size and resolution are not enough to establish compatibility. You need the complete model number, including its suffix or revision, because panels with similar dimensions can use completely different electrical interfaces.
The panel documentation should identify:
-
Native resolution and supported refresh rates.
-
Panel interface and connector configuration.
-
Number of signal lanes or channels.
-
Logic voltage and power requirements.
-
Backlight type and electrical specifications.
-
Supported signal timing and color depth.
-
Physical dimensions and mounting locations.
The manufacturer’s datasheet is particularly important. It gives you the electrical and timing information needed to select the correct controller instead of relying on assumptions based on the panel’s appearance.
The LCD controller board
The controller board is the electronics that make a bare display panel usable as an external monitor.
It receives video from a PC or console and converts that signal into the format required by the LCD panel. Depending on its design, it may also handle image scaling, refresh timing, firmware, brightness control, and the on-screen display menu.
An HDMI-equipped controller board is a common choice for a DIY monitor because most desktop gaming computers and many other devices can provide an HDMI output.
However, HDMI is only the input connection. The controller’s output must also match the LCD panel.
For example, a controller might accept HDMI from a graphics card but communicate with the internal LCD using eDP or LVDS. Those interfaces are electrically and technically different, so they cannot be treated as interchangeable connectors.
The panel cable and connector
The cable connects the controller to the panel. It may appear to be a small and inexpensive component, but choosing incorrectly can prevent the display from working or potentially damage its electronics.
Check the connector model, pin arrangement, interface, cable length, and panel orientation. Do not assume that two 30-pin or 40-pin connectors have identical electrical assignments.
Some laptop panels use thin eDP ribbon or micro-coax connections, while older models may use LVDS wiring. A matching connector shape does not guarantee a matching signal arrangement.
For a first project, purchase the controller and its specifically recommended panel cable as a compatible combination. This removes one common source of unnecessary troubleshooting.
The power supply and backlight driver
The controller and panel need an appropriate power arrangement. Many universal controller boards use an external DC adapter, but the exact input voltage, polarity, connector, and required current depend on the board.
The panel’s logic power is a separate consideration. Its backlight also needs a compatible driver and appropriate control signals.
Do not assume that supplying power to the controller automatically means every other component receives the correct voltage. The panel documentation and controller instructions must agree on the required power sequence and electrical limits.
A mismatched supply can damage the controller or panel. It is better to use the specified regulated adapter than experiment with an unverified power source.
The enclosure, stand, and controls
A working panel still needs a practical housing. You can use a 3D-printed enclosure, a fabricated aluminum frame, or a custom wooden structure, depending on the project.
The enclosure should protect the exposed electronics and support the panel without putting pressure on its delicate edges or ribbon connector.
You also need a way to position the display comfortably. A stand, wall mount, or VESA-compatible mounting arrangement may be necessary, depending on the panel and enclosure.
Other useful additions include an OSD keypad, power button, indicator LED, and accessible input-selection controls. Speakers and audio output are optional, but they should be planned before finalizing the enclosure.
Why gaming performance makes a DIY monitor more difficult
The biggest challenge is not displaying the desktop. It is making sure the finished monitor behaves properly when a game produces fast-moving images and rapidly changing frame rates.
A screen can show a picture at its native resolution while failing to deliver the refresh rate, synchronization, and motion clarity expected from a gaming monitor.
Refresh rate depends on the complete signal chain
A 144Hz panel does not automatically become a 144Hz monitor after connecting it to an HDMI controller.
The panel must support the required timing. The controller must generate that timing, its internal signal path must have sufficient bandwidth, and the connecting cable must support the required data rate.
The computer’s output and the selected connection must also support the target resolution and refresh rate.
Consider a hypothetical 1920 × 1080 panel designed for 60Hz operation. Connecting it to a controller advertised as supporting 144Hz does not establish that the panel can operate reliably at 144Hz.
The panel’s supported timing specifications remain the starting point. A replacement controller cannot simply turn an ordinary 60Hz panel into a properly engineered 144Hz gaming panel.
This is why the safest approach is to verify the entire combination before buying anything. The controller’s maximum input resolution and its supported panel-output modes must both meet your requirements.
Refresh rate and response time are different
Another important challenge is achieving good motion clarity.
Refresh rate measures how frequently the display updates the image. Response time describes how quickly individual pixels transition between colors.
These measurements are related, but they are not interchangeable. A display can accept a 144Hz signal while its pixels transition too slowly to produce clean-looking motion.
For example, slow transitions can create ghosting, where moving objects leave visible trails. Excessive overdrive can cause inverse ghosting, where bright or dark artifacts appear around moving objects.
Commercial gaming monitors often provide carefully configured overdrive settings to balance these effects. A DIY controller may not expose equivalent adjustments or may use a limited firmware profile.
RTINGS evaluates response time and input lag separately because they represent different aspects of monitor performance. Therefore, a successful 144Hz connection is not enough to demonstrate that a homemade display is competitive for fast-paced gaming.
Variable refresh rate requires additional support
Variable refresh rate, or VRR, is useful when your GPU cannot maintain a perfectly fixed frame rate.
Instead of forcing the panel to follow one constant refresh interval, VRR allows a compatible display to synchronize refresh timing with the incoming frame delivery within a documented operating range.
However, VRR is not automatically available just because the controller has an HDMI or DisplayPort connection.
The controller, panel, firmware, interface, and graphics hardware all need compatible support. The manufacturer must also document the actual operating range and implementation.
AMD’s FreeSync program illustrates why this distinction matters. FreeSync is a certified display technology that requires a compatible display and graphics hardware. A generic controller-board advertisement mentioning adaptive refresh does not prove that the completed assembly qualifies as a FreeSync monitor.
Color, brightness, and HDR add more complexity
Gaming quality also depends on image characteristics beyond speed.
A panel may have limited color coverage, relatively low brightness, or weak contrast compared with a modern gaming monitor. Those limitations remain even when the controller produces the correct resolution.
HDR is particularly easy to misunderstand. Receiving an HDR video signal does not automatically give a panel the brightness, contrast control, color reproduction, or local-dimming capabilities required for a convincing HDR experience.
A DIY monitor should therefore be described according to its verified panel capabilities. Do not advertise HDR, wide color gamut, or professional-level color accuracy merely because the controller supports those input signals.
How hard is it to build a gaming monitor from a matched kit?
A complete matched kit is the easiest route because the supplier has already selected the essential electronic components for a particular display configuration.
In a suitable kit, the panel, controller, connecting cable, power adapter, and configuration instructions are supplied together. You do not need to independently design the signal-conversion electronics.
The work is then mainly mechanical integration and careful assembly. You connect the documented components, secure the circuit board, arrange the cables, and fit the display into a suitable enclosure.
This is a reasonable project for someone familiar with basic electronics and comfortable handling delicate components.
However, the term matched kit deserves attention. A kit advertised as a monitor kit may be designed for an information screen, arcade cabinet, or secondary display rather than gaming.
Before ordering, verify that its documented specifications include your intended native resolution and refresh rate. Also check whether it provides the input connection, audio functionality, and adaptive-sync features you actually need.
A basic kit that works perfectly at 60Hz is not automatically a suitable foundation for a 144Hz gaming project.
For beginners, a complete kit with preconfigured firmware and plug-in connections is usually preferable to buying individual components from unrelated sellers.
Step-by-step process for building a gaming monitor
A practical DIY project should begin with a clearly defined gaming requirement, not with an attractive-looking LCD panel. Selecting the panel first and searching for compatible electronics afterward is one of the easiest ways to waste money.
Define the target specifications
Decide what you want the finished monitor to do before ordering components.
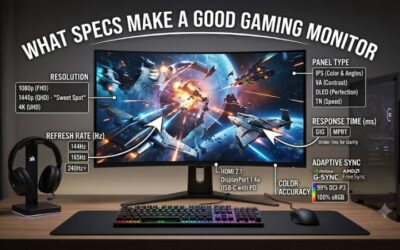
A simple secondary gaming display may only need 1920 × 1080 resolution at 60Hz or 75Hz. A competitive gaming display has more demanding requirements, particularly if you want a stable 144Hz or 165Hz experience.
Write down your essential specifications:
-
Screen size and native resolution.
-
Target refresh rate.
-
IPS, VA, TN, or OLED panel technology.
-
Required HDMI or DisplayPort inputs.
-
Whether VRR is necessary.
-
Desired brightness and color coverage.
-
Available desk space and mounting requirements.
You should also decide which computer or console will drive the monitor. A display designed for a desktop GPU may need different connections from a compact Raspberry Pi project or a console installation.
Identify the exact LCD panel
If you are reusing a laptop screen, locate the full model identifier on the back of the display.
Do not select a controller board based only on the laptop brand, screen size, or resolution. Different laptop configurations can contain panels with different interfaces and electrical requirements.
Search for the panel’s official datasheet or manufacturer documentation. Record the interface, connector pinout, voltage, timing requirements, backlight characteristics, and supported refresh rates.
If you cannot find reliable documentation, contact the controller supplier and request confirmation for the exact panel model.
This step should happen before purchasing the controller. A cheap controller that cannot operate your particular panel is not a bargain.
Find a compatible controller and cable
Once the panel is identified, look for a controller that supports its actual interface.
For example, a panel using eDP needs a compatible eDP-output controller. A panel using LVDS needs the appropriate LVDS configuration.
The board must also support the intended resolution, refresh timing, color depth, and input connection. If you want high refresh rates, ask the supplier to confirm the exact supported mode instead of relying on a generic maximum-resolution claim.
Request the correct panel cable at the same time. Confirm that the board, cable, and panel form a documented combination.
The supplier should ideally confirm the panel’s logic voltage, backlight arrangement, firmware configuration, and power requirements as well.
Prepare the tools and workspace
A basic connector-based build does not necessarily require professional electronics equipment.
Useful tools and materials include:
| Tool or material | Purpose |
|---|---|
| Precision screwdriver set | Removing mounting hardware and securing the enclosure |
| ESD protection | Reducing electrostatic-discharge risk |
| Digital multimeter | Checking documented low-voltage DC supply characteristics |
| Nonconductive work surface | Reducing accidental short-circuit risk |
| Plastic opening tools | Handling suitable plastic housings without unnecessary damage |
| Cable ties and mounting standoffs | Organizing and securing components |
| Suitable enclosure | Supporting the panel and protecting electronics |
Soldering equipment is only necessary if your specific design requires custom wiring or modifications. A fully matched kit with connector-based wiring can avoid this requirement.
However, soldering should not be attempted on delicate panel connectors without appropriate skills. Damaging a small ribbon connector can make an otherwise usable panel difficult to recover.
Connect and test the display before mounting it
Connect the controller and panel according to the supplier’s wiring documentation. Keep the assembly on a protected work surface instead of immediately installing it in a finished enclosure.
Before applying power, inspect the connections and verify that the selected adapter matches the controller’s documented requirements.
Once powered, check whether the panel displays the expected image. Confirm that the image is stable and that the computer recognizes the correct native resolution.
If the screen remains black, do not repeatedly reconnect cables or experiment with different voltage settings while powered. Disconnect the supply and investigate the documented connections first.
A black screen may indicate an incompatible panel interface, missing backlight control, an incorrect configuration, or a power problem. It does not automatically mean that the LCD panel is defective.
Build the enclosure and mount the electronics
After confirming that the display works, plan the enclosure around the actual dimensions of the panel and controller board.
Allow enough space for the cables, connectors, controls, and power input. Do not bend ribbon cables sharply or place mechanical pressure on exposed circuit boards.
The panel also needs appropriate physical support. LCD panels can be damaged by concentrated pressure, especially around their edges.
If you are using a custom stand, ensure that the completed monitor cannot tip over during normal use. If your design includes ventilation openings, keep them unobstructed.
Only finalize the housing after confirming that all connections remain accessible and the electronics have adequate clearance.
Configure and test gaming performance
Connect the finished display to your gaming PC and configure the appropriate resolution and refresh rate in the operating system.
Open the graphics driver’s display settings and check whether the intended gaming features are available. If VRR is a requirement, verify that the supported graphics software recognizes the display’s capabilities.
Then test the screen under actual gaming conditions.
Look for flickering, intermittent signal loss, noticeable ghosting, uneven brightness, and unexpected black screens. Use moving test patterns to identify obvious motion problems.
Do not assume that the operating system reporting 144Hz proves the display can deliver 144 distinct frames consistently. Frame-skipping checks and more controlled response-time testing provide stronger evidence.
If the display is stable only at a lower refresh rate, return to the panel and controller documentation instead of forcing unsupported timings.
What technical skills do you need?
The skill requirement depends heavily on how much of the display system has already been designed.
A matched kit mainly requires careful assembly. You should understand basic connector handling, read wiring instructions, identify power specifications, and know how to mount circuit boards securely.
Repurposing a salvaged laptop screen requires more research. You need to interpret a panel datasheet, distinguish eDP from LVDS, identify pin assignments, and verify electrical compatibility.
A high-refresh custom display requires additional knowledge of signal bandwidth, video timing, controller firmware, and display behavior. If you are designing the electronics yourself, the project moves into advanced engineering.
| Skill | Matched kit | Salvaged laptop panel | Custom controller |
|---|---|---|---|
| Reading specifications | Basic | Intermediate | Advanced |
| Connector handling | Essential | Essential | Essential |
| Datasheet interpretation | Limited | Important | Essential |
| Voltage verification | Basic | Important | Advanced |
| Firmware configuration | Usually supplied | May be required | Essential |
| Circuit design | Usually unnecessary | Usually unnecessary | Essential |
| Performance validation | Basic | Intermediate | Advanced |
You do not need to be an electrical engineer to assemble a compatible display kit. You do, however, need to recognize when a specification is missing or when a component combination has not been verified.
That distinction is more important than having an extensive collection of tools.
Is building a gaming monitor cheaper than buying one?
Building a monitor yourself is not automatically a money-saving project.
The most favorable situation is when you already own a working laptop panel and have access to suitable mounting materials, cables, and a compatible power source.
In that case, the remaining purchase requirements may be limited to the controller board and enclosure materials.
However, buying every component separately can make the finished project more expensive than expected. You need to consider the complete bill of materials rather than comparing the cost of an LCD panel with the retail price of a finished monitor.
| Cost category | DIY monitor | Finished gaming monitor |
|---|---|---|
| LCD panel | Separate purchase or salvaged part | Included |
| Controller electronics | Separate purchase | Integrated |
| Power supply | Must be matched | Included |
| Panel cable | Must be verified | Internal |
| Enclosure and stand | DIY or additional purchase | Included |
| OSD controls | May require separate components | Integrated |
| Warranty and support | May involve multiple suppliers | Usually handled by one manufacturer |
| Compatibility work | Your responsibility | Manufacturer’s responsibility |
There is also the possibility of buying an incompatible controller or damaging a panel during installation. Replacing either component can eliminate any expected savings.
The economics are even less favorable if your goal is a premium gaming experience. A high-refresh panel, capable controller, suitable enclosure, and reliable power system all contribute to the final cost.
A completed gaming monitor also comes with factory integration, a finished enclosure, and manufacturer-supported specifications. Those advantages are difficult to reproduce through an inexpensive DIY assembly.
Building makes more sense when you value customization, electronics experience, or reusing existing hardware. If your main objective is to obtain a reliable display for gaming at the lowest possible cost, comparing complete monitors is usually the more sensible starting point.
Safety precautions when assembling a DIY gaming monitor
Electrical safety is one area where a beginner should avoid improvisation.
A panel-and-controller kit with a documented external DC adapter is generally a more appropriate starting point than taking apart a complete monitor and working around its internal power electronics.
Modern flat-panel displays can contain power-supply capacitors that remain hazardous even after the device is unplugged. iFixit specifically warns about these components and recommends disconnecting the power supply before working on other internal parts. Older CRT monitors present additional high-voltage hazards and should not be treated as beginner projects.
iFixit
Follow these precautions:
-
Disconnect the external power supply before attaching or removing panel cables.
-
Use appropriate electrostatic-discharge protection when handling exposed electronics.
-
Never guess the panel’s voltage or connector pinout.
-
Do not touch exposed power circuitry or attempt to modify the monitor’s internal AC power supply.
-
Use only a regulated adapter with the specified voltage, polarity, and current capacity.
-
Keep circuit boards away from conductive surfaces and unsecured metal hardware.
-
Stop if a component becomes unusually hot, smells burnt, or shows signs of electrical damage.
A multimeter can help check low-voltage DC supplies, but it does not make working on exposed mains-powered circuitry safe. Anyone without electronics repair experience should leave internal power-supply work to a qualified technician.
Common mistakes that make DIY gaming monitors harder
Most failed projects begin with an incorrect component purchase rather than a complicated assembly problem.
The following mistakes are particularly worth avoiding:
| Mistake | Why it causes problems | Better approach |
|---|---|---|
| Buying a controller before identifying the panel | The interface or pinout may be incompatible | Find the full panel model first |
| Matching connectors by appearance | Similar connectors can have different electrical assignments | Check the datasheets |
| Assuming HDMI guarantees 144Hz | The panel-output side may not support the target mode | Verify the entire signal chain |
| Using an incorrect power adapter | Voltage or polarity mismatch can damage components | Follow the controller specifications |
| Expecting a 60Hz panel to become 144Hz | The panel has its own supported timing limits | Select a panel designed for the target rate |
| Ignoring firmware | The board may not contain the correct panel configuration | Obtain the correct firmware before assembly |
| Building the enclosure too early | Cables or controls may not fit properly | Test the complete electronics first |
The most important rule is to verify the panel, controller, cable, firmware, and power arrangement together.
A supplier’s claim that a board supports a certain resolution does not necessarily mean that it supports every panel with that resolution. Ask for confirmation of the exact model and operating mode before paying.
Frequently asked questions
Can a beginner build a gaming monitor?
Yes. A beginner can assemble a gaming monitor from a documented kit containing a compatible LCD panel, controller board, cable, and power adapter. The work mainly involves careful connections, enclosure assembly, and basic configuration. Custom high-refresh electronics are a different level of difficulty.
Can you build a monitor without soldering?
Yes. Many connector-based LCD kits use preassembled boards and cables. You can connect the components without soldering if the kit includes the necessary wiring and controls. Custom modifications may require soldering, but it is not an essential part of every DIY monitor project.
Can you turn a 60Hz laptop screen into a 144Hz gaming monitor?
Not simply by replacing its controller board. The LCD panel must support the required refresh timing, and the controller, cable, firmware, and computer connection must all support the same operating mode. A new controller cannot guarantee that a 60Hz panel will function reliably at 144Hz.
Can a Raspberry Pi control a DIY gaming monitor?
A Raspberry Pi can act as the video source for a monitor with a compatible HDMI input. However, it does not automatically replace the controller required to operate an arbitrary bare LCD panel. Direct connections require suitable display interfaces and software support.
Is building an OLED gaming monitor easier than building an LCD monitor?
Not necessarily. OLED panels do not require a separate LCD backlight, but they still need compatible driving electronics, power management, firmware, and physical integration. Obtaining a documented controller-and-panel combination remains important.
Is building a gaming monitor worth it?
It is worthwhile when you already have a compatible panel, enjoy electronics projects, or need a display with unusual dimensions or mounting requirements. It is usually less attractive when your only objective is affordable, dependable gaming performance.
Conclusion
Building a gaming monitor is a manageable project when you start with a complete, documented LCD kit. Repurposing a laptop panel requires more compatibility research, while creating a reliable high-refresh display involves advanced controller, firmware, and performance considerations.
The biggest challenge is not getting an image on the screen. It is ensuring that the panel, controller, cable, power supply, and gaming features work together reliably.
For beginners, a matched kit is the best starting point. For experienced electronics enthusiasts, converting a suitable laptop panel offers more flexibility. Manufacturing a complete display from raw materials, however, is an industrial engineering task rather than a realistic home DIY project.
Build one for learning, customization, or hardware reuse—not because it is automatically cheaper or better than buying a finished gaming monitor.