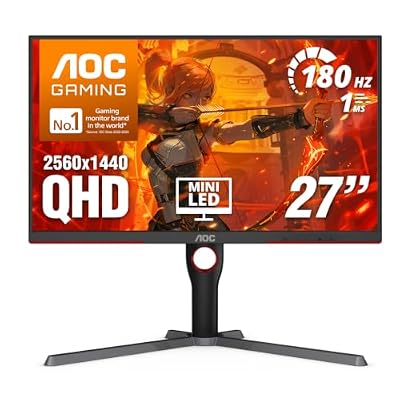
- Top Pick: msi MPG 321URX QD-OLED, 32" 4K UHD Quantum Dot OLED Gaming Monitor, 3840 x 2160, 0.03ms, 240Hz, True Black HDR 400, 90W USB Type C, HDMI, DP Port
- Best Value: SANSUI 24.5 Inch 300hz 240hz, FHD 1080P Gaming Monitor for FPS PC Gaming
- Premium Choice: ASUS ROG PG27AQWP-G 27 Inch 20th Edition OLED Gaming Monitor
🛒 Best Price Today on Amazon
Prime members get fast, free shipping on everything above, plus member-only deals. New members get a 30-day free trial — cancel anytime.
Your Monitor Settings Are Probably Wrong
Most gaming monitors arrive with settings that are flat-out wrong — overdrive cranked too high, weak contrast, off color profiles. Dial it in properly and the panel not only looks better, it can actually respond faster and feel snappier. Here’s how we set up a gaming monitor for 2026.
As an Amazon Associate we earn from qualifying purchases at no extra cost to you.




Essential Monitor Settings to Configure
1. Set Native Resolution
Stick to the panel’s native resolution, full stop. A 1440p monitor wants 2560×1440, not 1080p — native keeps things razor sharp with no scaling fuzz. If you need more frames, let DLSS/FSR render internally at a lower res while the display still outputs native. Best of both worlds.
2. Enable Maximum Refresh Rate
Head into Windows Display Settings → Advanced Display → Refresh Rate and crank it to the panel’s max (144Hz, 165Hz, 240Hz, whatever it supports). Tons of monitors quietly sit at 60Hz even when they can do far more. This is the single highest-impact tweak you’ll make — every extra Hz buys you smoothness and lower lag.
3. Configure Response Time (Overdrive)
The overdrive setting in your OSD cleans up ghosting on fast-moving objects, but push it too far and you get the opposite problem — “inverse ghosting,” those bright trailing halos. In practice Medium or Fast is the sweet spot, not Fastest or Extreme. Run the UFO motion test at blurbusters.com to nail down your panel’s ideal point.
4. Enable FreeSync / G-Sync
Turn on FreeSync (AMD panels) or G-Sync (NVIDIA panels) in the OSD, then double-check it’s actually live in your GPU driver. For G-Sync: NVIDIA Control Panel → Set Up G-Sync → Enable. For FreeSync: AMD Adrenalin → Gaming → Enable Radeon FreeSync. Variable refresh kills tearing and costs you nothing in latency.
5. Enable Low Input Lag / Game Mode
Pretty much every monitor hides a “Game Mode” or “Low Input Lag” toggle in the OSD. Flipping it off the post-processing — sharpening, noise reduction, motion smoothing — that quietly piles on display latency. Switch it on; you’ll barely notice the image change but you can claw back 10–50ms.
6. Adjust Brightness and Contrast
For gaming, aim for Brightness 80–100 nits in dark rooms, 200–350 nits in bright rooms, with contrast around 50–70% on most panels. IPS: contrast 50-70. VA: contrast 50-60, since VA tends to overcook contrast on its own. Don’t peg brightness at max — it blooms the highlights and crushes the perceived depth of dark scenes.
7. Set Color Temperature
For gaming, a 6500K (Warm) color temperature lines up with the sRGB standard and reads as the most natural. Push cooler (7500K+) and everything skews blue and inaccurate. Skip the “vivid” or enhanced color modes for everyday use — they oversaturate and tire your eyes out. If your panel has an sRGB mode, that’s the one to game in.
8. Configure HDR (If Supported)
Only bother with HDR when you’re running an HDR-capable game on a properly certified panel (DisplayHDR 600+ is the realistic floor). Turn it on in Windows: Settings → System → Display → HDR. In-game, enable HDR and calibrate peak luminance to your monitor’s rated figures. Weak HDR (DisplayHDR 400) routinely looks worse than plain SDR — leave it off on budget panels.
Monitor Settings Comparison
| Setting | Competitive Gaming | Immersive/Single-Player |
|---|---|---|
| Brightness | 150–200 nits | 200–350 nits |
| Overdrive | Fast/Medium | Medium |
| Color mode | sRGB / Standard | DCI-P3 / Vivid |
| HDR | Off (competitive) | On (if 600+ nit) |
| Game Mode | Always On | On |
| Sharpness | 50% (neutral) | 50–60% |
Should I use Game Mode on my monitor?
What is the best response time setting for gaming?
Should I enable HDR for gaming?
Does color calibration affect gaming performance?
Frequently Asked Questions
What response time setting should I use?
Choose a moderate overdrive level that sharpens motion without introducing overshoot artifacts, which look like inverse ghosting or bright trails behind objects. The highest setting often causes overshoot, so the middle option is usually the sweet spot for clean, smooth motion.
Should I enable HDR for gaming?
Enable HDR only if your monitor has genuine high brightness and local dimming; entry-level HDR panels often look worse than standard mode. On a capable display HDR adds impressive contrast and color in supported games, so test both and use whichever looks better.
What refresh rate should I set?
Always set the monitor to its highest supported refresh rate in Windows and your GPU control panel, since it does not default there automatically. Running at the full rate delivers smoother motion and lower latency, which is the main benefit of a high-refresh display.
How do I calibrate my monitor for gaming?
Adjust brightness for your room, set contrast so bright details remain visible, and pick a color temperature near neutral. Use a test pattern to fine-tune black levels so dark areas stay visible without washing out. Disable heavy image processing that adds input lag.
Should I use G-Sync or FreeSync?
Yes, enable variable refresh rate if your monitor and GPU support it. It synchronizes the display to your frame rate, eliminating tearing and stutter without the input lag of traditional V-Sync. It is one of the most impactful settings for smooth gameplay.
Ready to decide? Our #1 pick for 2026 is the Brightness.
Live price & availability on Amazon.