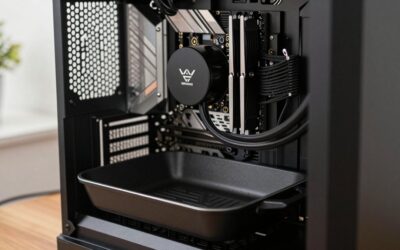
- Top Pick: Focus Premier Gaming Desktop, Intel Core i5-14600K 3.5GHz (5.3GHz Turbo Boost), RTX 5060 8GB, 1TB NVMe SSD, 16GB DDR4 RAM, 750W Gold PSU, Win 11
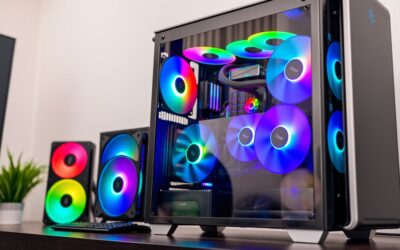
- Best Value: KOTIN Prebuilt Gaming PC RTX 5070 12GB, Ryzen 7 9700X, 32GB DDR5, 1TB SSD
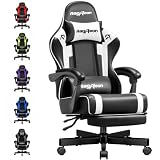
- Premium Choice: STGAubron Gaming PC Desktop,Core I7,GTX 1660 Super 6G,16G RAM,512G SSD
🛒 Best Price Today on Amazon
Prime members get fast, free shipping on everything above, plus member-only deals. New members get a 30-day free trial — cancel anytime.
Windows 11 Gaming Optimization — Start Here
Out of the box, Windows 11 ships with a pile of defaults tuned for battery savings, eye candy, and background services instead of pure gaming speed. This guide rounds up the Windows 11 gaming tweaks that actually move the needle in 2026 — adjustments you can knock out in under an hour that collectively add 10–25% more FPS and cut input lag noticeably.
As an Amazon Associate we earn from qualifying purchases at no extra cost to you.


Essential Windows 11 Gaming Settings
1. Enable Game Mode
Head to Settings → Gaming → Game Mode → On. Game Mode hands CPU and GPU priority to whatever you’re playing, throttles back update chatter, and keeps frame rates steadier. It’s especially good at stopping a background Windows Update from grabbing CPU cycles mid-match.
2. Set High Performance Power Plan
Fire up an admin Command Prompt and run powercfg /setactive SCHEME_MIN, or go Control Panel → Power Options → High Performance. Want more headroom? Unlock the hidden Ultimate Performance plan with powercfg -duplicatescheme e9a42b02-d5df-448d-aa00-03f14749eb61 and switch to it.
3. Enable Hardware-Accelerated GPU Scheduling (HAGS)
Settings → System → Display → Graphics → Hardware-Accelerated GPU Scheduling → On. This trims CPU-to-GPU scheduling latency by letting the GPU handle its own video memory. You’ll see the most benefit when you’re GPU-limited. Needs Windows 11 22H2+ and a WDDM 2.7+ driver.
4. Enable Auto HDR (For HDR Monitors)
Auto HDR layers AI-generated HDR luminance onto SDR games. Flip it on under Settings → System → Display → HDR → Auto HDR. It dresses up older titles for free — no FPS hit. You’ll need an HDR-capable monitor. It covers 1,000+ DirectX 11/12 games out of the box.
5. Disable Visual Effects
Open sysdm.cpl → Advanced → Performance Settings → Adjust for best performance. That kills the animations, shadows, and transparency effects eating GPU cycles. Tick “Smooth edges of screen fonts” back on so text stays legible. The CPU/GPU savings are small but real.
6. Disable Xbox Game Bar and Game DVR
Settings → Gaming → Xbox Game Bar → Off. While you’re there, kill background capture under Settings → Gaming → Captures → Record in background while playing a game → Off. Game Bar eats RAM and triggers micro-stutters in some games. Lean on the NVIDIA/AMD overlay if you want an FPS readout.
7. Update GPU Drivers and DirectX
Stay on top of GPU drivers. NVIDIA pushes Game Ready Drivers for big releases. AMD’s Adrenalin 2026 Edition packs Anti-Lag+ to shave latency and Fluid Motion Frames for frame interpolation. Run dxdiag to confirm DirectX 12 Ultimate is live.
8. Enable DirectStorage
DirectStorage 1.2 lets supported NVMe SSDs stream game assets straight into GPU memory and skip the CPU bottleneck. You’ll find it in titles like Forspoken and Marvel’s Spider-Man 2. Needs an NVMe SSD + DX12 GPU + Windows 11. Peek at Device Manager → NVMe drive to confirm NVMe 1.4 support.
9. Set Process Priority for Games
With the game open, pull up Task Manager → Details → right-click the game .exe → Set Priority → High. To automate it, a tool like Process Lasso can apply that to any game on launch. The point is making sure your game grabs CPU cores ahead of background junk.
10. Disable Mouse Acceleration
Settings → Bluetooth and Devices → Mouse → Additional Mouse Settings → Pointer Options → Uncheck “Enhance pointer precision”. Mouse acceleration makes your aim inconsistent because the cursor speeds up the faster you flick. Turning it off restores raw 1:1 input, which is essential for FPS play.
11. Configure DNS for Lower Latency
Sluggish DNS lookups stack latency on before you’ve even reached the game server. Switch to Cloudflare DNS (1.1.1.1) or Google DNS (8.8.8.8): Settings → Network → Your Connection → Edit DNS → Manual → IPv4: 1.1.1.1, Secondary: 1.0.0.1.
12. Disable Startup Programs
Task Manager → Startup Apps tab — switch off everything but your GPU control panel (GeForce Experience or AMD Adrenalin), antivirus, and audio software. Each startup entry chews RAM and CPU at boot and leaves a lingering footprint while you game.
Does Windows 11 actually improve gaming over Windows 10?
Should I disable antivirus for gaming?
Does enabling Game Mode actually help?
What’s the fastest way to improve PC gaming performance?
Frequently Asked Questions
Does Windows 11 Game Mode actually help?
Game Mode prioritizes the active game and limits background interruptions like driver installs and updates. On most systems the benefit is small but harmless, and it can prevent frame drops caused by background tasks. Leaving it enabled is a sensible default for gamers.
Should I disable VBS for gaming?
Virtualization-Based Security can reduce frame rates by a few percent on some systems. Disabling it may recover a little performance, but it also lowers security protections. Weigh the modest gains against the risk, and keep it enabled if security matters to you.
What is Hardware-Accelerated GPU Scheduling?
This feature lets the GPU manage its own memory scheduling, which can slightly reduce latency and improve performance in some titles. Results vary by hardware and game, so test it both on and off to see which gives smoother results on your specific system.
Do I need to disable startup apps?
Trimming unnecessary startup programs frees RAM and CPU cycles that would otherwise run in the background during gaming. Disabling launchers, updaters, and RGB utilities you do not need improves consistency and reduces stutter, especially on systems with limited memory.
Does Windows 11 support DirectStorage?
Yes, DirectStorage lets supported games load assets directly from an NVMe SSD to the GPU, reducing load times and streaming stutter. It requires a compatible game and drive to matter, but on eligible titles it delivers noticeably faster loading and smoother world streaming.