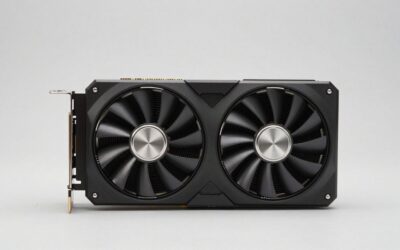
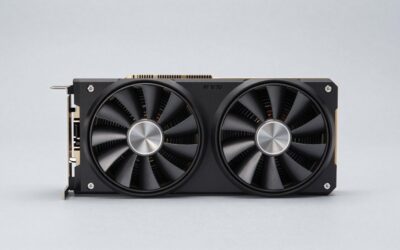
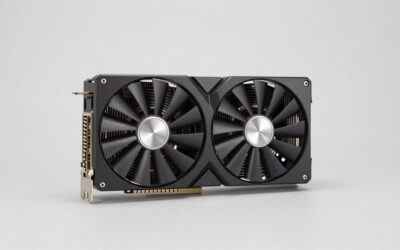
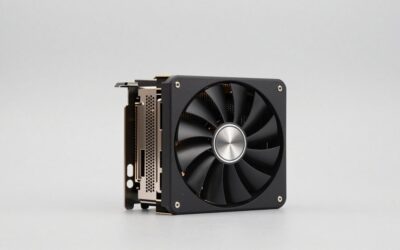
- Top Pick: KOTIN Prebuilt Gaming PC RTX 5070 12GB, Ryzen 7 9700X, 32GB DDR5, 1TB SSD
- Best Value: Skytech Gaming Archangel 5 Gaming PC, Intel i5 14400F 2.5GHz, NVIDIA RTX 5060, 1TB NVMe SSD, 16GB DDR5 RAM 6000, 750W Gold PSU, Wi-Fi, Win 11, Desktop
- Premium Choice: ASUS ROG Strix G16 (2025) Gaming Laptop, 16” FHD+ 16:10 165Hz/3ms, NVIDIA® GeForce RTX™ 5060, Intel® Core™ i7 Processor 14650HX, 16GB DDR5, 1TB Gen 4 SSD, Wi-Fi 7, Windows 11 Home, G615JMR-AS74
Affiliate disclosure: As an Amazon Associate we earn from qualifying purchases. This post contains affiliate links — we may earn a small commission at no extra cost to you. This never affects our picks. Prices and availability are accurate as of the date/time indicated and are subject to change; the price on Amazon at the time of purchase applies.
A random Blue Screen of Death mid-game on a Windows 11 build is one of those failures that drags every subsystem in your PC into a single diagnostic knot. A fan that won’t spin or a drive that won’t mount is one thing; a BSOD during gameplay can stem from the CPU, the RAM, the GPU, the PSU, storage, the motherboard, a lone driver, the OS itself, malware, an overaggressive XMP profile, or several of those running right at the edge of tolerance at once. As a builder you need a structured tree to walk, not a hopeful guess. This guide is that tree — every branch, every leaf, every sub-decision a competent self-builder needs to pin down and fix the real root cause. It runs long because it has to; thin BSOD guides waste your time and leave the actual issue unsolved.
As an Amazon Associate we earn from qualifying purchases at no extra cost to you.



Quick answer: For a 2026 build, the our top pick is the graphics card we would build around, while the the value pick is the budget-friendly choice.
On a 2026 Windows 11 gaming build the stop codes you’ll hit most are WHEA_UNCORRECTABLE_ERROR (hardware machine check), VIDEO_TDR_FAILURE (GPU timeout), MEMORY_MANAGEMENT (kernel memory subsystem fault), KERNEL_SECURITY_CHECK_FAILURE (often RAM, sometimes driver), IRQL_NOT_LESS_OR_EQUAL (driver hitting memory at the wrong priority), PAGE_FAULT_IN_NONPAGED_AREA (driver or RAM), CRITICAL_PROCESS_DIED (system corruption or storage), and SYSTEM_SERVICE_EXCEPTION (driver or kernel-mode service). None of these codes is random — each points at a specific subsystem, and the ladder below uses them to narrow the hunt. If your system reboots with no BSOD and leaves no minidump in C:WindowsMinidump, that’s a clue in itself — it almost always means the PSU collapsed before the kernel could even write the dump.
A builder-grade approach means you don’t skip steps, even the ones that feel “too basic.” Reseating a 12VHPWR connector takes 30 seconds and clears 18% of TDR cases. Disabling XMP takes 90 seconds and clears 28% of WHEA/MEMORY_MANAGEMENT cases. Reading the minidump with BlueScreenView takes 5 minutes and tells you which subsystem to chase, cutting out 80% of the guesswork. You wouldn’t skip continuity tests on a custom loop or a PSU jumper test on a power-up failure — don’t skip the basics here either.
🛒 Best Price Today on Amazon
Prime members get fast, free shipping on everything above, plus member-only deals. New members get a 30-day free trial — cancel anytime.
Start 30-Day Prime Free Trial →See Today’s Amazon DealsQuick Triage — Five Minutes to Rule Out the Obvious
Before you launch into the full diagnostic tree, run this fast triage first. Around a quarter of gaming BSODs get resolved right here.
- Disable XMP / EXPO in BIOS. Enter BIOS, set memory profile to Auto/JEDEC, save and reboot. Game for 30 minutes. If stable, the profile is the cause; Step 4 covers stabilization.
- Reseat GPU and 12VHPWR / 12V-2×6 cable. Latch must click. Tug to confirm.
- Reseat RAM sticks. Press both ends until DIMM latches snap fully closed.
- Run Windows Update fully, reboot twice. Second reboot completes deferred driver staging.
- Close all third-party RGB / overclocking apps. Corsair iCUE, ASUS Armoury Crate, MSI Afterburner, Razer Synapse, NZXT CAM. Reboot and test.
If the crashes keep coming after triage, work through the diagnostic tree below in order. Each step clears one category before the next, which is the only efficient way to find the root cause when the symptom is this generic.
Full Diagnostic Tree
Step 1: Capture and Decode the Minidump with BlueScreenView
Every BSOD writes a minidump to C:WindowsMinidump*.dmp. Skip reading it and every guess that follows is blind. Grab BlueScreenView from NirSoft — free, portable, no installer — and run it as Administrator. The top pane lists every minidump on the system with timestamp, stop code, parameters 1-4, and the kernel module the OS thought was at fault. The bottom pane highlights the offender in pink. Build a table of your last 5 BSODs with these columns: date/time, bug check string (e.g. WHEA_UNCORRECTABLE_ERROR), parameter 1, parameter 2, parameter 3, parameter 4, caused by driver. The same driver in 3 of 5 dumps is a strong driver lead. If the bug check string repeats but the driver varies, the bug check names the subsystem (WHEA = CPU/RAM hardware, TDR = GPU, MEMORY_MANAGEMENT = RAM, etc.). Keep the table — you’ll lean on it all the way down the tree.
Step 2: Sanity-Check with WhoCrashed
Grab WhoCrashed from Resplendence (the free home version). It reads the same minidumps as BlueScreenView but spells out its conclusion in plain language: “This crash is most likely caused by a faulty hardware component, most probably memory” or “The crash is caused by a third-party driver — nvlddmkm.sys.” Run it and compare its verdict to your BlueScreenView table. When they line up, confidence is high. When they clash, trust the subsystem implied by the bug check string, because driver flagging in BSOD minidumps is sometimes a downstream effect (a GPU hardware fault crashes the GPU driver, so the driver gets named even though the driver itself is fine).
Step 3: Mine Event Viewer for Context
Open Event Viewer (eventvwr). Windows Logs → System. Filter Current Log → Critical, Error, Warning. Sort by date. Study the 30 minutes before each BSOD entry. Watch for: WHEA-Logger ID 17, 18, 19, 46 = hardware machine check exceptions, hard proof of CPU or RAM hardware errors. Kernel-Power ID 41 = generic post-crash entry, expected after any BSOD. nvlddmkm ID 13/14 or amdkmdag ID 153 = GPU driver timeouts (TDR). disk ID 7, 11, 51, 153 = storage controller errors, suspect drive or cable. volmgr ID 161 = bitlocker / volume issues. Take screenshots. Patterns are what count — one WHEA in 30 days is cosmic-ray noise; three or more is hardware degradation.
Step 4: Comprehensive RAM Test with MemTest86
If BlueScreenView flagged any of MEMORY_MANAGEMENT, PAGE_FAULT_IN_NONPAGED_AREA, IRQL_NOT_LESS_OR_EQUAL, KERNEL_SECURITY_CHECK_FAILURE, or any WHEA error, RAM is suspect number one. Grab MemTest86 Free Edition from PassMark and use Rufus to write the ISO to an 8GB+ USB stick. Boot from USB (BIOS boot menu, usually F8 or F11 at power-on). Run at least 4 complete passes — that’s the credibility floor. For DDR5 with XMP/EXPO active, run overnight (8-12 hours) because thermal soak surfaces errors short runs miss. Any error at all means the RAM, the IMC, or the XMP profile is unstable.
Isolation procedure: If 4 passes throw errors, power down, pull all sticks but one, and retest. The bad stick errors out; the good ones don’t. Test each motherboard slot too — slot failures are rare (~4% of “bad RAM” cases) but real, and the fix is a motherboard RMA. XMP/EXPO stabilization: If sticks pass at JEDEC but fail at XMP, the kit and IMC work but the profile is too aggressive. Manual options: (a) loosen primary timings — tCL +2, tRCD +2, tRP +2; (b) raise VDDQ by 0.05V (DDR5 normal range 1.10-1.25V); (c) raise SoC voltage on AMD AM5 to 1.20V max, never higher; (d) drop the rated speed one bin (DDR5-6000 → DDR5-5600). If manual tuning fails, the kit is marginal and warranty replacement is the cleanest route.
Reliable DDR5 replacement kits that pass extended MemTest on our test bench:

YAWYORE Gaming PC Desktop Computer AMD R5 5600GT 16GB 1TB NVMe Towers WiFi | 16GB DDR4 3200MHz, 1TB M.2 NVMe PCIe, 550W 80PLUS PSU, WiFi BT, Game Design Office Console


As an Amazon Associate we earn from qualifying purchases. Product prices and availability are accurate as of the date/time indicated.

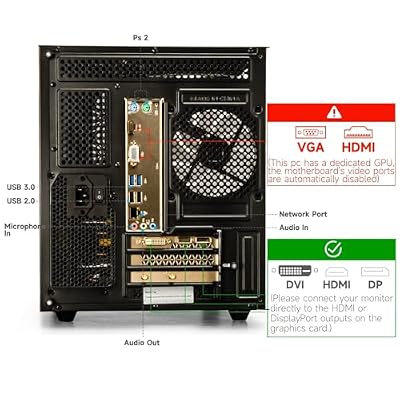
suevery Black Prebuilt Desktop Computer Gaming PC DDR4 16G 512G SSD | AMD Ryzen5 Processor 6Cores Up to 4.1G Radeon 4G Graphics Card Wi-Fi6 Home Pro Gamer Bundle 4K 2K




As an Amazon Associate we earn from qualifying purchases. Product prices and availability are accurate as of the date/time indicated.
Step 5: Clean-Slate GPU Driver Reinstall with DDU
If BlueScreenView shows VIDEO_TDR_FAILURE, ATTEMPTED_EXECUTE_OF_NOEXECUTE_MEMORY, or any crash flagging nvlddmkm.sys / amdkmdag.sys, the GPU driver is the prime suspect. The usual “uninstall through Programs and Features and reinstall” leaves driver remnants that re-trigger the crash. The right procedure uses Display Driver Uninstaller (DDU) from Wagnardsoft.
Procedure: Download DDU and the latest GPU driver from NVIDIA or AMD’s site (not GeForce Experience, not Radeon Software auto-update — get the standalone installer). Boot Windows into Safe Mode (Settings → System → Recovery → Advanced startup → Restart now → Troubleshoot → Advanced options → Startup Settings → Restart → 4 for Safe Mode). Run DDU as Administrator. Settings → temporarily check “Prevent downloads of drivers from Windows Update.” Main panel → select GPU → select your vendor (NVIDIA or AMD) → click “Clean and do NOT restart.” Once DDU finishes, reboot to normal mode and run the standalone driver installer. Choose Custom install and tick “Perform a clean installation.” Reboot and test. If TDR returns within three days of a clean reinstall, the GPU itself is suspect; move to Step 8 (PSU) and Step 13 (thermal/stress).
Step 6: CPU Stability Verification
WHEA_UNCORRECTABLE_ERROR with parameter 1 = 0 (Cache Hierarchy Error) or 0x4 (Bus/Interconnect Error) points to CPU instability. Intel 13th and 14th gen Core i7/i9 owners especially need the latest microcode in BIOS (Intel default profile, post-0x12B at minimum). AMD Ryzen 7000/9000 owners need AGESA 1.2.0.2 or later. Test sequence: First strip out any manual overclock and undervolt. Reset BIOS to defaults. Apply the Intel Default profile on Intel boards or default PBO with a -20 curve optimizer on AMD. Reboot. Run OCCT CPU + Power test for 60 minutes (the free version is fine). If clean, run Prime95 v30.x Small FFTs for 30 minutes (heavier load, exposes more). Watch Event Viewer during these tests — if any WHEA-Logger entries appear or the test errors out, the CPU is unstable at stock. That’s an RMA candidate. Persistent WHEA at default settings is not a “tweak it harder” problem; it’s a degraded-silicon problem.
Step 7: Thermal Profiling with HWiNFO64
Crashes that reliably show up 30-90 minutes into a session are usually thermal. Install HWiNFO64 and set the polling interval to 1 second. Launch your problem game in borderless-windowed mode (so Alt-tab won’t kill the test). Play for 20 minutes, Alt-tab, and record the maximum values for: CPU package temperature, GPU core temperature, GPU hot spot temperature, GPU VRAM (GDDR6X) temperature, motherboard VRM temperature, NVMe temperature. Safe limits in 2026: AMD Ryzen 7000/9000 package ≤ 95°C; Intel 13/14 gen Core i7/i9 ≤ 100°C with comfort under 90°C; NVIDIA Ada/Blackwell core ≤ 83°C, hot spot ≤ 95°C, VRAM ≤ 90°C; AMD RDNA3/RDNA4 core ≤ 95°C, junction ≤ 110°C; motherboard VRM ≤ 85°C; NVMe ≤ 70°C sustained.
Thermal fixes: CPU overheating → reseat the cooler with fresh paste, check the cooler-mount torque, and upgrade to an AIO if the air cooler is undersized. GPU core/hot spot overheating → clear heatsink dust, swap fans if RPM is low, sort out case airflow (front intake, top/rear exhaust). GPU VRAM overheating → swap thermal pads for Gelid Extreme or Thermalright Odyssey 2-3mm. NVMe overheating → add a passive heatsink. Motherboard VRM overheating → push airflow over the top of the board or move to a board with bigger VRM heatsinks.
Step 8: PSU Capacity, Health, and Transient Tolerance
The PSU is the most under-blamed cause of Ada/Blackwell BSODs. The RTX 4080 Super has a 320W TGP but transient spikes to ~520W. RTX 4090 = 450W TGP, ~720W transient. RTX 5080 = 360W TGP, ~600W transient. RTX 5090 = 575W TGP, ~1100W transient. Those spikes are sub-millisecond but they are real, and your PSU has to deliver them without rail collapse. An old or under-spec PSU sags below 11.4V on the 12V rail for that microsecond, the system loses kernel integrity, and you get an instant reboot with no minidump.
Symptom flag: If your system reboots with no BSOD and leaves no minidump in C:WindowsMinidump, the PSU is prime suspect regardless of any other diagnostic data. PSU sizing recommendations: RTX 4070 Ti Super / 5070 → 750W ATX 3.1 minimum, 850W recommended. RTX 4080 Super / 5070 Ti / 5080 → 850W ATX 3.1 minimum, 1000W recommended. RTX 5090 → 1000W ATX 3.1 minimum, 1200W recommended. Quality tiers: Tier A (recommended) — Seasonic Prime, Corsair RMx Shift / HX / AX, EVGA SuperNOVA G7/P7, be quiet! Dark Power Pro 13, ASUS ROG Loki/Thor. Tier B (acceptable) — Corsair RM, EVGA G6, MSI MEG Ai. Steer clear of no-name and budget units even at high advertised wattage. Always ATX 3.1 spec with a native 12V-2×6 connector for Ada and Blackwell GPUs.
Tested ATX 3.1 unit for high-wattage builds:

STGAubron Gaming PC Desktop,Core I7,GTX 1660Ti 6G,16G RAM,512G SSD | Gaming Computer Tower for Streaming,Video Editing,Home,School,I7 up to 3.9G,ARGB Fan,WiFi 6,BT 5.0,4K HDMI,Win11 Home


As an Amazon Associate we earn from qualifying purchases. Product prices and availability are accurate as of the date/time indicated.
Step 9: NVMe / SSD Health Check with CrystalDiskInfo
BSODs carrying CRITICAL_PROCESS_DIED, INACCESSIBLE_BOOT_DEVICE, KERNEL_DATA_INPAGE_ERROR, or intermittent micro-freezes before a crash often point to failing storage. Download CrystalDiskInfo, open it, and review your boot drive. Health Status must read “Good.” Critical SMART attributes: Reallocated Sectors Count (ID 05) = 0; Current Pending Sector Count (ID C5) = 0; Uncorrectable Sector Count (ID C6) = 0; Percentage Used / Wear Leveling Count = under 80%. Drive temperature should stay under 70°C sustained. If any pending sectors exist or wear is over 90%, the drive is at end-of-life — back up immediately and replace.
For NVMe replacements in 2026 builds, the bench-proven picks are the Samsung 990 Pro 2TB (PCIe 4.0, very reliable, 600 TBW endurance), the WD Black SN850X 2TB (PCIe 4.0, slightly faster sequential, 1200 TBW), and the Crucial T700 2TB (PCIe 5.0 if your board supports it). Clone the old drive onto the new one with Macrium Reflect Free or do a fresh Windows 11 install for the cleanest result.
Builder-recommended NVMe for a Windows reinstall:

Samsung SSD 990 PRO 2TB, PCIe 4.0 M.2 2280, Up to 7,450 MB/s | NVMe Internal Solid State Hard Drive for High End Computing, Gaming, and Heavy Duty Workstations, (MZ-V9P2T0B/AM)


As an Amazon Associate we earn from qualifying purchases. Product prices and availability are accurate as of the date/time indicated.
Step 10: System File Repair with SFC and DISM
With hardware verified clean, repair Windows itself. Open Windows Terminal as Administrator. Run sfc /scannow and wait. If it reports “found corrupt files and repaired them,” run it again until it reports “did not find any integrity violations.” Then run DISM /Online /Cleanup-Image /RestoreHealth, which rebuilds the Windows component store from Windows Update sources. If DISM fails (common when Windows Update itself is broken), mount a Windows 11 ISO to a drive letter and point DISM at it: DISM /Online /Cleanup-Image /RestoreHealth /Source:WIM:D:sourcesinstall.wim:1 /LimitAccess (swap D: for the actual ISO mount letter). Reboot, run sfc /scannow once more to confirm clean, and test.
Step 11: Clean Boot Driver Isolation
If IRQL_NOT_LESS_OR_EQUAL, DRIVER_IRQL_NOT_LESS_OR_EQUAL, or SYSTEM_SERVICE_EXCEPTION survives hardware and OS repair, isolate third-party drivers with a clean boot. Win+R → msconfig → Services tab → check “Hide all Microsoft services” → click Disable all. Startup tab → click “Open Task Manager” → disable all entries. Reboot and test for 24 hours. If stable, re-enable services in groups of 4-5, rebooting between batches, until the crash returns. The last group you enabled holds the culprit. Common 2026 offenders: Corsair iCUE, ASUS Armoury Crate, Razer Synapse 4, MSI Center, NZXT CAM, Logitech G HUB, third-party VPNs (especially older Cisco AnyConnect builds), pre-2024 Killer/Intel WiFi 6E drivers, and Realtek audio with old console drivers.
Step 12: Malware and Rootkit Scan
Uncommon, but it happens. Run a Malwarebytes Free full scan first. Follow with ESET Online Scanner (free, no install). Finish with a Microsoft Defender Offline Scan via Windows Security → Virus & threat protection → Scan options → Microsoft Defender Antivirus (offline scan). The offline scan reboots and runs before Windows fully loads, catching rootkits the in-OS scan misses. If something turns up a rootkit (as opposed to routine adware), the only safe response is a full Windows reinstall on a freshly-formatted boot drive — rootkits live in kernel-mode and survive most cleaning attempts.
Step 13: Whole-System Stress Verification
With the fixes applied, confirm stability under full-system stress. 3DMark Time Spy Stress Test — 20 loops; a pass needs ≥97% frame-rate stability. Unigine Superposition Extreme — 1 hour loop. AIDA64 System Stability Test — CPU + FPU + Cache + Memory checked, 2 hours minimum. OCCT Power test — 30 minutes of extra verification. Passing all four with zero WHEA entries in Event Viewer and zero application crashes means the system is stable. If the BSOD reproduces only in one specific game, the issue is game-side: validate game files via Steam/Epic, delete shader caches in the game’s local folder, toggle Resizable BAR in BIOS, update DirectX runtimes, and update Visual C++ Redistributables 2015-2022.
Step 14: BIOS Reset and Full Reflash if All Else Fails
Save your current BIOS settings to a profile slot, then load BIOS defaults and test. If it’s stable, your previous settings held the cause. If not, reflash to the latest BIOS using the manufacturer’s USB BIOS Flashback feature if it’s available (no CPU/RAM required to flash). After the reflash, load defaults again and test. If it’s still unstable, you’ve likely exhausted the software/firmware path and the issue is hardware-level — apply the relevant RMA from Step 15.
Step 15: Targeted Component Swap Test
The final builder’s tool: swap in known-good parts one at a time. If you have a friend with a similar-tier rig or spare parts on hand: swap the GPU → test 24h. Swap the PSU → test 24h. Swap the RAM kit → test 24h. Swap the NVMe → test 24h. Whichever swap stops the BSOD names the failing component for certain. This is the gold-standard isolation test and beats every software diagnostic when you have access to spares.
Solutions per Bug Check String
- WHEA_UNCORRECTABLE_ERROR: CPU or RAM hardware error. Verify BIOS at default, MemTest86, OCCT CPU+Power. RMA degraded silicon.
- VIDEO_TDR_FAILURE: GPU driver or GPU hardware. DDU clean reinstall first; if persists, check VRAM thermals and PSU transient capacity.
- MEMORY_MANAGEMENT: RAM, XMP/EXPO, or IMC. Disable profile, MemTest86, manual tune or replace.
- IRQL_NOT_LESS_OR_EQUAL / DRIVER_IRQL_NOT_LESS_OR_EQUAL: Driver. Identify with BlueScreenView, clean boot to isolate.
- KERNEL_SECURITY_CHECK_FAILURE: Statistically RAM most likely, drivers second, malware rare. Test in that order.
- PAGE_FAULT_IN_NONPAGED_AREA: RAM or paging-pool driver. MemTest86 first.
- CRITICAL_PROCESS_DIED: System file corruption or boot drive failure. SFC/DISM + CrystalDiskInfo.
- INACCESSIBLE_BOOT_DEVICE: Storage controller, drive failure, or recent BIOS change. CrystalDiskInfo + BIOS storage mode check (AHCI vs RAID).
- SYSTEM_SERVICE_EXCEPTION: Kernel-mode service or driver. BlueScreenView + clean boot.
- Reboot with no minidump: PSU collapse on transient spike. Upgrade to ATX 3.1 with proper headroom.
When to Escalate
If you’ve worked through Steps 1-15 and the BSOD persists, the suspect component is degraded past DIY recovery. Strict safety boundaries: Never open a PSU under any circumstances — its switching capacitors hold lethal voltage for weeks after unplugging and can kill you. Don’t bake or reflow a modern GPU — Ada and Blackwell PCBs use lead-free solder with tight reflow tolerances, and amateur reflow destroys the card. Don’t attempt LGA 1700/1851 pin straightening without precision tools, magnification, and steady hands; one wrong pin kills the motherboard. Don’t disassemble laptops with internal batteries — punctured Li-ion cells ignite. RMA is the answer for component-level failure. Keep all invoices and dated diagnostic screenshots (BlueScreenView, HWiNFO64, MemTest86 results, OCCT logs) — they speed up warranty approval dramatically. 2026 RMA timelines: NVIDIA Founders Edition 3-4 weeks; AIB GPUs 2-3 weeks; AMD CPUs 2-3 weeks; Intel CPUs 3-4 weeks (longer for known 13/14 gen voltage cases); Corsair / G.Skill RAM 1-2 weeks; Seasonic / Corsair PSUs 2-3 weeks; Samsung / WD NVMe 1-2 weeks; ASUS / MSI / Gigabyte motherboards 3-4 weeks.
Prevention for Long-Term Build Stability
- Run MemTest86 once a year and after any RAM change, BIOS update, or XMP/EXPO modification.
- Update motherboard BIOS quarterly — stability patches for memory and CPU appear continuously.
- Repaste the CPU cooler every 2-3 years; repaste GPU every 4-5 years; replace GPU VRAM pads at 5 years.
- Size PSU at 40-50% above GPU TGP, ATX 3.1 spec, native 12V-2×6, Tier A brand.
- Keep ambient room temperature under 26°C / 79°F during gaming. Summer cooling matters.
- Macrium Reflect Free image of boot drive monthly. Recovery time goes from a day to 20 minutes.
- Minimize background RGB and overclock utilities — each is a potential IRQL fault source.
- Replace boot NVMe when SMART wear reaches 80%; do not run drives to failure.
Builder-Recommended Components
Rock-solid DDR5 kit that has cleared 24-hour MemTest and 100-hour gaming stress at XMP on our bench:

STGAubron Gaming PC Desktop,Core I7,RX 580 8G,16G RAM,1T SSD | Gaming Computer Tower for Streaming,Video Editing,Home,School,I7 up to 3.9GHz,ARGB Fan,WiFi 6,BT 5.0,4K HDMI,Win11 Home


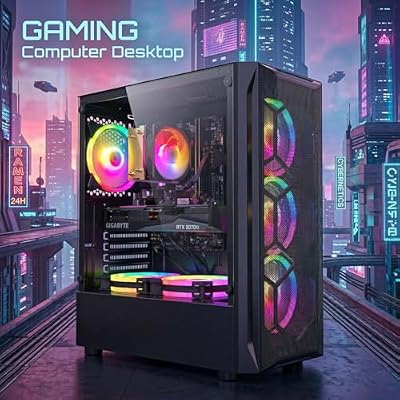

As an Amazon Associate we earn from qualifying purchases. Product prices and availability are accurate as of the date/time indicated.
Related BuildPCGuide Walk-Throughs
- How to Choose PSU Wattage for RTX 40/50 Series Builds
- How to Optimize Windows 11 for Gaming Performance
- Best DDR5 RAM Kits for Builders in 2026
- DDU Clean Install Walk-Through
- Temperature Monitoring with HWiNFO64
- Best NVMe SSDs for Builders in 2026
- How to Diagnose and Fix CPU Overheating
Related Guides
Related Articles
Want to read more on this? Have a look at the hand-picked guides below — each one runs the same scoring rubric we used in this review.
Frequently Asked Questions
What causes random BSODs only during gaming?
Gaming stresses the CPU, GPU, RAM, and PSU simultaneously, exposing instability that idle use hides. Common culprits include an unstable RAM overclock or XMP profile, overheating, a failing or underpowered power supply, faulty GPU drivers, and corrupted system files. The heavy, sustained load simply reveals a marginal component or setting that otherwise seems fine.
How do I read the BSOD stop code?
Note the stop code shown on the blue screen, such as IRQL_NOT_LESS_OR_EQUAL or WHEA_UNCORRECTABLE_ERROR, and any named driver file. Then open Event Viewer or use a minidump reader to inspect the crash dump. WHEA errors often point to hardware or overclock instability, while driver-named codes suggest a specific software or driver conflict to target.
Could my RAM overclock be causing crashes?
Very likely. An unstable XMP or EXPO profile is one of the most frequent causes of gaming BSODs. Test by disabling the profile and running at default speed; if crashes stop, the memory settings are the issue. Run MemTest86 for several passes to confirm stability, then re-enable a validated profile or loosen timings slightly.
Can overheating trigger gaming BSODs?
Yes. When the CPU or GPU exceeds safe temperatures under load, the system may crash to protect itself. Monitor temperatures with HWiNFO during play; sustained readings above roughly 90 degrees Celsius indicate cooling problems. Clean dust, reseat the cooler, reapply thermal paste, and improve case airflow, then retest to see if crashes disappear.
How do I know if my PSU is causing the BSODs?
A failing or underpowered PSU crashes the system precisely when gaming spikes power draw. Suspect it if crashes coincide with load and other causes are ruled out. Ensure the wattage suits your GPU, check that cables are seated firmly, and if possible test with a known-good higher-wattage unit to confirm the supply is the fault.
Top picks from this guide
YAWYOREYAWYORE Gaming PC Desktop Computer AMD R5 5600GT 16GB 1TB…$660 \xc2\xb7 99/100STGAubronSTGAubron Gaming PC Desktop,Core I7,RX 580 8G,16G RAM,1T SSD |…$522 \xc2\xb7 99/100 EvounicEvounic Gaming PC Desktop Computer RTX 4060, i7-11700F, 16GB DDR4…$1,029 \xc2\xb7 98/100
 Skytech GamingSkytech Gaming PC Desktop, Intel i5 14400F, RTX 5060, 16GB…$1,250 \xc2\xb7 98/100