To install memory in a laptop, you need to power off the laptop, disconnect the charger, open the bottom access panel or entire bottom cover, release the retention clips, seat the SO-DIMM module at a 30-degree angle until it clicks, press it flat until the side clips lock, then reassemble and verify the new capacity in BIOS or Windows Task Manager.
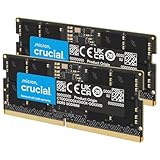
Unlike desktop DIMMs, laptop memory uses the smaller SO-DIMM form factor and many modern ultrabooks have some or all RAM soldered to the motherboard with no upgrade slot. Checking compatibility before you buy prevents ordering the wrong DDR generation, speed, or capacity that the laptop will not boot with.
Quick answer: Our top pick in 2026 is the Pin Count / Notch Position — our #1 rated choice. See the full ranked comparison, alternatives and buying advice below.
Step 1: Check If Your Laptop RAM Can Be Upgraded
Not every laptop allows a RAM upgrade. Before buying anything, determine which of these three designs your model uses:
- Fully upgradeable: One or two accessible SO-DIMM slots under a dedicated hatch or under the bottom panel. Common in 15-inch and 17-inch workstations and gaming laptops like Lenovo Legion 5, HP Omen 16, Dell Inspiron 15 3530.
- Hybrid: 8GB or 16GB soldered + one open SO-DIMM slot. Very common on thin-and-light designs such as Lenovo IdeaPad Slim 5, ASUS VivoBook 15, Acer Swift Go 14. You can add RAM but cannot replace the soldered portion.
- Fully soldered: No slots, all memory soldered. Most ultrabooks like MacBook Air/Pro (Apple Silicon), Dell XPS 13 Plus, Microsoft Surface Laptop, ASUS Zenbook 14 OLED (many SKUs). No user upgrade is possible.
How to verify in 30 seconds:
- Check the manufacturer’s spec sheet or maintenance manual. Search “[model] + maintenance manual” – Lenovo, Dell, and HP publish these with a “Memory” section showing slot count and max capacity.
- In Windows, press Ctrl+Shift+Esc to open Task Manager > Performance > Memory. It shows slots used vs. slots available (e.g., “Slots used: 1 of 2”) and the form factor. If it says “Slots used: 2 of 2” with no free slot, you will need to replace an existing module.
- Use CPU-Z (Memory and SPD tabs) to see current DDR generation and whether modules are present in each slot.
Step 2: Find the Correct SO-DIMM Type, Speed and Capacity
Laptop DDR memory is not interchangeable across generations. A DDR4 slot will not accept DDR5 and vice versa due to different notch positions and voltage.
| Spec | DDR4 SO-DIMM | DDR5 SO-DIMM |
|---|---|---|
| Pin Count / Notch Position | 260-pin | 262-pin |
| Voltage | 1.2V | 1.1V |
| Common JEDEC Speeds in 2026 Laptops | 2666 MT/s, 3200 MT/s | 4800 MT/s, 5200 MT/s, 5600 MT/s |
| Peak Bandwidth Per Module (64-bit channel) | 25.6 GB/s at 3200 MT/s | 38.4 GB/s at 4800 MT/s / 44.8 GB/s at 5600 MT/s |
| Typical Module Capacities | 4GB, 8GB, 16GB, 32GB | 8GB, 16GB, 32GB, 48GB |
| Max Capacity Per Laptop (2026 mainstream) | 64GB (2x32GB) | 96GB (2x48GB) on Intel Core Ultra / AMD Ryzen 7040+ platforms |
What to buy:
- Match the generation: If CPU-Z shows DDR4-3200, buy DDR4 SO-DIMM. If it shows DDR5-4800, buy DDR5 SO-DIMM. Do not mix DDR4 and DDR5.
- Speed: You can install a faster module than stock (e.g., DDR5-5600 in a DDR5-4800 system) but it will downclock to the slower speed supported by the CPU and existing module. For dual-channel stability, buy the same JEDEC speed as the installed module.
- Capacity: Check the CPU and chipset limit. Intel Core 12th-14th Gen and Core Ultra Series 1/2 and AMD Ryzen 5000/7000/8000 mobile typically support 64GB-96GB total. Most 2024-2026 thin-and-light laptops are limited to 32GB or 64GB even if larger modules exist.
- Rank and voltage: Stick to standard JEDEC 1.2V (DDR4) or 1.1V (DDR5) non-ECC, unbuffered SO-DIMM. Avoid XMP/EXPO high-voltage gaming kits unless your BIOS explicitly supports them; many laptops ignore XMP profiles and run at baseline JEDEC speeds.
Worked Example: Do You Need More Bandwidth?
Memory bandwidth doubles when you run two identical modules in dual-channel. This matters for integrated graphics and heavy multitasking.
Calculation: Bandwidth = (Transfer Rate x Bus Width) / 8. For a single channel at DDR5-4800 with a 64-bit bus: (4800 MT/s x 64) / 8 = 38,400 MB/s = 38.4 GB/s. In dual-channel with two modules: 38.4 x 2 = 76.8 GB/s.
For comparison, a single DDR4-3200 module provides 25.6 GB/s, or 51.2 GB/s in dual-channel. If you upgrade a laptop with AMD Radeon 780M or Intel Arc integrated graphics from a single 8GB DDR5-4800 stick (38.4 GB/s) to 2x8GB DDR5-4800 (76.8 GB/s), you often see 25-40% higher frame rates in games at 1080p because the iGPU is no longer bandwidth-starved. Adding a second module of the same speed gives more real-world benefit than buying a single faster module.
Step 3: What You Need Before You Open the Laptop
- Correct SO-DIMM module(s) – usually 8GB to 32GB modules in 2026 are usually $25-$70 per module for DDR4 and usually $30-$90 for DDR5 depending on capacity.
- Small Phillips #0 or #1 screwdriver. Some Dell/HP models use Torx T5.
- Plastic spudger or old plastic card to pry the bottom panel without scratching.
- Small container or magnetic mat for screws – lengths may differ, mixing them can damage the board.
- ESD safety: Work on a hard, non-carpeted surface. Wear an ESD wrist strap clipped to unpainted metal if you have one, or periodically touch a grounded metal object (like a desktop PC chassis that is plugged in but switched off at the wall). Avoid wearing wool or fleece.
Shut down the laptop completely – do not just sleep or hibernate. On Windows, hold Shift while clicking Shut down to force a full shutdown. Unplug the AC adapter and any USB-C dock. If your laptop has an external battery disconnect pinhole or BIOS Battery Disconnect option, use it. Otherwise you will disconnect the internal battery after opening.
Step 4: How to Install Memory in a Laptop Step by Step
1. Remove the bottom cover
Place the laptop upside down on a soft cloth. Remove all visible Phillips screws on the bottom panel. On models without a dedicated RAM hatch, you need to remove the entire bottom cover. Starting from the hinge edge, gently run a plastic spudger around the seam to release the plastic clips. Lift the panel straight off. Do not use a metal screwdriver to pry.
2. Disconnect the battery (if accessible)
If you see a battery connector with a ribbon cable to the motherboard, carefully slide the connector out or lift the locking tab and pull the cable straight out. Press and hold the laptop power button for 5 seconds to discharge residual power. This prevents shorting the board if you slip.
3. Locate the SO-DIMM slots
The slots are near the center, often under a thin mylar shield or metal RF shield. If there is a hybrid design, you will see one soldered chip area covered by a shield and one empty slot with two metal arms on the sides. If both slots are filled and you are replacing, you will see two modules stacked.
4. Release an existing module (if replacing)
Push the two side retention clips outward simultaneously. The module will pop up to about 30 degrees. Pull it straight out along that angle. Do not lift straight up or rock side to side.
5. Seat the new module
Hold the module by its edges, avoiding the gold contacts and chips. Align the notch in the gold edge with the key in the slot – it only fits one way. Insert at roughly a 30-degree angle and push firmly until the gold contacts are almost fully hidden. Then press down flat until both side clips click and lock into the notches on the module. The module should be level and not wobble when pressed. If it does not click, it is not fully inserted.
If installing two modules, install the module in the lower slot first on stacked-slot designs. Use a matched pair (same capacity, speed, and ideally same brand/model) for reliable dual-channel operation.
6. Reassemble and power on
Reconnect the battery cable, replace the bottom panel, press it firmly around all edges until clips engage, then reinstall screws in their original holes. Do not overtighten. Plug in AC power and power on. First boot after a RAM change can take 30-90 seconds longer as the BIOS retrains memory – do not force it off if the screen stays black briefly.
Step 5: Verify the Upgrade Worked
Check that the system sees the new capacity and is running in dual-channel:
- BIOS/UEFI: Press F2, Del, or F12 during boot (varies by brand – Lenovo F2/Fn+F2, Dell F2, HP F10/Esc). The Main or System Information page should show total memory, e.g., 32768 MB.
- Windows Task Manager: Ctrl+Shift+Esc > Performance > Memory. Confirm total capacity, speed (e.g., 4800 MT/s), and Slots used: 2 of 2. If speed shows lower than expected, a module is downclocking to match the slower stick.
- CPU-Z: Memory tab > Channel # should say “Dual” when two identical modules are installed. If it says “Single” with two modules, reseat them or swap slots.
- Windows System: Settings > System > About > Installed RAM should show the new total.
If the laptop does not POST (black screen, power LED blinking, or beep codes), power off, disconnect AC and battery, reseat the modules fully until they click, try one module at a time in each slot to isolate a faulty module, and ensure you did not install DDR5 in a DDR4 slot.
Dual-Channel Tips and Common Compatibility Pitfalls
Dual-channel requires two modules on separate 64-bit channels. Performance gains are modest for web browsing but significant for integrated graphics, video editing, and compiling.
- Best performance: Two identical modules – same capacity, speed, and rank. Example: 2x16GB DDR5-5600 is preferable to 1x32GB DDR5-5600 for bandwidth.
- Flexible option: Mismatched capacities still run in flex/ hybrid mode – e.g., 8GB soldered + 16GB SO-DIMM = 16GB (8+8) runs in dual-channel, remaining 8GB runs single-channel. You still get most of the benefit.
- Avoid: Mixing DDR4-3200 CL22 with DDR4-2666 CL19 – the system will run both at 2666 MT/s with the looser timings, losing performance. Mixing capacities like 4GB + 32GB can work but may cause instability on older BIOS versions.
- Do not exceed max per slot: Some 2022-2023 laptops limited to 16GB per slot will not boot with a 32GB module even if total is under the platform max. Check the manual’s “Maximum per slot” line.
- Update BIOS after upgrade if memory is not recognized correctly: Vendors often add support for newer 24GB/48GB DDR5 densities via BIOS updates.
| Your Situation | Recommended Action | Why |
|---|---|---|
| 1 slot free, 8GB soldered + empty DDR5-4800 system | Add 1x8GB DDR5-4800 SO-DIMM (same speed) | Cheapest path to full 16GB dual-channel flex mode, +76.8 GB/s bandwidth |
| 2 slots, 1x8GB, need 16GB total | Add matching 8GB same brand/speed or replace with 2x8GB kit | Enables true dual-channel without wasting the existing module |
| 2 slots, 2x4GB, need 32GB for VMs/editing | Replace with 2x16GB DDR4-3200 or DDR5-4800 kit | Older 4GB modules have low density and different rank, fresh matched kit is more stable |
| No slots, soldered 16GB, need more RAM | No upgrade possible; consider external optimization or replacement laptop | Soldered LPDDR5 cannot be added without board-level soldering |
After verifying dual-channel and capacity, run Windows Memory Diagnostic (search “Windows Memory Diagnostic” > Restart now and check for problems) or MemTest86 from a USB drive for one full pass if you experience crashes or blue screens. A single error means reseating or replacing the module.
Ready to decide? Our #1 pick for 2026 is the Pin Count / Notch Position.
Live price & availability on Amazon.