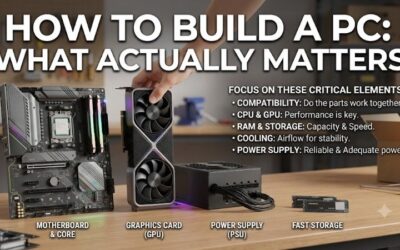
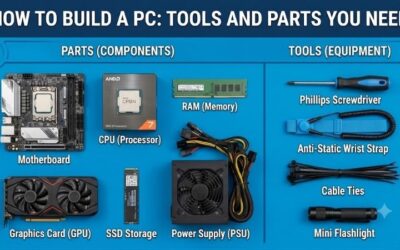
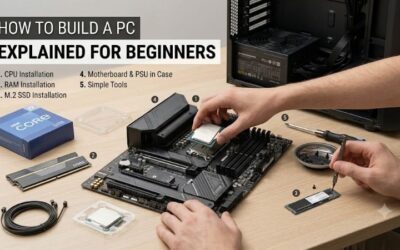
A PC build comes down to four phases: choose parts that are compatible with each other, assemble them in an order that keeps everything reachable, get through the first boot and BIOS, then install Windows and drivers. This pc building guide 2026 walks through all four in order, explains the reason behind each step, and points to the specific problems that catch first-time builders. Nothing here needs special skills, only patience and a clear checklist.
- Quick answer
- Step 1: Decide what the PC is for
- Step 2: Choose the platform first
- Step 3: Pick the remaining parts in the right order
- Step 4: Prepare your workspace
- Step 5: Build on the motherboard first
- Step 6: Prepare and fill the case
- Step 7: Connect the power and the front panel
- Step 8: First boot and BIOS
- Step 9: Install Windows 11 and drivers
- Common mistakes and fixes
- Safety and troubleshooting
- What to read next
- How we compared
- Sources
- Frequently Asked Questions
If you only want the short version, the table below is the whole process on one screen. The rest of the article explains each line so you can decide, not just follow.

iFixit Mako Driver Kit - 64 Precision Bit Set for Electronics Repair | 64 Precision Bit Set for Electronics Repair
Included for 'PC Building Guide 2026: From Parts List to First Boot and Windows Setup' because the listing specifies 64 Precision Bit Set for Electronics Repair and 64 Precision Bit Set for Electronics Repair, details this guide uses to compare options.
View on Amazon
iFixit Pro Tech Toolkit - Electronics, Smartphone, Computer & Tablet Repair Kit
Included for 'PC Building Guide 2026: From Parts List to First Boot and Windows Setup' because the listing specifies Electronics and Smartphone, details this guide uses to compare options.
View on Amazon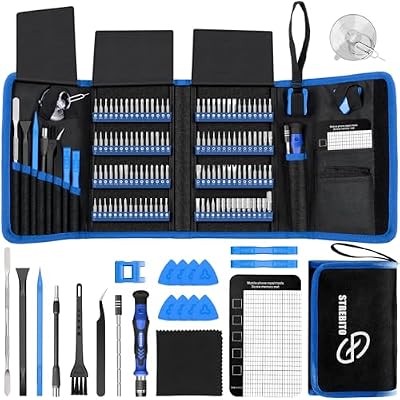
STREBITO Electronics Precision Screwdriver Sets 142-Piece with 120 Bits | Magnetic Repair Tool Kit for iPhone, MacBook, Computer, Laptop, PC, Tablet, PS4, Xbox, Nintendo, Game Console
Included for 'PC Building Guide 2026: From Parts List to First Boot and Windows Setup' because the listing specifies Magnetic Repair Tool Kit for iPhone and MacBook, details this guide uses to compare options.
View on Amazon
Fanttik E2 Ultra Electric Screwdriver, Screwdriver for Electronics (Grey) | 50 Magnetic Bits, Max.0.6N.m, RevoStor Magnetic Storage, 5/32''Hex Screwdriver for PC, 3D Printer, RC Cars, Drone
Included for 'PC Building Guide 2026: From Parts List to First Boot and Windows Setup' because the listing specifies Screwdriver for Electronics (Grey) and 50 Magnetic Bits, details this guide uses to compare options.
View on AmazonQuick answer: Our top pick in 2026 is the 1. Plan — our #1 rated choice. See the full ranked comparison, alternatives and buying advice below.
Quick answer
| Phase | What you do | Why it matters |
|---|---|---|
| 1. Plan | Pick the CPU platform, then motherboard, RAM, case, cooler, PSU and GPU in that order | Socket and memory type lock the first three choices together |
| 2. Prepare | Clear a table, sort screws, read both manuals | Most damage comes from rushing and loose parts |
| 3. Outside the case | Seat the CPU, RAM, M.2 SSD and (if it fits) cooler on the motherboard | It is far easier to see pins and slots on an open board |
| 4. Inside the case | Standoffs, I/O shield, board, PSU, GPU, cables | Heavy parts go in while there is still room for your hands |
| 5. First boot | Monitor on the graphics card, enter BIOS, enable the memory profile | Confirms every part is detected before you install an OS |
| 6. Software | Windows 11 from a USB drive, chipset and GPU drivers, updates | A clean, supported install with the right drivers in the right order |
Step 1: Decide what the PC is for
Every part choice flows from the job. A machine for 1080p esports titles, one for 1440p high-refresh gaming, and one for video editing or streaming spend their money in different places. Write one sentence before you open a single store page, for example: “1440p gaming at 144 Hz with room to upgrade the graphics card in three years.” That sentence settles most of the arguments you will have with yourself later.
A common rule in independent build guides is to put the largest share of a gaming budget into the graphics card, and to avoid buying a flagship processor if the graphics card cannot keep up with it. The reverse also holds: pairing a high-end graphics card with a very old, slow processor can leave frames on the table in CPU-heavy games. Aim for balance, then spend any leftover on the part that limits you most.
It also helps to decide your screen early. A 1080p 144 Hz monitor, a 1440p 165 Hz monitor and a 4K 60 Hz television ask very different things of a graphics card. Pixel count roughly doubles from 1080p to 1440p-ish workloads and quadruples at 4K, so the same card that is comfortable at 1080p can be the bottleneck at higher resolutions. Pick the monitor target now and you avoid overbuying or underbuying later.
Step 2: Choose the platform first
The platform is the processor socket plus the memory type. Choose it first because the motherboard, RAM and cooler mounting all depend on it. As of October 2026 the sockets you will realistically meet are these:
| Socket | Processors | Memory | Typical chipsets | Who it suits |
|---|---|---|---|---|
| AM5 | AMD Ryzen 7000, 8000G and 9000 series | DDR5 only | A620, B650, B850, X670, X870 | Builders who want a platform AMD has committed to supporting for further processor generations |
| LGA1851 | Intel Core Ultra 200S series | DDR5 only | H810, B860, Z890 | Builders who prefer Intel and want its newest desktop socket |
| LGA1700 | Intel 12th, 13th and 14th generation Core | DDR4 or DDR5, depending on the board | H610, B660, B760, Z690, Z790 | Value builds, especially with discounted older boards |
| AM4 | AMD Ryzen 1000 to 5000 series | DDR4 | A520, B450, B550, X570 | Tight budgets where DDR4 savings or reuse matter |
Never mix and match: an AM5 processor will not physically fit an LGA1851 board, and a DDR5 module will not fit a DDR4 slot because the notch sits in a different position. Check the processor support list on the motherboard maker’s website too. Some boards need a BIOS update before they recognise a newer processor, and boards that advertise BIOS Flashback can be updated from a USB drive without a processor installed.
Memory prices have been unusually volatile in 2026, with several independent outlets reporting steep DDR5 increases tied to manufacturers shifting capacity toward AI memory. That is why older DDR4 platforms such as AM4 are being discussed for tight budgets again. If your budget is fixed, price the RAM and SSD first as fixed costs, then see what is left for the graphics card.
Step 3: Pick the remaining parts in the right order
- Motherboard. Match the socket, then the size (ATX, micro-ATX or mini-ITX). Look for the features you will actually use: the number of M.2 slots, USB ports on the rear panel, Wi-Fi, and whether the main PCIe slot supports PCIe 5.0 (useful for future graphics cards, not mandatory today).
- Memory. Two matched modules give you dual-channel bandwidth. Sixteen gigabytes is the practical minimum for gaming in 2026 and 32 GB is the comfortable target if the budget allows. Read the board’s qualified memory list; AMD boards use EXPO profiles and Intel boards use XMP profiles, although many kits carry both.
- Storage. An NVMe M.2 SSD is the default boot drive. A second SATA SSD or larger NVMe drive can wait.
- Case. Choose it after the board so you know the form factor, then verify three clearances in the case’s spec sheet: maximum graphics card length, maximum CPU cooler height and radiator support if you want a liquid cooler.
- CPU cooler. Some processors include a basic cooler but many do not. An air tower cooler is simple and durable, and an all-in-one liquid cooler (AIO) helps in cases with limited height.
- Power supply. Pick reliable quality and enough wattage (see the table below). Modern graphics cards use either 8-pin PCIe connectors or the newer 12V-2×6 connector, so make sure the PSU supplies the right cable natively.
- Graphics card. Pick it last, because it is the part with the widest range of sizes, power draw and cost, and it is the one most likely to change as your budget settles.
Power supply sizing
Add the graphics card’s rated board power to the processor’s rated maximum power, add roughly 100 W for the rest of the system, and then leave headroom. Graphics card makers publish a recommended PSU wattage for each model, and that recommendation is the figure to trust over any generic calculator.
| Build tier | Example combined GPU + CPU draw | Sensible PSU class |
|---|---|---|
| Entry (1080p) | About 200 to 300 W | 550 to 650 W |
| Mid (1440p) | About 350 to 450 W | 750 to 850 W |
| High (4K / flagship GPU) | About 550 W and up | 1000 W and up, with a native 12V-2×6 cable |
Worked example: a graphics card rated at 220 W plus a processor with a 105 W maximum plus 100 W for everything else totals 425 W. Adding roughly 40 percent headroom for power spikes and to keep the unit near its efficient range points at a 650 to 750 W unit. Spending a little more on a better-quality PSU is one of the few “save money later” decisions that genuinely pays off, because the PSU protects every other part.
Step 4: Prepare your workspace
- Use a large, flat, non-carpeted table with good light. The motherboard box makes a handy work surface for the board itself.
- You need one Phillips #2 screwdriver for nearly everything. A magnetic tip helps, and a small bowl keeps screws from wandering.
- Touch the bare metal of the case or PSU casing now and then to discharge static. A wrist strap is optional and inexpensive.
- Unbox parts only when you need them. Keep the graphics card in its bag until the last step.
- Read the motherboard manual’s installation chapter once. It shows exactly where the 24-pin, CPU power and front-panel headers live.
- Do not tighten any screw to the point of strain. Snug is enough; the threads in a motherboard standoff or an M.2 post are small.
Step 5: Build on the motherboard first
Install the processor
Lift the socket lever, align the small triangle on the processor with the triangle on the socket, and lower it straight in with no pressure. On Intel LGA sockets and AMD AM5 the pins are in the board, so a bent pin usually means a slipped processor or a dropped board. Close the retention mechanism; on LGA sockets the plastic cover pops off as the lever closes. Never force anything. If it does not drop in freely, it is aligned wrongly.
Install memory
Open the clips, line up the notch, and press down firmly on both ends until the clips snap. With two modules, use the slots the manual names for dual channel, usually the second and fourth slots counting from the processor. Unseated memory is the single most common reason for a no-boot first power-on.
Install the M.2 SSD
Remove the heatsink on the top M.2 slot if there is one, slide the drive in at a slight angle, press it flat and fasten the retaining screw or latch. Replace the heatsink, peeling off the protective film from the thermal pad first. Check the manual for which M.2 slot shares bandwidth with SATA ports, since using one can disable certain SATA connectors on some boards.
Install the cooler
For a tower cooler, mount the backplate or brackets that match your socket, apply thermal paste if the cooler does not have pre-applied paste (a pea-sized dot is enough), and tighten the screws in a diagonal pattern a little at a time. Plug the cooler’s fan cable into the header labelled CPU_FAN. If your case is cramped, wait to fit a very tall air cooler until after the board is mounted and the 4+4 pin CPU power cable is plugged in, because the cooler can cover that connector.
Step 6: Prepare and fill the case
- Standoffs. Brass standoffs raise the motherboard off the tray. Match their positions to your board size. A standoff with no matching hole under the board can short it; a missing standoff lets the board flex when you insert cards.
- I/O shield. Many modern boards have it built in. If yours is separate, press it into the rear opening before the board goes in, or you will take everything out again.
- Power supply. Mount it with the fan facing the vent (usually down if the case has a bottom filter). Route its cables through the cut-outs. Connect only the cables you need if it is modular.
- Motherboard. Lower it onto the standoffs and install every screw it has a hole for.
- Front panel and fan cables. Connect them before the graphics card goes in, because the card blocks your fingers.
- Graphics card. Remove the matching expansion slot covers, open the slot latch, push the card straight in until the latch clicks and secure the bracket with screws.
Step 7: Connect the power and the front panel
| Connector | Where it goes | Common mistake |
|---|---|---|
| 24-pin ATX | Right edge of the motherboard | Not fully clicking in the latch |
| CPU 4+4 pin (EPS) | Top left of the motherboard near the processor | Plugging a PCIe cable into it, or forgetting it |
| PCIe 8-pin or 12V-2×6 | Graphics card | Leaving the connector slightly unseated |
| SATA power | Drives, if any | Forgetting they need both data and power |
| Front panel header | Bottom right of the motherboard | Wrong pin orientation on the power switch |
| USB 3.0 / USB-C front header | Marked on the board | Forcing a connector into the wrong header |
For the 12V-2×6 connector, vendors including CableMod and darkFlash advise leaving at least 35 mm of straight cable before any bend and pushing the plug in until the latch clicks. The newer connector is designed so the card only powers up if the power pins are fully seated, but you should still look at it from the side to confirm there is no gap. Use the cable that came with your PSU or graphics card rather than mixing parts from different brands.
Step 8: First boot and BIOS
- Plug the monitor cable into the graphics card, not the motherboard. If you plug into the motherboard, you may see nothing at all.
- Connect the keyboard, mouse and power cord, then switch on the PSU and press the case power button.
- Press Delete or F2 repeatedly as it starts to enter the BIOS.
- Check that the processor, RAM capacity and storage are all detected.
- Enable the memory profile (EXPO or XMP). Without it the RAM may run at a much lower default speed.
- Check the fan speeds, set a fan curve if you want, and save and exit.
The first boot can take longer than normal, sometimes a minute or more, while the board trains the memory. That is expected on DDR5 platforms, so wait before concluding something is wrong.
Step 9: Install Windows 11 and drivers
Windows 10 reached end of support in October 2025, so a new build should use Windows 11. Microsoft’s published requirements include UEFI with Secure Boot capability, TPM 2.0, 4 GB of RAM and 64 GB of storage. Most current motherboards expose TPM as a firmware option called fTPM on AMD or PTT on Intel; if the installer complains, enable it in the BIOS.
- On another PC, use Microsoft’s Media Creation Tool to write the installer to a USB flash drive of at least 8 GB.
- Boot the new PC from the USB drive (the boot menu key is usually F11 or F12), choose the custom install and pick the empty SSD.
- After the first desktop appears, connect to the internet and run Windows Update fully.
- Install the chipset driver from AMD or Intel, then the graphics driver from NVIDIA, AMD or Intel, and then any Wi-Fi or audio drivers the motherboard maker lists.
- Update the BIOS from the motherboard maker’s support page if a newer version fixes memory or processor issues.
- Run a stress test, such as a long loop of a demanding game or a free benchmark, and watch temperatures with a monitoring tool. Processor temperatures in the 70s to 80s Celsius under load are common; sudden spikes into the upper 90s deserve a closer look at the cooler mounting.
Common mistakes and fixes
| Mistake | Symptom | Fix |
|---|---|---|
| Monitor on motherboard port | No display | Move the cable to the graphics card |
| RAM not fully seated | No POST, memory LED or beep codes | Reseat with firm pressure until both clips snap |
| Missing CPU power cable | Fans spin, no display | Connect the 4+4 pin cable near the processor |
| Plastic film left on cooler | High temperatures | Remove the protective film from the cold plate |
| Memory profile not enabled | Games run slower than expected | Turn on EXPO or XMP in BIOS |
| Extra standoff under the board | Random shutdowns or no power | Remove standoffs that have no matching hole |
| Display cable in the wrong GPU output | Refresh rate stuck at 60 Hz | Set the refresh rate in Windows display settings after installing the graphics driver |
Safety and troubleshooting
Switch off and unplug the PSU before touching components, and touch bare metal to discharge static. Never open a power supply; the capacitors can hold a charge. If the system will not start, work through the checklist in order:
- Check that the PSU switch is on and the wall cable is secure.
- Check that the 24-pin and the CPU 4+4 pin cables are fully pushed in.
- Reseat the RAM, trying one module at a time in the slot the manual recommends.
- Confirm that the front panel power switch cable is on the correct two pins. If in doubt, briefly touch the two power-switch pins with a screwdriver to start the board.
- Make sure the monitor is connected to the graphics card and set to the right input.
- Remove the graphics card and use integrated graphics (if your processor has them) to see whether the card or the rest of the system is at fault.
- Look for debug LEDs on the motherboard; they identify CPU, DRAM, VGA or BOOT errors.
What to read next
This guide is the hub. When you need more depth on a specific stage, these sibling topics cover them separately:
- Cable management and wiring: header pinouts, routing the 24-pin and CPU cables, and tie-down order.
- PSU wattage and cable choices for high-power graphics cards.
- Choosing between air and liquid cooling for your case.
- BIOS updates and memory profile settings.
- Small form factor builds and their clearance limits.
How we compared
We compared manufacturer manuals, specifications and independent guides named below. We did not build or benchmark these systems ourselves.
Sources
- Microsoft, Windows 11 system requirements and Media Creation Tool documentation
- AMD, AM5 platform and chipset documentation
- Intel, Core Ultra 200S series and LGA1851 platform documentation
- Motherboard manufacturer installation manuals (ASUS, MSI, Gigabyte, ASRock)
- CableMod, 12V-2×6 cable guide
- darkFlash, ATX 3.1 power supply GPU cable precautions
- XDA Developers and darkFlash, 2026 coverage of AM4 versus AM5 memory costs
- Corsair and Lian Li, PC case specification sheets
Frequently Asked Questions
How long does it take to build a PC for the first time?
Most first-time builders need three to five hours including preparation, with the first boot and Windows install adding another hour or two. Taking your time on cable routing costs minutes but saves you from opening the case again.
Do I need thermal paste?
Many coolers ship with paste pre-applied. If yours does not, add a pea-sized dot to the centre of the processor’s heat spreader. Do not use more, because the mounting pressure spreads it.
Can I build a PC without a graphics card?
Only if the processor has integrated graphics. Many recent AMD and Intel chips do, and this is handy for diagnostics, but gaming performance will be limited.
Which is better, AMD or Intel, for a new build?
Both make capable gaming processors. AM5 is attractive for its longer upgrade path, while LGA1851 is Intel’s newest desktop socket. Compare current independent reviews for the specific models you can afford rather than choosing by brand.
Should I buy Windows or use a free alternative?
Windows 11 remains the practical choice for most PC games and anti-cheat systems. You can install it before activation and add a licence later through Settings.
What if my PC does not turn on?
Start with the simplest checks: PSU switch, 24-pin and CPU power cables, then RAM seating. Debug LEDs on the motherboard show where the startup process stops.
Is a PC building guide PDF useful?
The manuals for your actual motherboard and case are the best printable references, because they show exact header positions. Download the PDF versions from each manufacturer’s support page and keep them open while you build.
Do I need to update the BIOS before using a new processor?
Only if the board’s support list says your processor requires a newer version. Boards with BIOS Flashback let you update from a USB drive without a processor installed.
Ready to decide? Our #1 pick for 2026 is the 1. Plan.
Live price & availability on Amazon.