Top Cyberpunk Neon Gaming Setup Builder Picks for 2026
Here are our current top cyberpunk neon gaming setup builder picks, compared on real Amazon owner reviews, price, and features. Live prices update below.
- Top Cyberpunk Neon Gaming Setup Builder Picks for 2026
- Why A Builder’s Approach Beats A Decorator’s
- The Four-Channel Architecture
- The Color Sync Problem (And How To Solve It)
- The Parts List (With Power Planning)
- Cable Management — The Builder’s Hardest Job
- Calibration Pass
- Final Verdict
- Related Reading
- Related Guides
- Related Articles
- Frequently Asked Questions
- Related Articles
Affiliate disclosure: As an Amazon Associate we earn from qualifying purchases. This post contains affiliate links — we may earn a small commission at no extra cost to you. This never affects our picks. Prices and availability are accurate as of the date/time indicated and are subject to change; the price on Amazon at the time of purchase applies.
Why A Builder’s Approach Beats A Decorator’s
Most cyberpunk gaming setup articles online are written from a decorator’s perspective. They tell you what to buy and show you finished photos. They don’t tell you how to actually wire it. They don’t tell you that the Govee Glide Hexa controller pulls 24V at 4A and you need to plan an outlet near the wall mount, or that running a Razer Goliathus Chroma 3XL through a USB hub will sometimes break Synapse’s color sync because of bandwidth contention. They show you the result. They don’t show you the labor.
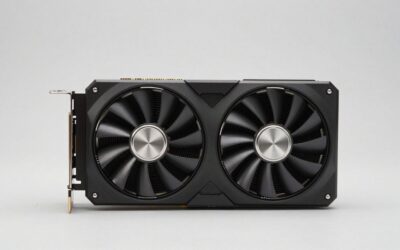
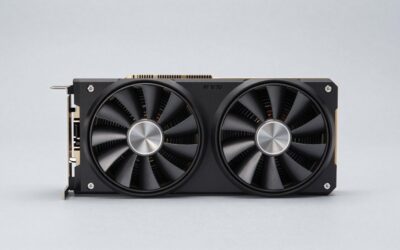
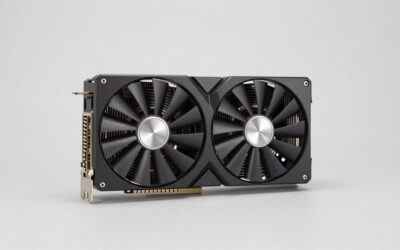
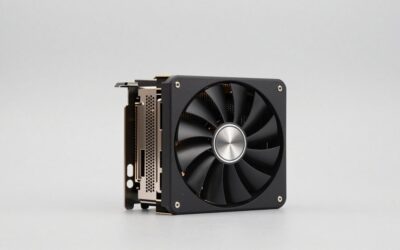
Quick answer: For a 2026 build, the our top pick is the graphics card we would build around, while the the value pick is the budget-friendly choice.
This article is the labor. We’re going to build a cyberpunk neon gaming setup from the perspective of someone doing the wiring, planning the power, and thinking about the controller topology of every RGB device in the room. The goal is a four-channel neon system: case lighting, peripheral lighting, bias/under-desk lighting, and wall lighting. Each channel runs through its own controller and software stack, but the colors and timing across all four need to coordinate cleanly enough that the room reads as one designed system rather than four separate light shows.
This is a builder’s guide. Read it before you order anything. The planning phase is where this build succeeds or fails, and the planning is what most guides skip. We’ll get to product picks, but they make more sense once you understand the four-channel architecture they fit into. So bear with us through the wiring section before we get to the shopping list.
The Four-Channel Architecture
Channel 1: Case Internal RGB
This is your PC case with its fans, AIO pump (if you have one), and any internal addressable strips. The controller is typically a motherboard ARGB header (5V 3-pin) driven through your motherboard’s RGB software (Asus Aura, Gigabyte RGB Fusion, MSI Mystic Light) or a third-party controller like the Lian Li L-Connect 3 if you’re running their Uni Fan ecosystem.
For cyberpunk neon you want the case to be a strong supporting actor, not the lead. It sits on or under the desk and is partly hidden by the monitor and chair from the main viewing angle. So the case lighting needs to read as a coordinated color but doesn’t need complex patterns. A static magenta-cyan split (front fans cyan, rear fans magenta, or vice versa) reads as deliberate and matches the room. Skip rainbow cycle modes — they break the room’s two-tone discipline.
Power budget for this channel: covered by your PSU. No external draw.
Channel 2: Peripheral RGB (Razer Synapse)
This is your keyboard, mouse, mousepad, headset, and any other USB-connected RGB devices on the desk. The controller is your host PC running Razer Synapse (if you bought into the Razer ecosystem as we recommend), Logitech G Hub, or Corsair iCUE. We’re going to recommend Razer Synapse here because the Razer peripheral lineup has the best dual-color sync support, and because the Razer Goliathus 3XL Extended is genuinely the best aesthetic mousepad for this build.
The key configuration step for this channel is a static profile — not an effect like "wave" or "ripple" or "reactive." You want a static color-zone assignment that puts magenta on some devices and cyan on others. Our recommended assignment: cyan on the keyboard (Razer Huntsman Mini) and the left half of the mousepad, magenta on the mouse (Razer Naga X) and the right half of the mousepad. That creates a smooth color gradient across the desk from left to right. The eye reads it as a deliberate spatial composition.
Power budget: trivial, all USB-bus-powered. But the USB hub matters. We recommend the Razer-branded USB hub, or any powered USB 3.0 hub with at least 5 ports, for the peripheral chain. A passive hub will flicker the Goliathus Chroma because the LED current draw on the large mousepad exceeds passive-hub spec.
Channel 3: Bias / Under-Desk Neon
This is the Govee Neon Rope strips running under the front desk lip (downlight onto the floor) and behind the monitor (uplight onto the wall behind). Each segment is its own device with its own controller, its own wall-wart power supply, and its own slot in the Govee app.
For our four-channel architecture, we recommend running two separate Govee Neon Rope segments rather than one long one. The reason is independent color control: under-desk runs cyan, behind-monitor runs magenta. Run one continuous strip and you can’t do this cleanly; the Govee app supports one color per segment, not split colors within a segment.
Power budget: each 10-foot Govee Neon Rope segment draws about 24W at full brightness (24V at 1A on the 10-foot SKU). For two segments, that’s 48W. Each segment has its own power brick. Plan for two outlets — or one outlet plus a power strip — within reach of where the segments mount.
Mounting: use the included clips for cable runs, and supplement with 3M VHB tape on any curves or corners. Don’t rely on the adhesive-only mount on textured walls or unfinished wood; it’ll sag within weeks.
Channel 4: Wall / Ambient
This is the Govee Glide Hexa wall installation. This is the dominant visual element of the room and the channel doing the most aesthetic work. It’s also the channel with the highest power draw and the most complex mounting requirement.
The Glide Hexa runs off a 24V power supply with a controller hub that handles up to 20 tiles per supply. A starter pack of 10 tiles pulls about 60W at peak brightness; a 20-tile expansion pulls about 120W. The controller hub mounts on the wall behind the array and routes a single power cable down to a wall outlet. Plan one outlet within 4 feet of the bottom edge of your Hexa grid.
Color assignment: the Hexa app supports per-tile color, which lets you build a checkerboard of magenta and cyan across the grid. That’s the visual signature of a well-executed cyberpunk wall. The new firmware (early 2026) introduced hard-edge color transitions that make this pattern look crisp instead of blurry.
The Color Sync Problem (And How To Solve It)
Here’s the honest builder’s truth decorator guides skip: you cannot perfectly sync four channels across four different software stacks in real time. What you can do is set each channel to a static configuration that matches the others closely enough that the human eye reads it as coordinated. We call this a "tuned static" setup, as opposed to a "synced dynamic" setup that would require all four channels to react to the same event source in real time.
Tuned static is what almost every published cyberpunk build is actually doing under the hood, even when the photos make it look dynamic. The trick is calibrating the colors across each ecosystem so they match. Razer Synapse, the Govee app, motherboard RGB software, and any third-party controller all interpret "magenta" slightly differently — sometimes RGB(255,0,255), sometimes RGB(220,30,200), sometimes with slightly different hue shifts. Spend 30 minutes early in the build calibrating each ecosystem to the same hex value (we use #FF00CC for magenta and #00CCFF for cyan as a starting point) and you save hours of frustration later.
The Parts List (With Power Planning)
Wall Channel — Govee Glide Hexa Starter + 10-Tile Expansion
Starter pack with 10 tiles, plus one 10-tile expansion pack for a 20-tile wall. 20 tiles is the sweet spot for a wall behind a 49-inch monitor and gives enough surface area for a real checkerboard pattern. Smaller grids look like sample wall decals; larger grids start crowding the camera frame. 20 tiles, arranged in a roughly 5×4 or 6×4 hexagonal cluster, is the right call for most setups.
Power: one 24V/5A power brick included with the starter, enough for up to 20 tiles. Plan one wall outlet within 4 feet of the bottom of the grid. Mount the controller hub behind the bottom-most tile so the cable run stays hidden.
Mounting: the included VHB-style adhesive holds on smooth walls (drywall paint, smooth latex finish). On textured paint or wallpaper, back it up with 3M Command strips rated for 3-pound objects. Each tile weighs about 4.5 ounces.
Bias Channel A — Govee Neon Rope Under-Desk
One 10-foot Govee Neon Rope segment, mounted along the underside front lip of the desk, pointing down at the floor. This is your cyan channel. The silicone diffuser tube gives a continuous glow that reads as neon rather than RGB strip light. The downward angle bounces the light off the floor and creates a subtle floor wash that anchors the desk visually.
Power: one wall-wart, 24V 1A, included. Put an outlet near the back leg of the desk.
Mounting: the included clip set handles straight runs; for the front-lip mounting we recommend supplementing with adhesive tape at each clip location for redundancy. The strip is light (about 11 oz for 10 feet) but the silicone tube has a slight stiffness that wants to pull the mount loose over time if you don’t double-tape.
Bias Channel B — Govee Neon Rope Behind-Monitor
A second 10-foot Govee Neon Rope segment, mounted to the back of the monitor (use cable clips, not adhesive — monitors have ventilation slots adhesive blocks) pointing at the wall behind. This is your magenta channel. The light bounces off the wall and creates a halo behind the monitor that frames it cinematically.
Power: a second wall-wart, same spec. Power-strip both Neon Rope bricks together near the back of the desk and run a single cord to the outlet.
Peripheral Channel — Razer Trio
The desk peripherals all share the Razer Synapse channel. We recommend the trio of Goliathus 3XL, Huntsman Mini Analog, and Naga X for the canonical cyberpunk build. All three sync through Synapse with matching color profiles.
The Goliathus 3XL is the load-bearing peripheral here. The mousepad is the visual base for the whole desk, and the RGB perimeter ties together every other device sitting on top of it. Without the Goliathus, the keyboard and mouse RGB look like floating points of color rather than parts of a unified deck.
The Huntsman Mini Analog is small enough to leave desk space open and bright enough that the per-key RGB competes with the rest of the room lighting. The analog feature is a productivity bonus but isn’t strictly required for the aesthetic.
The Naga X delivers the cyberdeck visual density on the desk’s right side. The 12-button thumb cluster is the single most photographable peripheral element in any cyberpunk build.
Power: USB-bus-powered, drawing negligible current. Run all three through a powered USB 3.0 hub (not a passive hub) to avoid flicker on the Goliathus. Total current draw across all three: about 1.5A at 5V on the USB chain.
Monitor Channel — Samsung Odyssey G9 49" OLED
The monitor is its own channel, sort of — the only RGB on the monitor itself is the optional Infinity Core Lighting on the back, which projects color onto the wall behind. For a cyberpunk build, set the Core Lighting to a static color (magenta) that complements the Hexa pattern, or turn it off and rely on the Neon Rope behind-monitor strip for the wall halo. We recommend the latter; the Govee Neon Rope is brighter, has better diffusion, and lets you tune the color exactly to match your other channels.
Power: standard wall outlet, the G9 draws about 165W in typical SDR use, peaks around 240W in HDR with full screen brightness. Use a dedicated outlet — don’t share with the Hexa wall array or the desktop PC.
Case Channel — NZXT H9 Flow With ARGB Fans
The NZXT H9 Flow is the recommended case for a cyberpunk build. The dual-chamber layout puts the GPU on a horizontal mount visible through the side panel, the cable-management cavity is hidden behind the motherboard, and the front intake is a clean glass panel that lets fan RGB read cleanly from the front. Pair it with NZXT F-Series RGB Core fans (or any 5V ARGB 3-pin fans) and control through motherboard ARGB.
For the cyberpunk color assignment: front fans cyan (so the front of the case glows cyan from a viewing angle), rear and top fans magenta. The GPU shroud, if it carries its own RGB, set to magenta.
Power: covered by your PSU’s draw. Motherboard ARGB headers typically supply 3A at 5V per header, more than enough for a full case of 6-7 ARGB fans.
Chair — Razer Iskur Red/Black
The chair is a non-electrical aesthetic component, but it does critical visual work. The red/black colorway breaks the magenta-cyan dominance with a warmer accent that adds depth to the room. Without the red chair, the room reads as cool-tone-monotone. With it, the room gains a foreground (warm chair) and background (cool wall) that give the camera composition depth.
Cable Management — The Builder’s Hardest Job
You’ll have, in this build, roughly the following cables to manage:
- 1 power cable to the Hexa array
- 2 power cables to the Neon Rope segments
- 1 power cable to the monitor
- 1 power cable to the desktop PC
- 1 USB cable from PC to powered hub
- 3-4 USB cables from hub to peripherals
- 1 USB cable from hub to headphone DAC/amp (if applicable)
- 1 DisplayPort cable from PC to monitor
- 1 HDMI cable from PC or console to monitor (if applicable)
- 1 ethernet cable (recommended for OLED firmware updates)
That’s 13-15 cables visible if you do nothing. With careful routing you can get this down to 2-3 visible cables — the power cable from the desk-side power strip down to the wall outlet, and the run from the Hexa controller down the wall.
Cable-management hardware: an under-desk cable tray (we recommend the IKEA Signum or a third-party equivalent), a cable raceway down the wall (paintable to match wall color), and velcro cable ties (not zip ties — you’ll redo the routing several times during a build).
Routing strategy: route every cable to the back of the desk, bundle it into the cable tray under the desk, and send a single power-strip cord and a single ethernet cord down to the floor and along the baseboard to the wall outlet. The wall outlet area is the only place where messy cable convergence is acceptable, and it should be hidden behind the desk or behind a console/cabinet.
Calibration Pass
Once everything is wired, run a calibration pass. Sit in your chair at the normal gaming position. Look at the wall. Walk around the desk. Photograph the setup from multiple angles. Look for the following common issues:
Color drift between channels. The Hexa magenta may read a touch pinker than the Neon Rope magenta. Nudge the Hexa color value toward red (try RGB 255,30,180) until the two match.
Brightness imbalance. The Hexa wall is usually too bright at default; the Goliathus mousepad is usually too dim. Set the Hexa to 60% brightness, the Goliathus to 80% via Synapse.
Camera vs eye discrepancy. Phone cameras run aggressive auto white balance and tend to shift cyan toward green. If you’re documenting your build with photos, lock your phone camera’s white balance to about 5500K manual, or use a dedicated camera app like Halide.
Reflection issues. Glossy desks pick up reflections from every light source. This usually looks great but occasionally throws a hot reflection that overwhelms one part of the photo. If a specific reflection bugs you, reposition the offending light source by a few inches.
Final Verdict
The builder’s anchor pick for a cyberpunk neon setup in 2026 is the Govee Glide Hexa wall system. Of every component in this build, the Hexa is the one you can’t fake or substitute cheaply. The Neon Rope can be approximated by other brands. The Razer peripherals have functional substitutes from other manufacturers. The monitor can be downgraded to a 34-inch ultrawide if budget is tight. But the wall pattern that makes a cyberpunk room read as a cyberpunk room — that comes from the Hexa or its near-equivalents (Nanoleaf Shapes, which work but cost more per area covered), and there’s no cheap substitute. Buy the Hexa first and build outward from there.
Related Reading
- OLED vs IPS Gaming Monitors in 2026
- LG vs Samsung OLED Brand Comparison
- Ray Tracing On vs Off — Performance Analysis
- Best ARGB Case Fans 2026
- Cable Management Guide For Aesthetic Builds
- Best PSUs For High-Wattage RGB Builds
Related Guides
Related Articles
Want to dig deeper here? Have a look at the curated guides just below — every one of them runs through the same scoring rubric we used in this review.
Frequently Asked Questions
How do I wire LED strips cleanly for a neon setup?
Plan a single power source and route strips along desk edges and wall channels using adhesive-backed cable raceways. Use addressable strips daisy-chained with data cables hidden behind panels, and add inline connectors at corners instead of bending strips sharply. Label each run and leave slack so you can adjust without re-adhering everything.
What is the difference between RGB and addressable ARGB lighting?
Standard RGB sets one color across an entire strip, while addressable ARGB controls each LED individually, enabling flowing rainbows, chase effects, and reactive patterns essential to the cyberpunk look. ARGB needs a compatible three-pin header or controller and correct data direction. Mixing the two on one channel will not work, so plan around ARGB.
How do I avoid a messy tangle of controllers and hubs?
Consolidate lighting onto a single controller or motherboard software ecosystem so one app drives everything. Mount a powered ARGB hub behind the desk or inside the case, route all strip data leads to it, and use a common power rail. Fewer separate controllers means fewer wall plugs and simpler synchronized effects.
Will bright neon lighting cause eye strain during long sessions?
It can if lighting sits behind the monitor at high brightness with a dark room, creating harsh contrast. Add gentle bias lighting behind the screen at moderate brightness and warmer accent zones elsewhere to reduce strain. Keep the brightest saturated neon on peripheral walls rather than directly in your line of sight.
What colors define the cyberpunk aesthetic?
Cyberpunk leans on saturated magenta, cyan, and electric blue against deep dark surfaces, with occasional acid green or hot pink accents. Contrast is key, so pair the neon glow with matte black furniture and metallic details. Program a two or three-color scheme rather than a full rainbow to keep the mood cohesive.